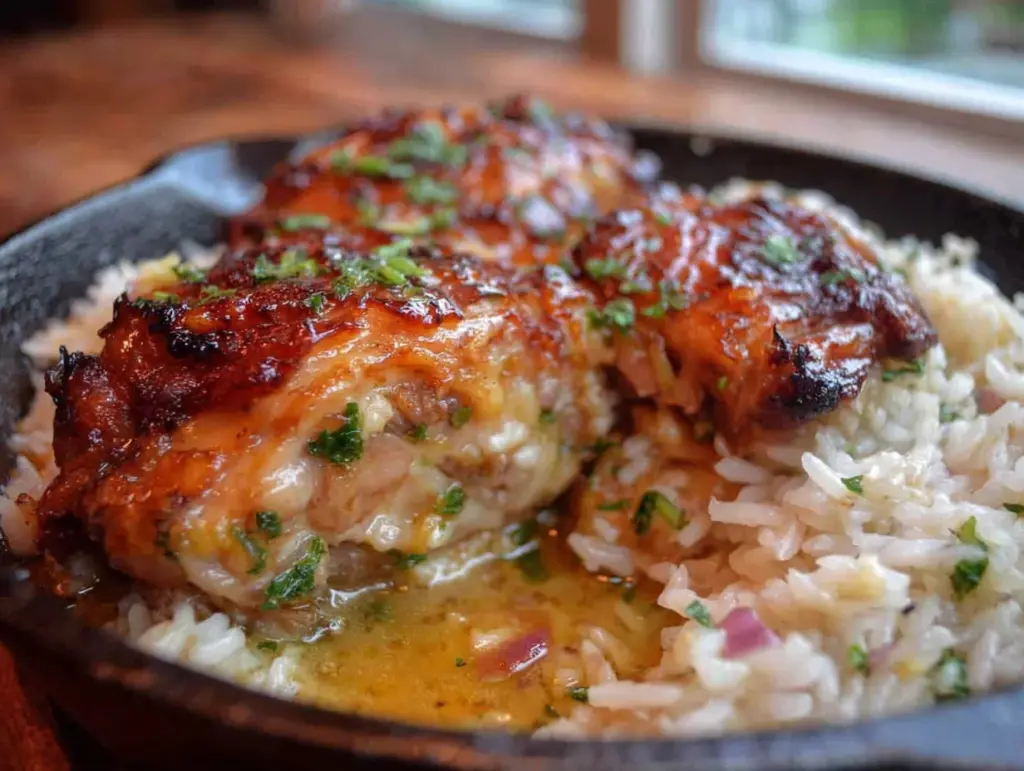
It was a Tuesday night in late October, the kind where the kitchen light feels too bright and the idea of washing more than one pan feels like a personal insult. I had a pack of chicken thighs thawing on the counter, a head of garlic that was starting to sprout, and honestly, zero energy for anything complicated. I remember staring into the pantry, willing dinner to just appear. And that’s when the idea for this easy one-pan garlic butter chicken and rice was born—not from a fancy cookbook or a chef’s technique, but from pure, desperate laziness. I just wanted something that tasted like I’d tried, without actually having to try that hard.
I grabbed the rice, the butter, and that sprouting garlic. I figured, worst case, we’d order pizza. But something clicked that night. The smell of garlic hitting melted butter in a hot pan—it’s the kind of smell that makes you slow down, even on a rushed evening. As the chicken thighs sizzled and the rice soaked up all that buttery, savory goodness, I realized I was making something special. It wasn’t complicated. It was just… right. The whole dinner came together in that one pan, the rice fluffy and fragrant, the chicken so tender it fell apart with a fork. And the best part? I only had one dish to wash.
That’s the thing about this recipe. It doesn’t ask for much. It’s the kind of meal you make when you want a home-cooked dinner but don’t want to spend your whole evening in the kitchen. It’s for those nights when you need a win, something simple that delivers big flavor without a lot of fuss. I’ve made it so many times since that first Tuesday, tweaking it just a little, and it’s never let me down. Trust me on this one.
Why You’ll Love This Recipe
This isn’t just another chicken and rice recipe. I’ve tested this one more times than I can count, and it’s the version I always come back to. Here’s why it works so well:
- One Pan, Minimal Mess: Everything cooks in a single skillet or Dutch oven. That means less time scrubbing and more time actually eating dinner.
- Pantry-Friendly Ingredients: You probably have most of these things already. Butter, garlic, rice, chicken, broth—nothing fancy or hard to find.
- Perfect for Busy Weeknights: From start to finish, you’re looking at about 40 minutes. That’s faster than delivery, and way more satisfying.
- Seriously Crowd-Pleasing: I’ve served this to picky kids, hungry guests, and even my mother-in-law (the toughest critic I know). It gets empty plates every single time.
- Rich, Comforting Flavor: That garlic butter sauce seeps into every grain of rice and coats the chicken in the most incredible way. It’s the definition of comfort food.
What makes this recipe different from all the others? It’s the technique. Instead of just dumping everything in a pan, we take a few minutes to sear the chicken first. That golden-brown crust adds a depth of flavor you just can’t get any other way. Then, the rice gets toasted in that same garlic butter before the liquid goes in. It’s a small step, but it makes a huge difference. The rice comes out perfectly separate and flavorful, not mushy or bland.
This is the kind of meal that makes you feel like you’ve got it all together, even when you don’t. It’s cozy, it’s satisfying, and it’s honestly the best version of garlic butter chicken and rice I’ve ever had.
What Ingredients You Will Need
This recipe uses simple, everyday ingredients, but each one plays a specific role in building that incredible flavor. No weird stuff here—just good, honest food that works.
- Chicken Thighs (1.5 lbs / 680g): I prefer boneless, skinless thighs for this. They stay juicy and tender, even after simmering in the rice. You can use chicken breasts, but thighs are more forgiving and have better flavor. Pat them dry with a paper towel before seasoning—it helps them brown beautifully.
- Unsalted Butter (4 tablespoons / 56g): Butter is the star here. We use unsalted so we can control the salt level ourselves. Don’t substitute margarine; the flavor just isn’t the same. I always use a good quality butter like Kerrygold when I can.
- Garlic (6-8 cloves, minced): Fresh garlic is non-negotiable. Please don’t use the pre-minced stuff in a jar. It has a different, slightly bitter taste. Mince it fresh—it takes two minutes and makes all the difference.
- Yellow Onion (1 medium, diced): A simple yellow onion adds a savory base note. You could use a white onion, but yellow has a sweeter, more mellow flavor that works perfectly here.
- Long-Grain White Rice (1.5 cups / 300g): I’ve tested this with jasmine, basmati, and standard long-grain. They all work, but I prefer jasmine for its slightly floral aroma. Do not use instant rice or short-grain rice—they’ll turn into a sticky mess.
- Chicken Broth (3 cups / 720ml): Use a good quality low-sodium broth. If you use regular broth, be careful with extra salt. I like using the leftover broth from my overnight crockpot chicken when I have it—it adds even more depth.
- Dried Thyme (1 teaspoon): Thyme and garlic butter are a classic combo. You can use fresh thyme (about 1 tablespoon of leaves), but dried works great here.
- Paprika (1 teaspoon): I use sweet paprika for color and a mild, earthy sweetness. Smoked paprika would also be amazing if you want a deeper flavor.
- Salt and Black Pepper (to taste): Don’t be shy with the salt. It’s what makes all the flavors pop.
- Fresh Parsley (for garnish, optional): A sprinkle of fresh parsley at the end makes it look pretty and adds a fresh pop of flavor.
That’s it. Eight simple ingredients (plus salt, pepper, and garnish) that come together to make something truly special.
Equipment Needed
You don’t need a fancy kitchen to make this. Here’s what you’ll need:
- A Large, Deep Skillet or Dutch Oven: This is the most important piece. You need something with a tight-fitting lid and enough surface area to brown the chicken without crowding. A 12-inch skillet with high sides or a 5-quart Dutch oven works perfectly. I use my old cast-iron Dutch oven for this—it holds heat beautifully.
- A Wooden Spoon or Spatula: For stirring the rice and scraping up those delicious browned bits from the bottom of the pan.
- A Sharp Knife and Cutting Board: For mincing the garlic and dicing the onion.
- Measuring Cups and Spoons: For accuracy. I’ve eyeballed it before and ended up with mushy rice. Trust the measurements.
- Tongs: For flipping the chicken. A fork will pierce the meat and let the juices escape.
If you don’t have a Dutch oven, no worries. Any heavy-bottomed skillet with a lid will work. Just make sure it’s oven-safe if you want to use that method (more on that later).
Preparation Method
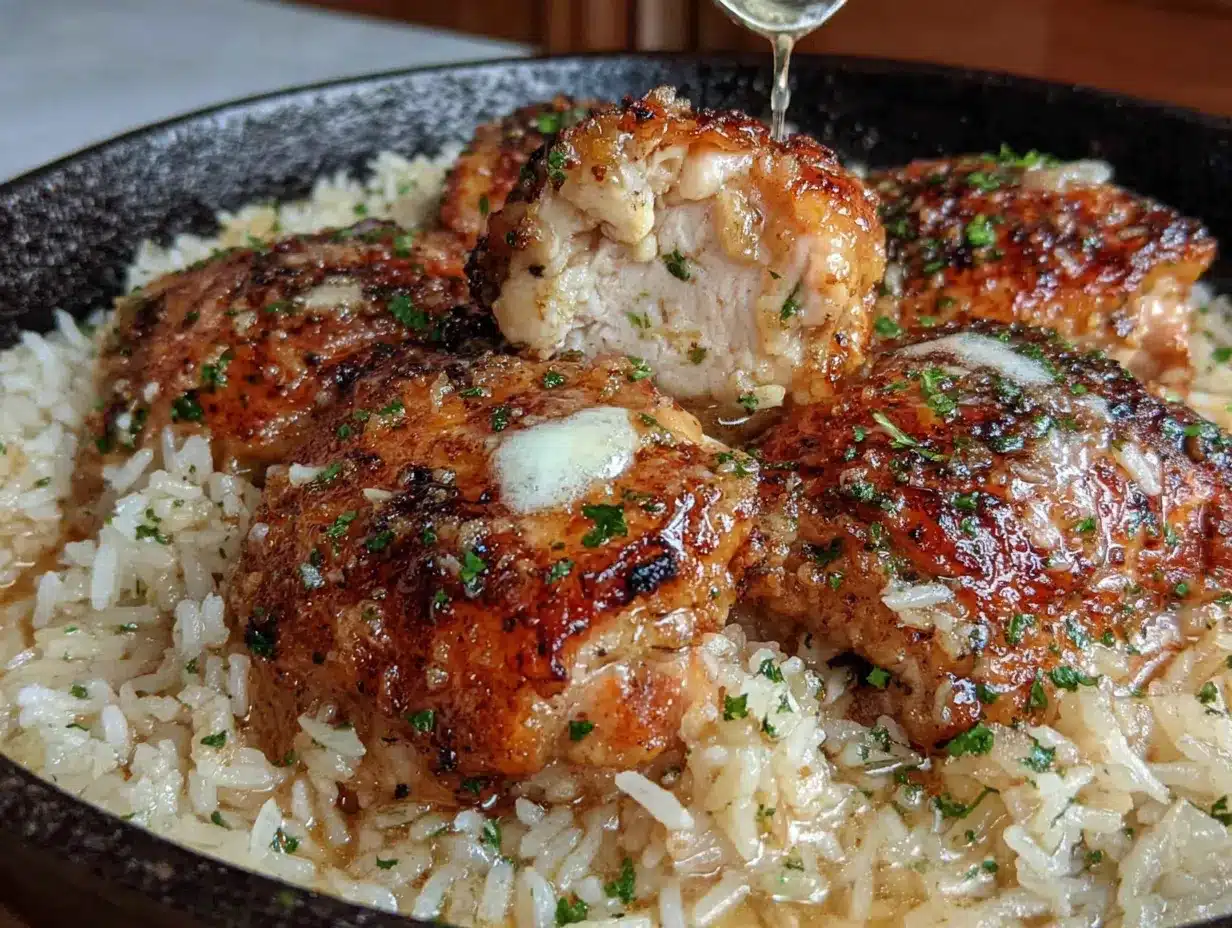
Alright, let’s get cooking. This is straightforward, but I’ll walk you through every step so you get perfect results.
- Season the Chicken (5 minutes): Pat the chicken thighs dry with paper towels. This is crucial for browning—wet chicken steams, not sears. Season generously on both sides with salt, pepper, and the paprika. Let them sit while you prep the rest.
- Melt the Butter (2 minutes): Place your skillet or Dutch oven over medium-high heat. Add the 4 tablespoons of butter and let it melt completely. It should sizzle gently, not burn. Swirl the pan to coat the bottom.
- Sear the Chicken (8-10 minutes): Place the chicken thighs in the hot butter, smooth side down. Don’t crowd the pan—work in two batches if needed. Let them cook undisturbed for 4-5 minutes until the bottom is a deep golden brown. Flip with tongs and cook another 3-4 minutes. The chicken won’t be cooked through yet, and that’s fine. Transfer the seared chicken to a plate and set aside.
- Sauté the Aromatics (3 minutes): Reduce the heat to medium. Add the diced onion to the pan with the remaining butter and drippings. Scrape up any browned bits from the bottom—that’s pure flavor. Cook for 2 minutes until the onion starts to soften. Add the minced garlic and cook for just 30-60 seconds until fragrant. Don’t let the garlic burn, or it’ll turn bitter.
- Toast the Rice (2 minutes): Add the dry, uncooked rice to the pan. Stir it around in the butter, onion, and garlic mixture for about 2 minutes. You’ll notice the rice starts to look slightly translucent at the edges and smell nutty. This step is key for fluffy, separate grains.
- Add the Liquid (1 minute): Pour in the chicken broth and add the dried thyme. Stir everything together, scraping the bottom of the pan one last time. Bring the liquid to a gentle boil.
- Return the Chicken (30 seconds): Nestle the seared chicken thighs back into the rice. They should be partially submerged. Any juices that collected on the plate go in too.
- Simmer and Cook (20-25 minutes): Reduce the heat to low, cover the pan with a tight-fitting lid, and let it simmer. Do not lift the lid during this time! The steam is what cooks the rice. Set a timer for 20 minutes. After 20 minutes, check the rice. It should be tender and have absorbed most of the liquid. If it’s still a bit firm, cook for another 3-5 minutes with the lid on.
- Rest (5 minutes): Once the rice is tender, remove the pan from the heat. Let it sit, covered, for 5 minutes. This allows the steam to finish distributing and makes the rice extra fluffy.
- Fluff and Serve (2 minutes): Remove the lid. Be careful of the steam—it’s hot! Use a fork to gently fluff the rice. Taste and adjust salt and pepper if needed. Garnish with fresh parsley and serve immediately.
And that’s it. One pan, a little patience, and you’ve got a dinner that tastes like you spent hours on it.
Cooking Tips & Techniques
I’ve messed this recipe up more times than I’d like to admit, so let me save you the trouble. Here are the things I’ve learned the hard way:
- Don’t Skip the Searing: I know it’s tempting to just throw everything in the pan and walk away. But that golden-brown crust on the chicken is where the magic lives. It adds a nutty, savory depth that makes the whole dish taste richer. It’s worth the extra 10 minutes.
- Resist the Urge to Peek: I get it. You want to see if the rice is cooking. But every time you lift that lid, you let out precious steam. That steam is what cooks the rice evenly. Trust the process and keep the lid on until the timer goes off.
- Low and Slow is the Way to Go: When you add the broth and put the lid on, make sure the heat is on low. A vigorous boil will cook the liquid off too quickly and leave you with undercooked rice. You want a gentle, steady simmer.
- Use the Right Pan: A thin-bottomed pan will give you hot spots and uneven cooking. A heavy skillet or Dutch oven distributes heat evenly, which means your rice cooks uniformly. It’s a small detail that makes a big difference.
- Toast the Rice Properly: Don’t rush this step. Stirring the raw rice in the hot butter for a full two minutes coats each grain and helps it stay separate. You’ll smell a nutty aroma when it’s ready.
I once forgot to toast the rice and just added it dry with the broth. The result was a clumpy, sticky mess that reminded me of cafeteria food. Learn from my mistakes!
Variations & Adaptations
This recipe is a fantastic base, and you can change it up in so many ways. Here are some of my favorites:
- Make it Creamy: After the rice is cooked, stir in 1/4 cup of heavy cream or cream cheese. It turns the whole dish into a decadent, risotto-like meal. I do this when I’m feeling extra indulgent.
- Add Vegetables: Throw in a cup of frozen peas and carrots during the last 5 minutes of cooking. Or, sauté sliced mushrooms along with the onions. For a green option, stir in a handful of fresh spinach right before serving—it wilts beautifully into the hot rice.
- Try Different Proteins: This works great with boneless chicken breasts (just reduce the cooking time by 5 minutes), or even with Italian sausage links. For a seafood twist, sear some shrimp in the butter for 2 minutes per side, remove them, and add them back in at the very end just to warm through.
- Spice It Up: Add 1/2 teaspoon of red pepper flakes along with the garlic for a little heat. Or, swap the paprika for smoked paprika and add a pinch of cayenne.
- Go Low-Carb: You can substitute the rice with cauliflower rice. Sauté the cauliflower rice in the butter for 5 minutes after the aromatics, then add just 1/2 cup of broth and the chicken. Cook covered for 10 minutes. It’s not the same, but it’s a solid alternative.
- Make it a Casserole: After searing the chicken, transfer everything to a baking dish, cover tightly with foil, and bake at 375°F (190°C) for 35-40 minutes. This is great for feeding a crowd.
I once added a handful of chopped sun-dried tomatoes and a splash of balsamic vinegar for a tangy, Mediterranean twist. It was a happy accident that I’ve repeated many times.
Serving & Storage Suggestions
This dish is a meal in itself, but here’s how to serve it and what to do with leftovers.
Serving: Serve this straight from the pan for a cozy, family-style dinner. I like to sprinkle a little extra fresh parsley and a pinch of flaky sea salt on top right before serving. It goes beautifully with a simple green salad dressed with lemon vinaigrette or some steamed green beans. A side of crusty bread is never a bad idea to soak up any extra buttery sauce. For a complete meal, I often pair this with a bowl of creamy butternut squash soup on the side for a truly satisfying fall dinner.
Storage: Let the dish cool completely to room temperature. Transfer leftovers to an airtight container. It will keep in the refrigerator for up to 4 days. The flavors actually get better overnight as they meld together.
Reheating: The best way to reheat is in a skillet over medium-low heat with a splash of chicken broth or water. Stir occasionally until heated through. This helps re-steam the rice and prevents it from drying out. You can also microwave it in 30-second bursts, but the texture won’t be as good.
Freezing: This freezes surprisingly well. Place cooled leftovers in a freezer-safe container or zip-top bag. It will keep for up to 3 months. Thaw overnight in the refrigerator before reheating. The rice might be slightly softer after freezing, but the flavor is still fantastic.
Nutritional Information & Benefits
Here’s an approximate nutritional breakdown per serving (based on 6 servings):
- Calories: 485
- Protein: 32g
- Fat: 22g
- Carbohydrates: 38g
- Fiber: 1g
- Sugar: 2g
- Sodium: 680mg
This meal provides a good balance of protein from the chicken and energy from the rice. Chicken thighs are a great source of B vitamins, which help with energy metabolism, and selenium, an important antioxidant. The garlic is not just for flavor—it’s known for its immune-supporting properties. Using butter in moderation adds fat-soluble vitamins A, D, and E.
If you’re watching your sodium, use low-sodium broth and go easy on the added salt. For a lighter option, you can use chicken breasts and reduce the butter to 3 tablespoons. This dish is naturally gluten-free, making it a safe choice for those with celiac disease or gluten sensitivity.
Conclusion
This easy one-pan garlic butter chicken and rice is the definition of a weeknight hero. It’s simple enough for a Tuesday, but impressive enough for company. The rich, buttery garlic flavor, the perfectly tender chicken, and the fluffy, savory rice—it all comes together in one pan with minimal effort and maximum payoff.
I love this recipe because it proves you don’t need a dozen pots and pans or a long list of exotic ingredients to make a meal that feels special. It’s honest, comforting food that fills your kitchen with the best smells and your belly with the best flavors. I hope you give it a try and make it your own. Add your favorite vegetables, spice it up, or keep it exactly as written—it’s hard to go wrong.
I’d love to hear how it turns out for you! Drop a comment below and let me know if you made any fun variations. And if you’re looking for another one-pan wonder, you have to try my honey garlic chicken with root vegetables—it’s another favorite in my house. Happy cooking!
Frequently Asked Questions
Can I use chicken breast instead of thighs?
Absolutely! Chicken breasts work fine, but they can dry out more easily. Reduce the simmering time by about 5 minutes and check the internal temperature—it should reach 165°F (74°C). Boneless, skinless thighs are more forgiving and stay juicier.
Why is my rice mushy?
Mushy rice usually means too much liquid or the heat was too high. Make sure you’re using a low simmer, not a boil. Also, don’t lift the lid during cooking. If you’ve already made it, try spreading the rice on a baking sheet and letting it air out for a few minutes to release excess moisture.
Can I make this in a rice cooker?
You can adapt it! Sear the chicken and sauté the aromatics in a skillet first, then transfer everything (including the uncooked rice and broth) to your rice cooker. Cook on the regular white rice setting. The chicken might not get as brown, but it’ll still be tasty.
How do I prevent the rice from burning on the bottom?
This happens if the heat is too high or the pan isn’t heavy enough. Use low heat after adding the broth, and make sure your pan has a thick, heavy bottom. If you’re worried, you can also cook it in a 375°F (190°C) oven instead of on the stovetop—just use an oven-safe pan.
Can I add cheese to this?
Yes! Stir in 1/2 cup of grated Parmesan cheese right after the rice is done cooking. The heat will melt it into a creamy, delicious sauce. You could also sprinkle some mozzarella on top and broil it for a minute to get it bubbly and golden. It’s a game-changer.
Pin This Recipe!
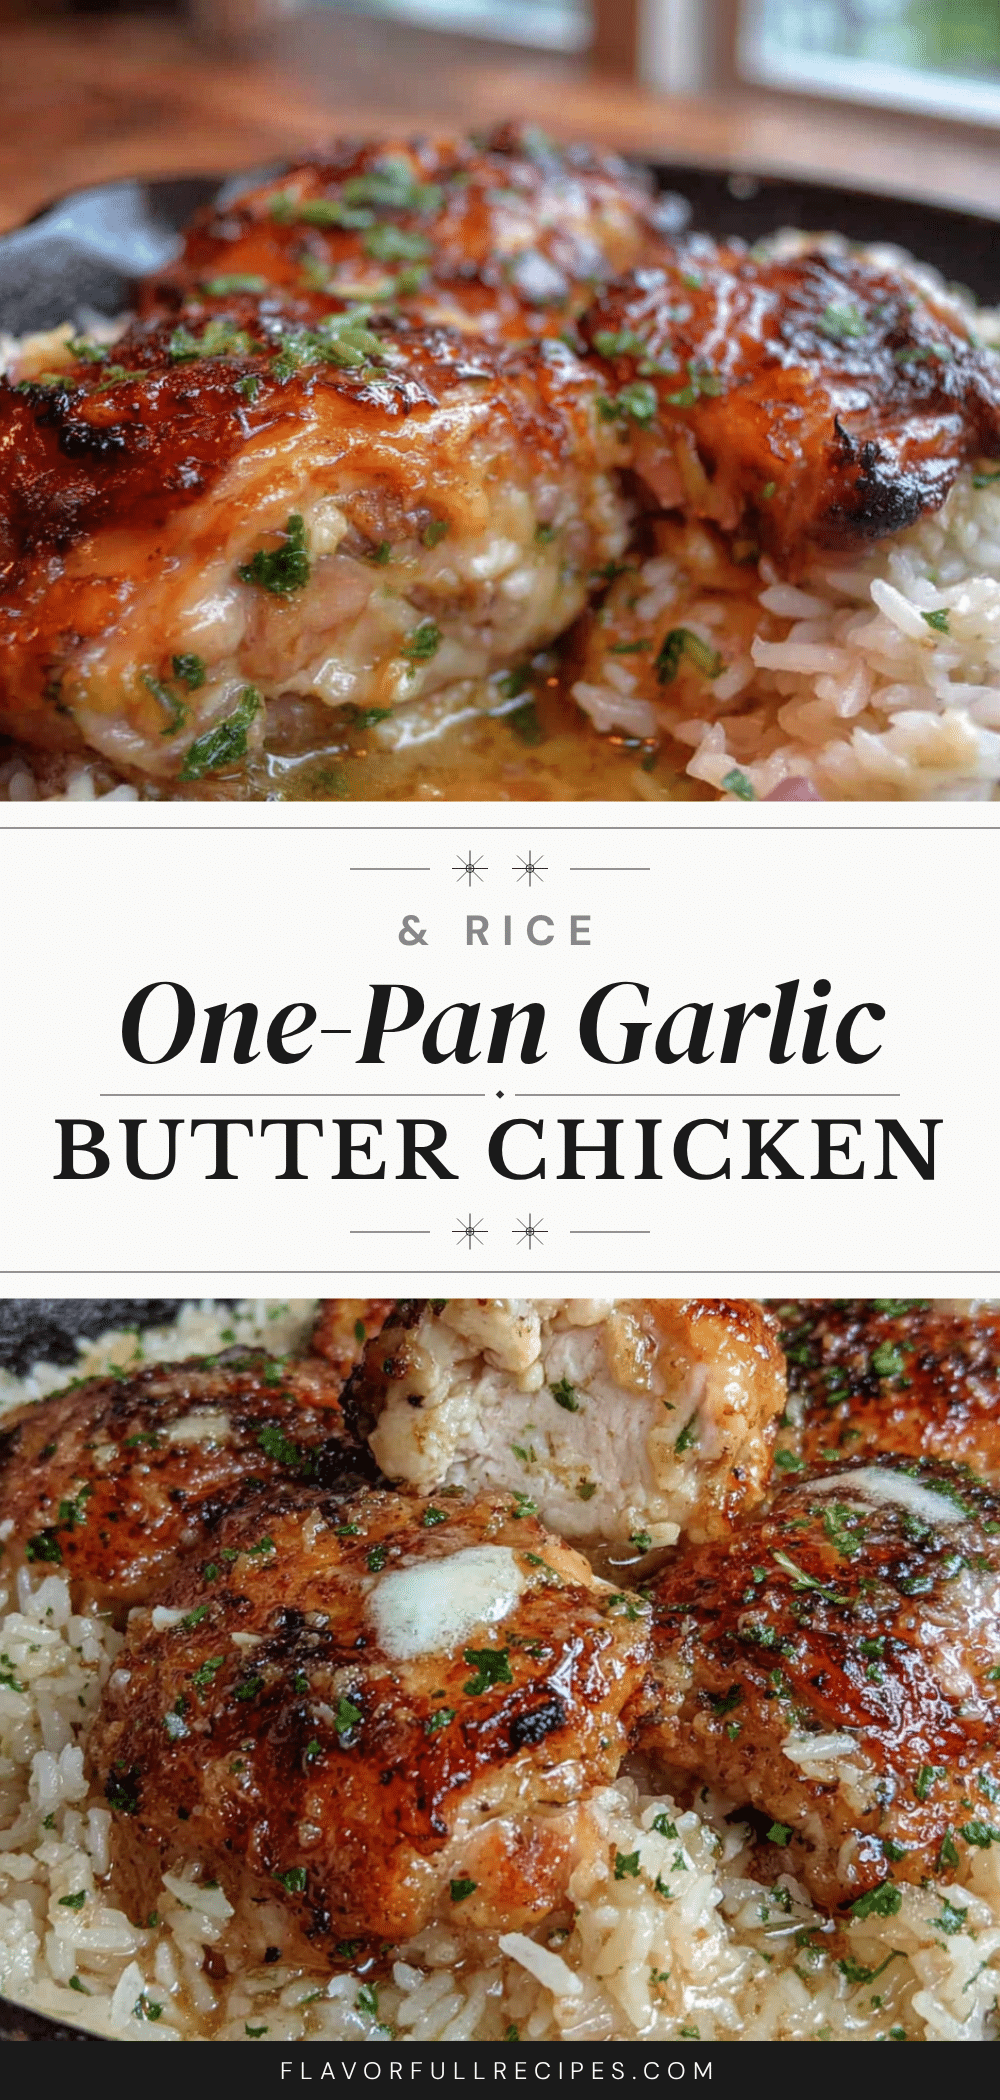
Easy One-Pan Garlic Butter Chicken and Rice
- Total Time: 40 minutes
- Yield: 6 servings 1x
Description
A simple, comforting one-pan meal featuring juicy chicken thighs and fluffy rice in a rich garlic butter sauce. Perfect for busy weeknights, this recipe delivers big flavor with minimal cleanup.
Ingredients
- 1.5 lbs (680g) boneless, skinless chicken thighs
- 4 tablespoons (56g) unsalted butter
- 6–8 cloves garlic, minced
- 1 medium yellow onion, diced
- 1.5 cups (300g) long-grain white rice (jasmine preferred)
- 3 cups (720ml) low-sodium chicken broth
- 1 teaspoon dried thyme
- 1 teaspoon sweet paprika
- Salt and black pepper to taste
- Fresh parsley for garnish (optional)
Instructions
- Pat the chicken thighs dry with paper towels. Season generously on both sides with salt, pepper, and paprika. Let sit while prepping other ingredients.
- Place a large, deep skillet or Dutch oven over medium-high heat. Add 4 tablespoons of butter and let it melt completely, swirling to coat the bottom.
- Place the chicken thighs in the hot butter, smooth side down. Cook undisturbed for 4-5 minutes until deep golden brown. Flip with tongs and cook another 3-4 minutes. Transfer to a plate (chicken will not be fully cooked).
- Reduce heat to medium. Add diced onion to the pan, scraping up browned bits. Cook for 2 minutes until softened. Add minced garlic and cook for 30-60 seconds until fragrant.
- Add the dry rice to the pan. Stir for about 2 minutes until the rice looks slightly translucent and smells nutty.
- Pour in chicken broth and add dried thyme. Stir, scraping the bottom of the pan. Bring to a gentle boil.
- Nestle the seared chicken thighs back into the rice, including any accumulated juices.
- Reduce heat to low, cover with a tight-fitting lid, and simmer for 20-25 minutes. Do not lift the lid during cooking.
- Remove from heat and let rest, covered, for 5 minutes.
- Remove lid carefully. Fluff rice with a fork. Adjust salt and pepper to taste. Garnish with fresh parsley and serve immediately.
Notes
Don’t skip searing the chicken—it adds deep flavor. Resist lifting the lid while rice cooks to ensure even cooking. For best results, use a heavy-bottomed pan and toast the rice in butter before adding liquid.
- Prep Time: 10 minutes
- Cook Time: 30 minutes
- Category: Main Course
- Cuisine: American
Nutrition
- Serving Size: 1 serving (about 1/6
- Calories: 485
- Sugar: 2
- Sodium: 680
- Fat: 22
- Saturated Fat: 10
- Carbohydrates: 38
- Fiber: 1
- Protein: 32
Keywords: one-pan chicken and rice, garlic butter chicken, easy weeknight dinner, one skillet meal, chicken thigh recipe