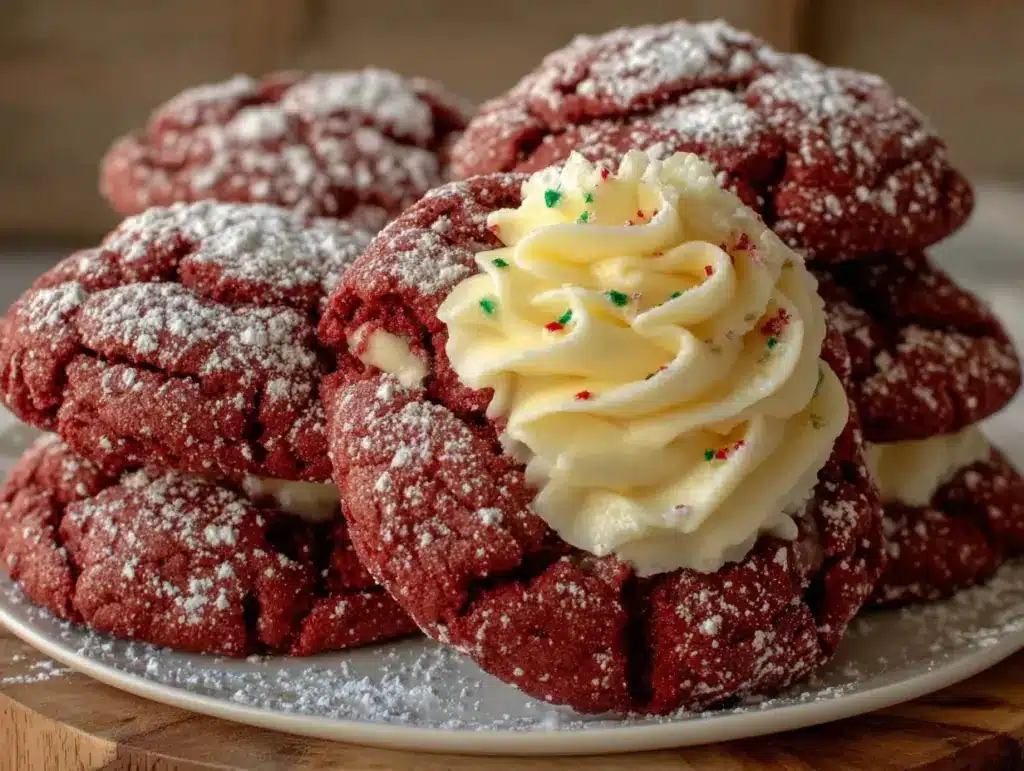
That first crackle of powdered sugar under a fork—the kind that shatters just enough to give way to something soft and secret—still stops me cold every single time. It was a rainy Tuesday afternoon in my tiny apartment kitchen, the kind of grey day where the only sensible thing to do was bake something that felt like a celebration. I had a block of cream cheese that needed using up and a sudden, fierce craving for red velvet, but not the layer-cake kind. I wanted something handheld, something that looked like a snow-dusted jewel and tasted like a bakery secret. That first batch of red velvet crinkle cookies was a happy accident born from impatience and a deep love for cream cheese frosting. I was trying to speed up the cookie-making process by stuffing the filling inside, and honestly? It worked better than I ever imagined. The cookie itself stayed fudgy and rich, and the center became this molten, tangy surprise that made every bite feel like you’d found the last one in the box.
These aren’t your average crinkle cookies. They’re a little extra, a little dressed up, but they come together with the same easy, no-fuss energy as a classic drop cookie. The dough is forgiving, the filling is simple, and the result is this gorgeous, bakery-worthy cookie that feels both nostalgic and brand new. I’ve made them for holiday cookie swaps, Valentine’s Day treats, and random Tuesday afternoons when I needed a little edible joy. They never last long. There’s something about that red velvet color against the white powdered sugar that just draws people in, like a promise of something good. And the promise is kept—every single time.
Why You’ll Love This Recipe
I’ve tested this recipe more times than I care to count, tweaking the flour ratio, the cocoa powder, the chilling time, until I landed on the version that makes me close my eyes after the first bite. This is the one. Here’s why I think you’ll love it too:
- Bakery-Quality at Home: These cookies look like they came from a fancy bakeshop, but they’re surprisingly simple to make. The cream cheese filling is the secret weapon that takes them from good to unforgettable.
- Perfectly Balanced Flavor: The tangy cream cheese filling cuts through the sweetness of the red velvet cookie, creating a flavor harmony that isn’t cloying. It’s the kind of cookie you can eat two of without feeling like you need a glass of milk—though you’ll probably want one anyway.
- Fudgy, Not Cakey: A lot of red velvet cookies turn out dry or cakey. Not these. They’re soft, fudgy, and almost brownie-like in the center, with that beautiful crinkled top that makes them so photogenic.
- Crowd-Pleasing Showstopper: I’ve brought these to parties and watched people literally stop mid-conversation to ask, “What is THAT?” They’re a guaranteed hit with kids and adults alike. The red color and snowy coating make them perfect for holidays, but they’re welcome any time of year.
- Simple Ingredients, No Fuss: You don’t need any fancy equipment or hard-to-find ingredients. The filling is just cream cheese, sugar, and a little vanilla. The dough comes together in one bowl. It’s the kind of recipe that feels special without being stressful.
What Ingredients You Will Need
This recipe relies on simple, pantry-friendly ingredients to deliver that signature red velvet flavor and a luscious cream cheese center. Each component plays a specific role, so here’s what you’ll need and why it matters.
- For the Cream Cheese Filling:
- 4 oz (113g) cream cheese, softened: This is the star of the filling. Use full-fat cream cheese for the richest, creamiest result. Let it sit at room temperature for about 30 minutes so it blends smoothly without lumps. I prefer Philadelphia brand for its consistent texture.
- 2 tablespoons (25g) granulated sugar: Just a touch of sweetness to balance the tanginess of the cream cheese.
- 1/2 teaspoon vanilla extract: Pure vanilla extract adds a warm, aromatic note. Avoid imitation vanilla if you can—it makes a difference in the final flavor.
- For the Red Velvet Cookie Dough:
- 1 1/2 cups (190g) all-purpose flour: Spoon and level your flour for the most accurate measurement. Scooping directly from the bag can pack in too much flour and make the cookies dry.
- 2 tablespoons (10g) unsweetened cocoa powder: Use natural unsweetened cocoa powder, not Dutch-processed. It gives the cookies that classic red velvet color and a subtle chocolate flavor. I like Ghirardelli or Hershey’s Special Dark for a richer taste.
- 1 teaspoon baking powder: This helps the cookies spread and puff up just enough to create those signature crinkles.
- 1/4 teaspoon salt: Salt enhances all the flavors and balances the sweetness.
- 1/2 cup (115g) unsalted butter, softened: Butter adds richness and flavor. Make sure it’s softened to room temperature, not melted, for the best texture.
- 3/4 cup (150g) granulated sugar: This is the main sweetener for the dough. It also helps create that crinkly top.
- 1 large egg, room temperature: An egg at room temperature emulsifies into the butter-sugar mixture more easily, creating a smoother dough.
- 1 teaspoon vanilla extract: A second hit of vanilla reinforces the flavor.
- 1 tablespoon (15ml) buttermilk: Buttermilk adds a slight tang and helps activate the baking powder. If you don’t have buttermilk, you can mix 1 tablespoon of milk with 1/2 teaspoon of lemon juice or white vinegar and let it sit for 5 minutes.
- 1 tablespoon (15ml) red food coloring: This is what gives the cookies their iconic red color. I use liquid gel food coloring (like Americolor or Wilton) for a vibrant hue without thinning the dough too much. You can also use natural beet powder, but the color will be more muted and earthy.
- For Rolling:
- 1/2 cup (60g) powdered sugar: This is for coating the dough balls before baking. It creates that beautiful snowy crinkle effect. Make sure it’s fresh and free of lumps.
Equipment Needed
You don’t need a lot of fancy tools for this recipe, which is part of its charm. Here’s what you’ll want to have on hand:
- Electric mixer (handheld or stand): A mixer makes creaming the butter and sugar a breeze. A hand mixer works perfectly fine, but a stand mixer with the paddle attachment is even easier. If you’re mixing by hand, make sure your butter is very soft.
- Mixing bowls: You’ll need a medium bowl for the dry ingredients and a larger bowl for the dough. A small bowl for the cream cheese filling is helpful too.
- Baking sheets: Two standard baking sheets work well. Line them with parchment paper or silicone baking mats for easy cleanup and even baking.
- Cooling rack: A wire rack allows the cookies to cool evenly without getting soggy on the bottom.
- Cookie scoop (about 1.5 tablespoons): A cookie scoop ensures uniform-sized cookies that bake evenly. If you don’t have one, you can use a spoon, but the cookies might vary in size.
- Plastic wrap: For chilling the dough. It’s essential for preventing the cookies from spreading too much.
Preparation Method
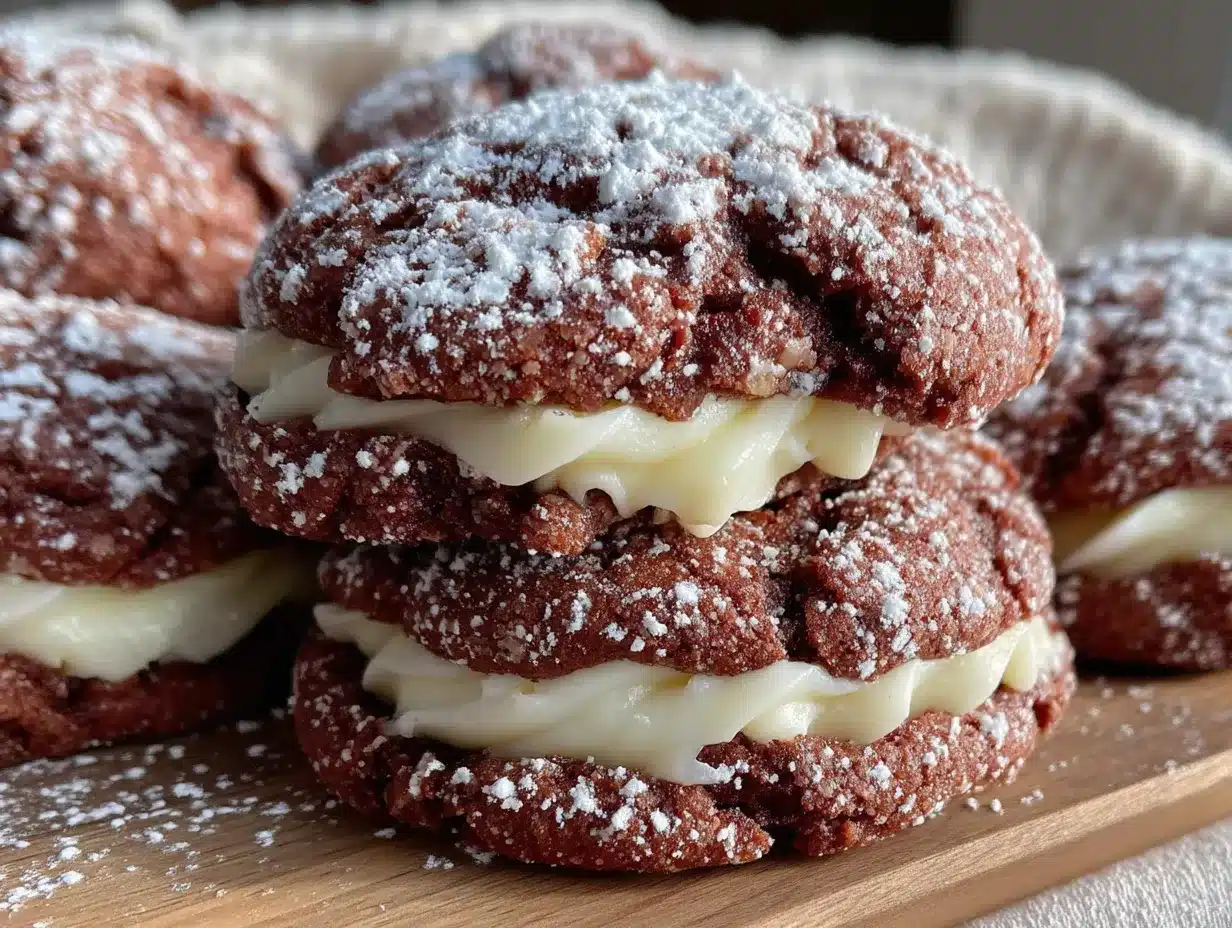
Let’s get baking. Follow these steps carefully, and you’ll have a batch of stunning red velvet crinkle cookies with a creamy surprise inside.
- Make the Cream Cheese Filling: In a small bowl, combine the softened cream cheese, 2 tablespoons of granulated sugar, and 1/2 teaspoon of vanilla extract. Mix until smooth and well-combined. You can do this with a spatula or a small whisk. Cover the bowl and pop it in the freezer for about 15-20 minutes. This firms up the filling so it’s easier to handle when you’re stuffing the cookies. You want it to be scoopable but not rock-hard.
- Whisk Dry Ingredients: In a medium bowl, whisk together the all-purpose flour, cocoa powder, baking powder, and salt. Set this aside.
- Cream Butter and Sugar: In a large bowl, beat the softened butter and 3/4 cup of granulated sugar together with an electric mixer on medium speed until light and fluffy, about 2-3 minutes. You’ll see the mixture become paler in color and increase in volume. Scrape down the sides of the bowl as needed.
- Add Egg, Vanilla, and Buttermilk: Add the egg, 1 teaspoon of vanilla extract, and the buttermilk to the butter mixture. Beat on medium speed until everything is well incorporated. The mixture might look slightly curdled at this point—that’s totally normal. Don’t worry.
- Add Food Coloring: Pour in the red food coloring and beat until the color is evenly distributed. The dough will be a vibrant, slightly alarming shade of red. That’s exactly what we want.
- Combine Wet and Dry Ingredients: Gradually add the dry ingredient mixture to the wet ingredients, mixing on low speed just until the flour disappears. Do not overmix. Overmixing can develop the gluten and make the cookies tough. You’ll have a soft, slightly sticky red dough.
- Chill the Dough: Cover the bowl with plastic wrap and refrigerate the dough for at least 2 hours, or up to 24 hours. Chilling is non-negotiable here. It firms up the butter, which prevents the cookies from spreading into flat pancakes in the oven. A well-chilled dough also makes it much easier to stuff with the cream cheese filling.
- Preheat and Prep: When you’re ready to bake, preheat your oven to 350°F (175°C). Line two baking sheets with parchment paper or silicone baking mats.
- Assemble the Cookies: Take the chilled dough and the cream cheese filling out of the refrigerator/freezer. Scoop out about 1.5 tablespoons of dough (I use a medium cookie scoop). Flatten it slightly in your palm. Place a small scoop of the chilled cream cheese filling—about 1 teaspoon—in the center. Gently wrap the dough around the filling, sealing it completely. Roll it into a smooth ball. Don’t worry if a little filling peeks out; just pinch it closed.
- Coat in Powdered Sugar: Place the powdered sugar in a shallow bowl. Roll each stuffed dough ball generously in the powdered sugar, making sure it’s completely coated. The more sugar, the better the crinkle effect. Place the coated dough balls about 2 inches apart on the prepared baking sheets.
- Bake: Bake for 12-14 minutes. The cookies will look puffed and set around the edges, but the centers will still be soft and slightly underdone. The tops will have developed beautiful cracks, revealing the red dough underneath the white sugar. Let them cool on the baking sheet for 5 minutes before transferring them to a wire rack to cool completely. The filling will be very hot, so don’t skip this cooling step.
Cooking Tips & Techniques
I’ve learned a few things the hard way so you don’t have to. Here are my best tips for perfect red velvet crinkle cookies every single time.
- Don’t Skip the Chill: I cannot stress this enough. Chilling the dough is the single most important step for achieving that signature crinkled top. Without it, the cookies will spread too much, lose their shape, and the filling might leak out. I’ve made the mistake of rushing this step, and I ended up with flat, sad discs of red cookie. Trust the process.
- Freeze the Filling: Popping the cream cheese filling in the freezer for 15-20 minutes makes it much easier to handle. It becomes firm enough to scoop into neat little balls that won’t squish out when you wrap the dough around them. If the filling is too soft, it’ll just ooze out during baking.
- Seal the Dough Completely: When you’re wrapping the dough around the filling, make sure there are no gaps or thin spots. If the filling isn’t fully enclosed, it can bubble out during baking and create a mess. A good seal also ensures that every bite has a perfect ratio of cookie to creamy center.
- Use a Cookie Scoop: A cookie scoop is your best friend for uniform cookies. It ensures that all the cookies are the same size, so they bake evenly. If you’re using a spoon, try to make each ball about the same volume.
- Don’t Overbake: The cookies will look slightly underdone when you take them out of the oven. That’s exactly what you want. They continue to bake on the hot baking sheet as they cool. Overbaking will result in dry, hard cookies. A slightly soft center is the goal.
Variations & Adaptations
This recipe is wonderfully versatile. Here are a few ways you can make it your own.
- Chocolate Lover’s Twist: For an even more decadent cookie, add 1/2 cup of semi-sweet or dark chocolate chips to the dough before chilling. You can also dip the cooled cookies in melted dark chocolate for a truly indulgent treat.
- White Chocolate & Cranberry: Swap the cream cheese filling for a white chocolate chip and dried cranberry filling. Simply mix 1/4 cup of white chocolate chips and 2 tablespoons of dried cranberries into the dough. The tartness of the cranberries pairs beautifully with the sweet red velvet base.
- Gluten-Free Version: Substitute the all-purpose flour with a 1:1 gluten-free baking flour blend (like Bob’s Red Mill or King Arthur). Make sure the blend contains xanthan gum for structure. The texture will be slightly more tender, but they’ll still be delicious and have that lovely crinkle.
- Vegan Adaptation: Use vegan butter and a flax egg (1 tablespoon ground flaxseed mixed with 3 tablespoons water) in place of the butter and egg. Use a dairy-free cream cheese for the filling. The texture will be a bit different, but the flavor will still be fantastic.
- Peppermint Red Velvet: Add 1/2 teaspoon of peppermint extract to the dough along with the vanilla. Roll the finished cookies in crushed candy canes for a festive holiday twist. This is a huge hit at Christmas cookie swaps.
Serving & Storage Suggestions
These cookies are best enjoyed fresh, but they store surprisingly well, too.
- Serving: Serve these cookies at room temperature. The cream cheese filling will be soft and luscious, not gooey. They’re perfect on their own, but a glass of cold milk or a cup of hot coffee is a wonderful companion. For a dessert platter, arrange them alongside other treats like our ultimate maple pecan blondies for a stunning spread.
- Storage: Store the cookies in an airtight container in the refrigerator for up to 5 days. The cream cheese filling needs to be kept cold. Let them sit at room temperature for about 15 minutes before serving to soften the filling.
- Freezing: You can freeze the baked cookies for up to 3 months. Place them in a single layer in a freezer-safe container, separating layers with parchment paper. Thaw in the refrigerator overnight. You can also freeze the unbaked, stuffed dough balls. Place them on a baking sheet and freeze until solid, then transfer to a freezer bag. Bake from frozen, adding 2-3 minutes to the baking time.
- Flavor Development: The flavors actually meld and improve after a day in the fridge. The red velvet flavor deepens, and the cream cheese filling gets even more luscious. Don’t be surprised if you find yourself sneaking one straight from the fridge the next day.
Nutritional Information & Benefits
These are definitely a treat, but here’s a general idea of what you’re getting per cookie (based on a batch of 24).
- Approximate Nutritional Values (per cookie): Calories: 180, Fat: 9g, Saturated Fat: 5g, Cholesterol: 30mg, Sodium: 95mg, Carbohydrates: 24g, Fiber: 0.5g, Sugar: 16g, Protein: 2g.
- Health Benefits: While these are an indulgence, the cocoa powder provides a small amount of antioxidants called flavonoids. The cream cheese offers a bit of calcium and protein. If you’re looking for a slightly lighter option, you can use reduced-fat cream cheese in the filling.
- Dietary Considerations: This recipe contains gluten, dairy, and eggs. For gluten-free or vegan options, see the variations section above.
- Personal Perspective: I believe in balance. These cookies are a celebration, not an everyday snack. They’re for the moments when you want to treat yourself and the people you love. And honestly, a little bit of joy is good for the soul.
Conclusion
These red velvet crinkle cookies with cream cheese filling are more than just a pretty face. They’re soft, fudgy, and packed with a tangy surprise that makes every bite feel special. I’ve made them for holidays, birthdays, and random Tuesday nights, and they never fail to bring smiles. They’re the kind of cookie that makes you look like a baking superstar without requiring a ton of effort or fancy skills. The recipe is forgiving, the ingredients are simple, and the result is absolutely gorgeous.
I’d love to hear how yours turn out! Did you try any of the variations? Did you add a secret ingredient? Drop a comment below and let me know. And if you’re looking for another crowd-pleasing dessert, don’t miss our creamy caramel apple cheesecake dip—it’s the perfect no-bake companion to these cookies. Happy baking, friends! May your kitchen smell like vanilla and your cookies be perfectly crinkled.
Frequently Asked Questions
Can I use natural red food coloring?
Yes, you can use natural red food coloring, like beet powder or a natural gel. The color will be more muted and earthy, not the bright, vibrant red you get from artificial coloring. The flavor will also be slightly different. If you’re looking for that classic red velvet look, I recommend using a gel-based artificial coloring.
Why did my cookies spread too much?
The most common reason for spreading is that the dough wasn’t chilled long enough. Make sure you chill the dough for at least 2 hours, or even overnight. Another culprit could be using melted or overly soft butter. The butter should be softened to room temperature, not melted. Finally, check that your baking powder is fresh—old baking powder loses its leavening power.
Can I make the dough ahead of time?
Absolutely! The dough can be refrigerated for up to 24 hours before baking. In fact, the flavor often improves with a little extra chilling time. You can also freeze the unbaked, stuffed dough balls for up to 3 months. Bake them from frozen, adding a couple of minutes to the baking time.
Can I leave out the cream cheese filling?
Yes, you can absolutely make these as plain red velvet crinkle cookies. Simply skip the filling and roll the chilled dough balls directly in powdered sugar. They’ll still be delicious and have that beautiful crinkled top. They’ll just be a little simpler.
How do I know when the cookies are done?
The cookies are done when they look puffed and set around the edges, but the centers are still soft and slightly underdone. The tops will have developed cracks. They will continue to bake on the hot baking sheet as they cool. If you’re unsure, it’s better to underbake slightly than to overbake. Overbaked cookies will be dry and hard.
Pin This Recipe!


Best Red Velvet Crinkle Cookies with Cream Cheese Filling
- Total Time: 2 hours 45 minutes
- Yield: 24 cookies 1x
Description
These red velvet crinkle cookies are soft, fudgy, and packed with a tangy cream cheese filling that makes every bite feel special. They look like they came from a fancy bakeshop but are surprisingly simple to make.
Ingredients
- 4 oz (113g) cream cheese, softened
- 2 tablespoons (25g) granulated sugar
- 1/2 teaspoon vanilla extract
- 1 1/2 cups (190g) all-purpose flour
- 2 tablespoons (10g) unsweetened cocoa powder
- 1 teaspoon baking powder
- 1/4 teaspoon salt
- 1/2 cup (115g) unsalted butter, softened
- 3/4 cup (150g) granulated sugar
- 1 large egg, room temperature
- 1 teaspoon vanilla extract
- 1 tablespoon (15ml) buttermilk
- 1 tablespoon (15ml) red food coloring
- 1/2 cup (60g) powdered sugar
Instructions
- Make the Cream Cheese Filling: In a small bowl, combine the softened cream cheese, 2 tablespoons of granulated sugar, and 1/2 teaspoon of vanilla extract. Mix until smooth and well-combined. Cover the bowl and pop it in the freezer for about 15-20 minutes.
- Whisk Dry Ingredients: In a medium bowl, whisk together the all-purpose flour, cocoa powder, baking powder, and salt. Set aside.
- Cream Butter and Sugar: In a large bowl, beat the softened butter and 3/4 cup of granulated sugar together with an electric mixer on medium speed until light and fluffy, about 2-3 minutes. Scrape down the sides of the bowl as needed.
- Add Egg, Vanilla, and Buttermilk: Add the egg, 1 teaspoon of vanilla extract, and the buttermilk to the butter mixture. Beat on medium speed until everything is well incorporated.
- Add Food Coloring: Pour in the red food coloring and beat until the color is evenly distributed.
- Combine Wet and Dry Ingredients: Gradually add the dry ingredient mixture to the wet ingredients, mixing on low speed just until the flour disappears. Do not overmix.
- Chill the Dough: Cover the bowl with plastic wrap and refrigerate the dough for at least 2 hours, or up to 24 hours.
- Preheat and Prep: When you’re ready to bake, preheat your oven to 350°F (175°C). Line two baking sheets with parchment paper or silicone baking mats.
- Assemble the Cookies: Scoop out about 1.5 tablespoons of dough. Flatten it slightly in your palm. Place a small scoop of the chilled cream cheese filling—about 1 teaspoon—in the center. Gently wrap the dough around the filling, sealing it completely. Roll it into a smooth ball.
- Coat in Powdered Sugar: Place the powdered sugar in a shallow bowl. Roll each stuffed dough ball generously in the powdered sugar, making sure it’s completely coated.
- Bake: Bake for 12-14 minutes. Let them cool on the baking sheet for 5 minutes before transferring them to a wire rack to cool completely.
Notes
Chilling the dough is essential for achieving the crinkled top and preventing spreading. Freezing the cream cheese filling for 15-20 minutes makes it easier to handle. Do not overbake; the cookies will continue to bake on the hot sheet as they cool.
- Prep Time: 30 minutes
- Cook Time: 12-14 minutes
- Category: Dessert
- Cuisine: American
Nutrition
- Serving Size: 1 cookie
- Calories: 180
- Sugar: 16
- Sodium: 95
- Fat: 9
- Saturated Fat: 5
- Carbohydrates: 24
- Fiber: 0.5
- Protein: 2
Keywords: red velvet, crinkle cookies, cream cheese, stuffed cookies, holiday cookies, Valentine's Day, easy cookie recipe