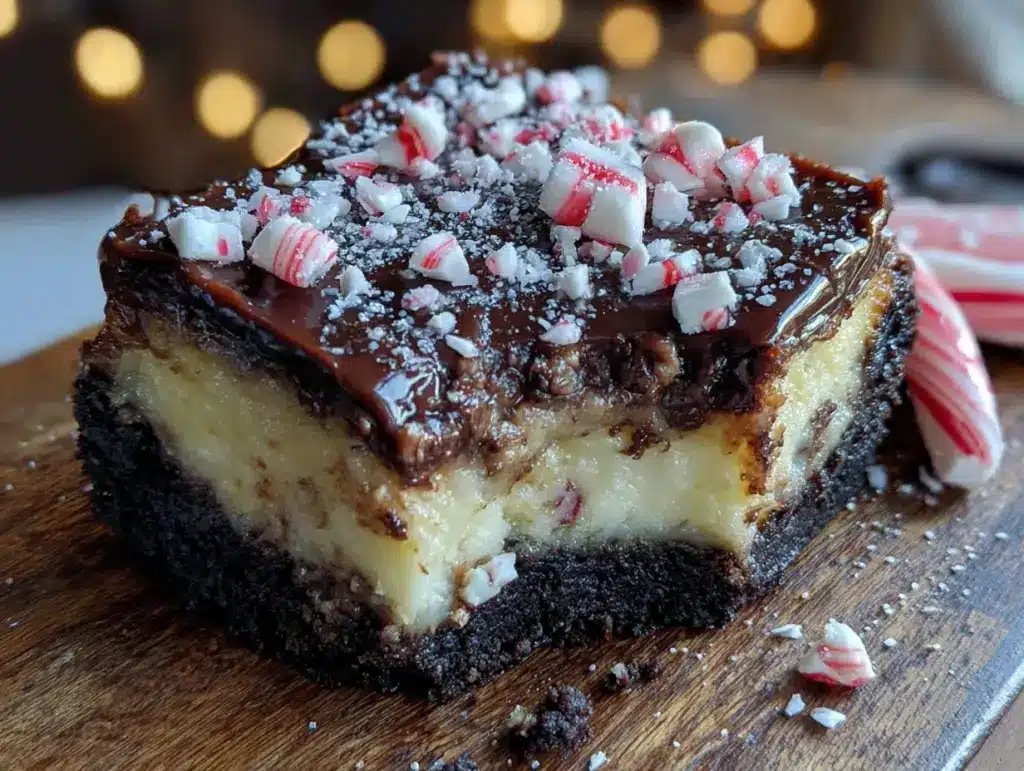
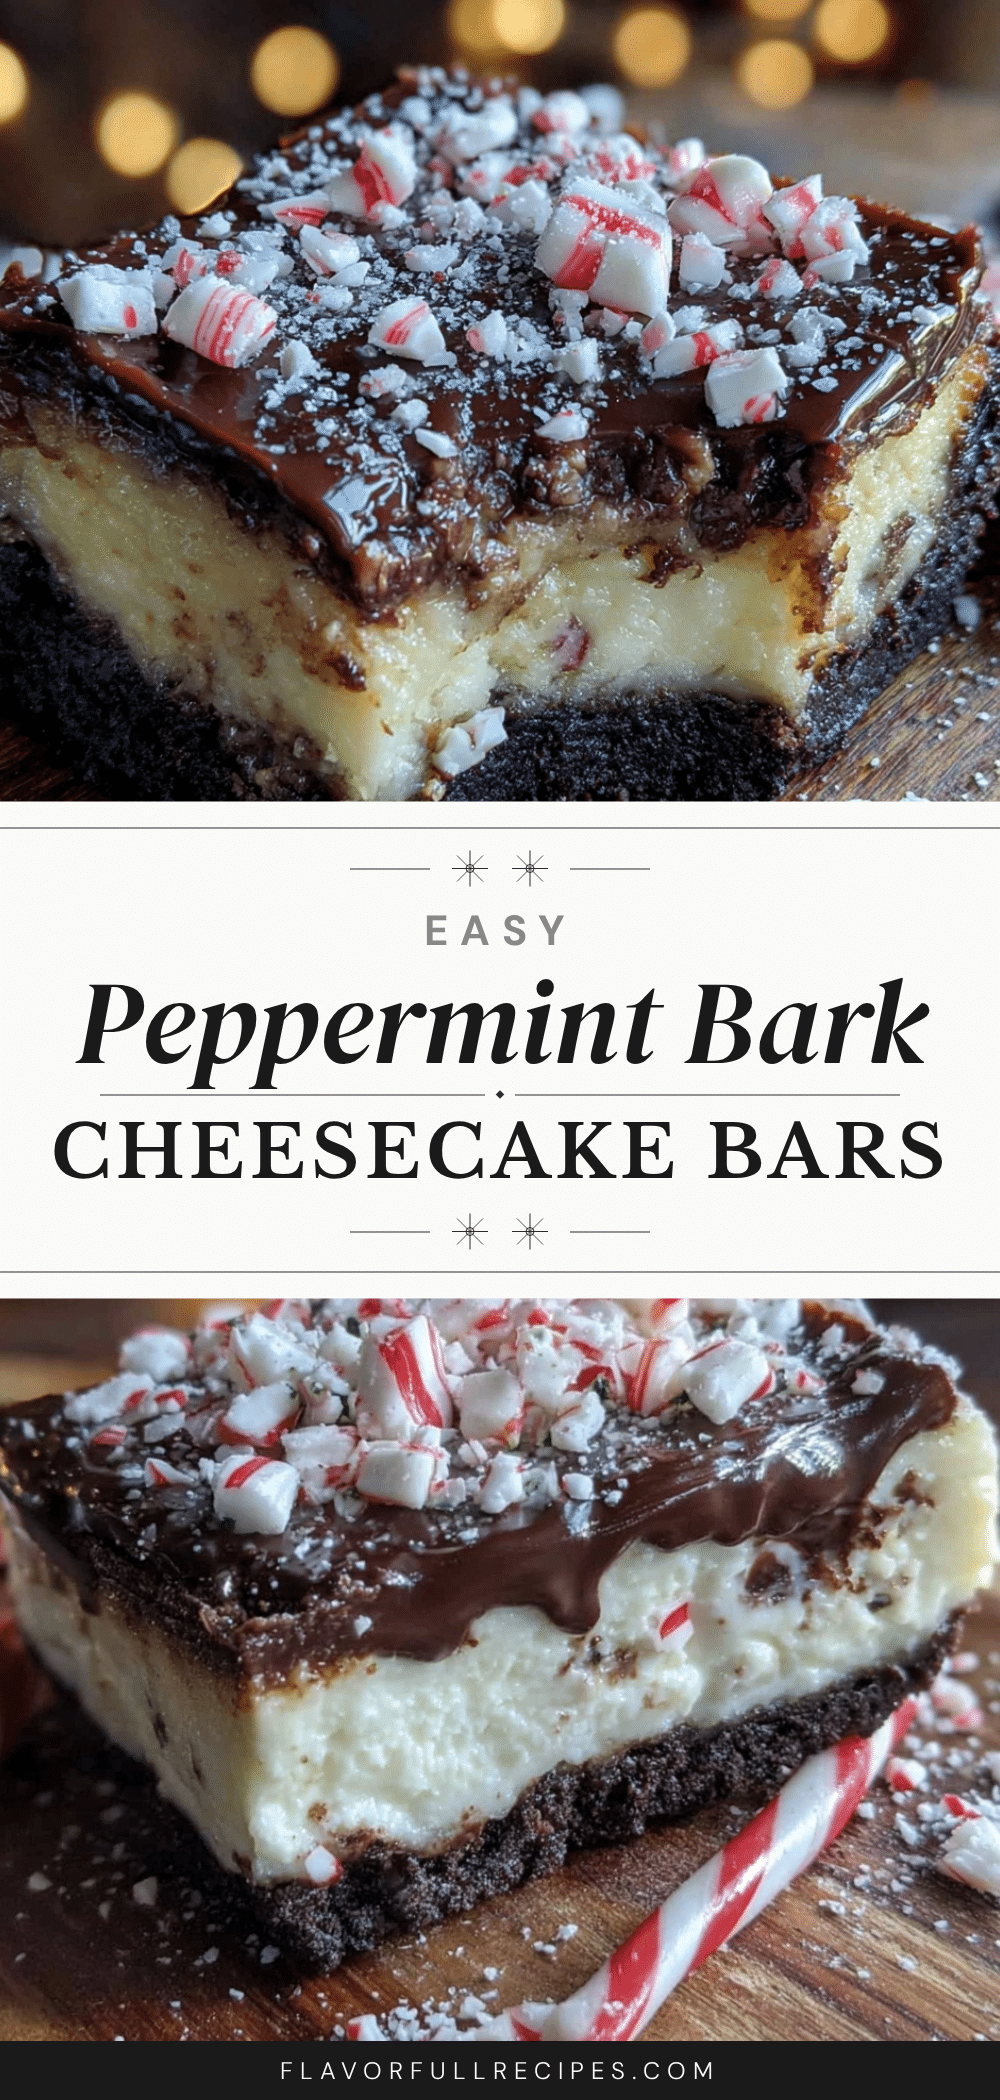
The crack. That’s the sound I was after. Not just any crack, but that sharp, clean snap when you bite through a layer of peppermint-studded dark chocolate, then hit the cool, velvety cheesecake underneath, and finally, the buttery crumble of the crust. That specific, multi-textural sound is the whole point of these Easy Peppermint Bark Cheesecake Bars. Everything else—the no-bake element, the holiday colors, the fact that they look like you spent all day on them—is secondary to getting that perfect bite.
I got obsessed with this texture after a holiday party last year. Someone brought a store-bought peppermint bark cheesecake, and honestly, it was a letdown. The chocolate layer was too thick and waxy, the cheesecake was dense, and the whole thing felt like a compromise. I wanted the lightness of a no-bake cheesecake, the crunch of real peppermint bark, and a crust that didn’t get soggy after a day in the fridge. So I spent a week in my kitchen, making batch after batch, listening for that crack.
This recipe is the result of those trials (and a few failures involving melted candy canes that refused to set). It’s the kind of dessert that feels like a gift to your future self. You make it the night before, let it chill, and the next day you have this stunning, crowd-pleasing dessert ready to go. It’s not just a recipe; it’s a strategy for a stress-free holiday. And honestly, that first perfect, crackling bite makes all the testing worth it.
Why You’ll Love These Easy Peppermint Bark Cheesecake Bars
Let me tell you why this recipe has become my go-to for every holiday gathering. It’s not just another dessert; it’s a showstopper that requires almost no oven time. I’ve tested this with my family, my picky neighbors, and even a group of chefs at a friend’s dinner party. Everyone agrees—this is the one.
- No-Bake & Stress-Free: You don’t even need to turn on your oven for the filling. This is a huge win during the busy holiday season when your oven is already full of roasted turkeys or cranberry orange glazed turkey breast. Just a little stovetop work for the crust, and the fridge does the rest.
- Simple Ingredients: No fancy grocery store trips required. You likely have cream cheese, butter, and vanilla in your kitchen right now. The special touch comes from crushed candy canes and good-quality chocolate, which are easy to find this time of year.
- Perfect for Holiday Parties: These bars are ideal for cookie swaps, potlucks, or even a fancy dessert table alongside your autumn harvest charcuterie board. They slice cleanly, hold their shape, and look incredibly professional.
- Crowd-Pleaser: Kids love the peppermint crunch, and adults appreciate the sophisticated flavor. I’ve never brought a plate of these anywhere that wasn’t completely empty within an hour.
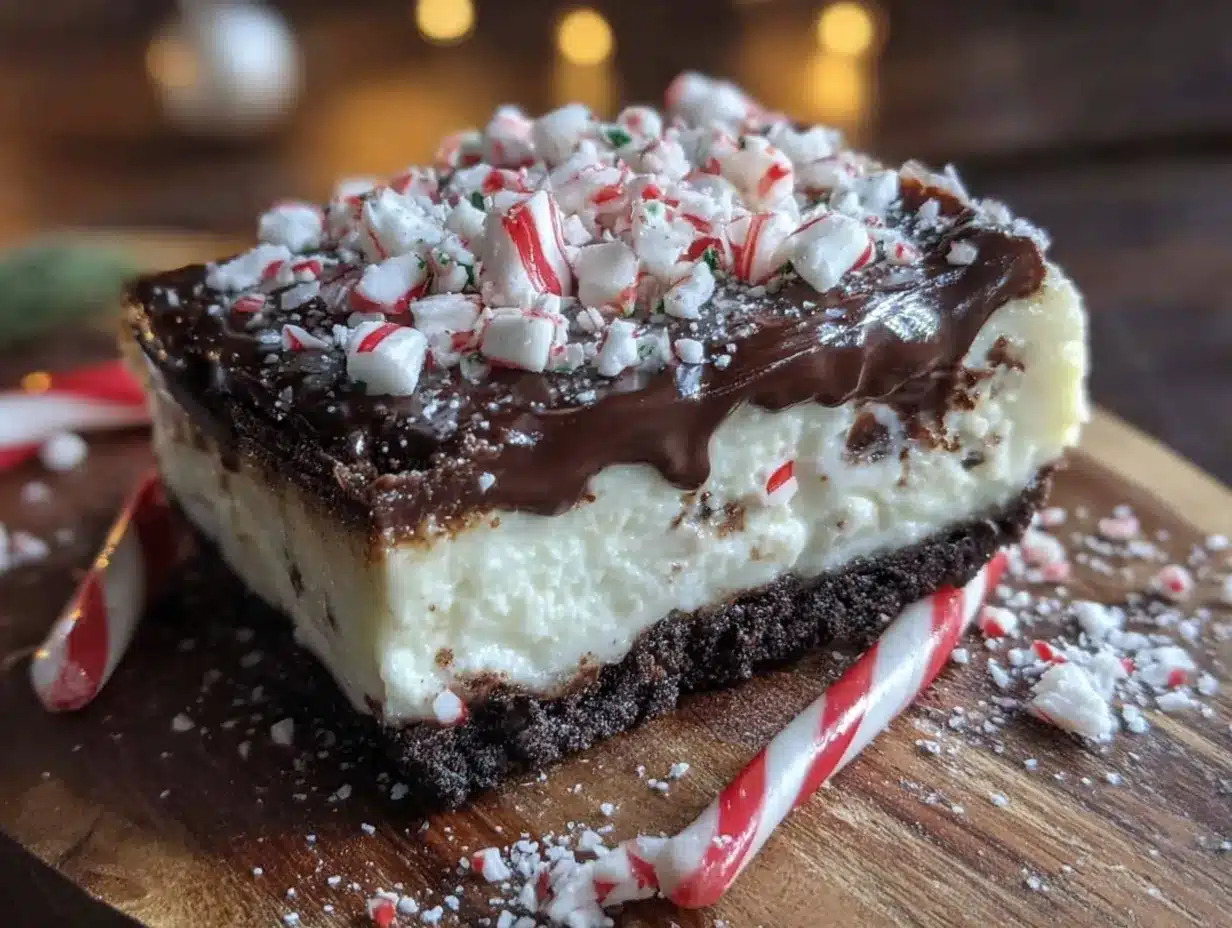
- Unbelievably Delicious Texture: The contrast between the cool, creamy cheesecake, the crunchy chocolate top, and the buttery crust is next-level. It’s the kind of dessert that makes you close your eyes after the first bite.
What makes this recipe different from the rest is the technique. I use a specific ratio of heavy cream to cream cheese that gives the filling a mousse-like lightness without being unstable. The chocolate layer isn’t just melted chocolate; it’s a thin, snappy bark that stays crisp even after refrigeration. This isn’t just another version of peppermint cheesecake—it’s my best version, perfected over a week of obsessive testing.
What Ingredients You Will Need
This recipe uses simple, wholesome ingredients to deliver that signature holiday flavor and perfect texture. Most of these are pantry staples, especially during the winter months. Let’s break down what you need and why each ingredient matters.
For the Crust
- 2 cups (200g) chocolate wafer crumbs (or 24 chocolate sandwich cookies, finely crushed). This gives a deep chocolate flavor that pairs perfectly with the peppermint. I prefer using Nabisco Famous Chocolate Wafers if I can find them, but crushed Oreos (with the filling removed) work beautifully too.
- 6 tablespoons (85g) unsalted butter, melted. The butter binds the crumbs and adds richness. Make sure it’s melted but not hot, or it will make the crust greasy.
- 2 tablespoons (25g) granulated sugar. Just a touch to balance the bitterness of the dark chocolate wafers.
- Pinch of salt. This enhances all the flavors and prevents the crust from tasting flat.
For the Cheesecake Filling
- 16 ounces (452g) full-fat cream cheese, softened to room temperature. This is non-negotiable. Low-fat cream cheese contains more water and will result in a runny filling. Let it sit on the counter for at least an hour before you start.
- 1/2 cup (100g) granulated sugar. Just enough sweetness to complement the chocolate and peppermint without overwhelming them.
- 1 teaspoon vanilla extract. Use pure vanilla extract if you have it. It adds a warmth that makes the cheesecake taste homemade.
- 1/2 teaspoon peppermint extract. Be careful here—peppermint extract is potent. A little goes a long way. I recommend using a high-quality brand like Nielsen-Massey for the cleanest flavor.
- 1 cup (240ml) heavy whipping cream, cold. This is the secret to the light, mousse-like texture. Do not substitute with half-and-half or milk; they won’t whip properly.
- Pinch of salt. Again, to balance the sweetness.
For the Topping
- 1 cup (170g) semi-sweet or dark chocolate chips. I prefer Ghirardelli 60% cacao chips for their rich flavor and smooth melt. You can use milk chocolate if you prefer a sweeter bark, but dark chocolate balances the sweetness of the cheesecake better.
- 1 tablespoon coconut oil or vegetable shortening. This helps the chocolate set with a beautiful shine and a clean snap. It also prevents the chocolate from blooming (getting those white streaks) when refrigerated.
- 1/2 cup (about 60g) crushed candy canes or peppermint candies. You want a mix of fine crumbs and small chunks for texture. Avoid the pre-crushed bags if possible; they tend to be too fine. Crush your own by placing candy canes in a zip-top bag and smashing them with a rolling pin—it’s oddly satisfying.
- Optional: 1/4 cup white chocolate chips, melted, for drizzling. This adds a beautiful visual contrast and an extra layer of sweetness.
Equipment Needed
You don’t need a professional pastry kitchen for these bars, but having the right tools makes the process smoother. Here’s what you’ll need:
- 9×9-inch square baking pan. This is the ideal size for bars that are thick enough to be satisfying but thin enough to slice cleanly. An 8×8-inch pan works too, but your bars will be slightly taller, and you may need to adjust the chilling time.
- Parchment paper. Absolutely essential. Line your pan with two overlapping strips of parchment, leaving overhang on all sides. This creates “handles” that let you lift the entire block of cheesecake out of the pan for clean slicing.
- Electric hand mixer or stand mixer. You need this to whip the cream and beat the cream cheese until smooth. A whisk and some elbow grease could work, but you’ll be tired and the texture won’t be as light.
- Medium mixing bowls. At least two—one for the crust mixture and one for the cheesecake filling.
- Large mixing bowl. For whipping the heavy cream. A metal or glass bowl that has been chilled in the freezer for 10 minutes helps the cream whip faster.
- Spatula. A silicone spatula is best for folding the whipped cream into the cream cheese mixture without deflating it.
- Rolling pin or meat mallet. For crushing the candy canes. A food processor works too, but be careful not to grind them into powder.
- Double boiler or microwave-safe bowl. For melting the chocolate. I prefer the double boiler method because it gives you more control and prevents the chocolate from burning.
Preparation Method
Let’s walk through this step-by-step. I’ve included all the little details I learned from my testing sessions so you can avoid my mistakes.
Step 1: Prepare the Pan and Crust (15 minutes)
Line your 9×9-inch baking pan with parchment paper, leaving a 2-inch overhang on all sides. This is your lifeline for getting the bars out cleanly. In a medium bowl, combine the chocolate wafer crumbs, melted butter, sugar, and salt. Stir with a fork until the mixture looks like wet sand and holds together when you squeeze it. Press this mixture firmly and evenly into the bottom of the prepared pan. I use the bottom of a flat measuring cup to really pack it down. The crust should be compact, not crumbly. Place the pan in the refrigerator to chill while you make the filling.
Step 2: Whip the Cream (5 minutes)
Pour the cold heavy whipping cream into a large chilled bowl. Using an electric hand mixer or stand mixer with the whisk attachment, beat the cream on medium-high speed until stiff peaks form. You’re looking for peaks that stand straight up when you lift the beaters—not soft, droopy peaks. Be careful not to over-whip, or you’ll end up with butter. Set the whipped cream aside in the refrigerator while you prepare the cream cheese mixture.
Step 3: Make the Cheesecake Filling (10 minutes)
In a large mixing bowl, beat the softened cream cheese with an electric mixer on medium speed until it’s completely smooth and there are no lumps. This usually takes about 2 minutes. Scrape down the sides and bottom of the bowl with a spatula. Add the sugar, vanilla extract, peppermint extract, and a pinch of salt. Beat on medium speed until everything is combined and smooth, about 1 minute more. The mixture should look glossy and uniform.
Step 4: Fold in the Whipped Cream (5 minutes)
This is the most important step for texture. Remove the whipped cream from the refrigerator. Add about one-third of it to the cream cheese mixture. Using a silicone spatula, gently fold the cream in. “Folding” means cutting through the center of the mixture, scraping the bottom, and bringing it up and over. Rotate the bowl as you go. Once the first third is mostly incorporated, add the remaining whipped cream and fold until no white streaks remain. The mixture should be light, airy, and mousse-like. Do not stir vigorously, or you’ll deflate the cream and end up with a dense, heavy cheesecake.
Step 5: Assemble and Chill (6+ hours or overnight)
Remove the pan with the crust from the refrigerator. Spoon the cheesecake filling over the crust and spread it into an even layer with a spatula. Give the pan a gentle tap on the counter to release any air bubbles. Cover the pan tightly with plastic wrap or aluminum foil. Refrigerate for at least 6 hours, but preferably overnight. The longer it chills, the cleaner your slices will be. Don’t rush this step—I tried cutting into a batch after only 4 hours once, and it was a sticky, messy disaster.
Step 6: Make the Peppermint Bark Topping (15 minutes)
About 30 minutes before you’re ready to serve, make the topping. In a double boiler or a microwave-safe bowl, combine the chocolate chips and coconut oil. If using a microwave, heat in 30-second intervals, stirring after each, until the chocolate is completely melted and smooth. Let it cool for 5 minutes—it should be warm to the touch but not hot. Pour the melted chocolate over the chilled cheesecake and spread it into a thin, even layer. Immediately sprinkle the crushed candy canes over the chocolate. If you’re using melted white chocolate for drizzling, drizzle it over the top now. Return the pan to the refrigerator for at least 30 minutes, or until the chocolate is completely set and firm to the touch.
Step 7: Slice and Serve (10 minutes)
Once the chocolate is set, use the parchment overhang to lift the entire block of cheesecake out of the pan and onto a cutting board. Use a sharp, large knife to slice the block into bars. For the cleanest cuts, wipe the knife clean with a damp paper towel between each slice. I like to cut them into 16 bars (4 rows by 4 rows), but you can make them larger or smaller depending on your crowd.
Cooking Tips & Techniques
After making these bars more times than I care to count, I’ve learned a few things the hard way. Here are my best tips for success:
Room temperature cream cheese is not optional. I know it’s tempting to microwave cold cream cheese to speed things up, but don’t do it. Microwaved cream cheese melts unevenly, creating hot spots that can curdle when you add the cream. Instead, take the cream cheese out of the fridge an hour before you start. If you’re in a rush, cut it into small cubes and let them sit on the counter for 20 minutes.
Don’t skip the coconut oil in the chocolate. This is the trick that makes the chocolate layer snap instead of bend. Without it, the chocolate will be soft and chewy, especially after being refrigerated. The coconut oil (or shortening) helps the chocolate set with a firm, glossy finish that cracks beautifully when you bite into it.
Crush your candy canes strategically. You want a mix of textures—some fine powder that sticks to the chocolate, and some small chunks that add crunch. I put my candy canes in a zip-top bag, then use a rolling pin to gently crush them. I stop when I have a mix of dust and pieces about the size of a pea. If you crush them too fine, they’ll dissolve into the chocolate and you’ll lose the texture.
Watch your peppermint extract. I learned this lesson after making a batch that tasted like toothpaste. Start with 1/2 teaspoon, taste the filling (it’s safe to eat raw since there are no eggs), and add more only if needed. The flavor will intensify slightly as the cheesecake chills, so it’s better to err on the side of caution.
Patience is key for clean slices. The hardest part of this recipe is waiting. If you try to slice the bars before the cheesecake is fully set, you’ll end up with a mess. I recommend making them the night before you plan to serve them. The wait is worth it for those perfect, Instagram-worthy slices.
Variations & Adaptations
This recipe is wonderfully adaptable. Here are some of my favorite variations:
Gluten-Free Version: Simply use gluten-free chocolate wafer cookies or gluten-free Oreos for the crust. Everything else in the recipe is naturally gluten-free. I’ve tested this with Schar chocolate cookies, and the crust comes out perfectly crunchy.
White Chocolate Peppermint Bark: Swap the dark chocolate topping for white chocolate. Use 1 cup of white chocolate chips and 1 tablespoon of coconut oil. The result is sweeter and creamier, with a beautiful snowy look. Add a few drops of red food coloring to the white chocolate for a festive marbled effect.
Mint Chocolate Chip Version: Fold 1/2 cup of mini chocolate chips into the cheesecake filling before spreading it over the crust. This adds little pockets of chocolate throughout the creamy filling, making every bite a surprise.
Dairy-Free Adaptation: Use dairy-free cream cheese (like Kite Hill or Tofutti) and a dairy-free heavy cream alternative (like coconut cream from a can of full-fat coconut milk). The texture will be slightly different—a bit denser—but still delicious. Make sure your chocolate is dairy-free as well.
Spiced Peppermint Bars: Add 1/2 teaspoon of cinnamon and a pinch of nutmeg to the cheesecake filling. The warm spices play beautifully against the cool peppermint, creating a flavor that feels like a cozy winter afternoon.
Serving & Storage Suggestions
These bars are best served cold, straight from the refrigerator. The contrast between the cold, creamy filling and the snappy chocolate topping is at its peak when the bars are chilled. I like to let them sit at room temperature for about 5 minutes before serving—just enough to take the edge off the chill without softening the texture.
For presentation, arrange the bars on a festive platter or a wooden board. They look beautiful alongside other holiday treats like candy corn rice krispie treats or a plate of maple pecan blondies. A dusting of powdered sugar and a few extra crushed candy canes on top adds a professional touch.
Storage: Store the bars in an airtight container in the refrigerator for up to 5 days. Place a sheet of parchment paper between layers to prevent them from sticking together. The texture holds up remarkably well—the crust stays crunchy, and the chocolate remains snappy.
Freezing: These bars freeze beautifully. Once the chocolate topping is set, cut the bars and place them on a baking sheet in the freezer for 1 hour. Once frozen solid, transfer them to a freezer-safe container or zip-top bag, separating layers with parchment paper. They’ll keep for up to 3 months. To serve, thaw in the refrigerator overnight. Do not thaw at room temperature, or the cheesecake will become too soft.
Flavor Development: The peppermint flavor actually mellows and becomes more integrated after a day or two in the fridge. I honestly think these bars taste even better on day two than on day one. The chocolate layer also sets more firmly over time, giving you an even cleaner snap.
Nutritional Information & Benefits
While these are definitely a treat, knowing what’s in them helps you enjoy them mindfully. Here’s the estimated nutritional breakdown for one bar (based on 16 bars):
| Nutrient | Amount per Bar |
|---|---|
| Calories | 285 |
| Total Fat | 19g |
| Saturated Fat | 11g |
| Cholesterol | 45mg |
| Sodium | 180mg |
| Total Carbohydrates | 26g |
| Dietary Fiber | 1g |
| Sugars | 18g |
| Protein | 3g |
Potential Allergens: This recipe contains dairy (cream cheese, heavy cream, butter) and gluten (from the chocolate wafers). It may also contain traces of soy (often found in chocolate chips).
Health Highlights: On the plus side, dark chocolate is rich in antioxidants and can be beneficial for heart health in moderation. The peppermint in the topping can aid digestion—a nice bonus after a heavy holiday meal. And honestly, a small square of this cheesecake is far more satisfying than a pile of generic holiday cookies. It’s about quality over quantity.
Dietary Considerations: This recipe can be made gluten-free and dairy-free with the substitutions mentioned above. It is not suitable for a vegan diet unless you use vegan cream cheese and a plant-based heavy cream alternative.
Conclusion
These Easy Peppermint Bark Cheesecake Bars have become my signature holiday dessert, and I think they’ll become yours too. They’re the perfect blend of nostalgic peppermint bark and creamy, dreamy cheesecake, all wrapped up in a no-bake package that takes the stress out of holiday entertaining.
I love how customizable they are—you can make them your own with different chocolate toppings, spice additions, or dietary adaptations. The first time I made these for my family’s Christmas dinner, my aunt asked for the recipe before she’d even finished her first bar. That’s the kind of reaction you can expect.
So go ahead—give these a try. Make them for your next holiday party, your cookie swap, or just because you deserve a little something special. And when you do, I’d love to hear about it. Leave a comment below and tell me how they turned out, or share your own twist on the recipe. Happy holidays, and happy baking (or rather, happy no-baking)!
Frequently Asked Questions
Can I use a different size pan?
Yes, but the thickness of the bars will change. An 8×8-inch pan will give you slightly taller bars, and you may need to increase the chilling time by an hour or two. A 9×13-inch pan will give you thinner bars, and you may want to reduce the chilling time slightly.
Can I use pre-crushed candy canes from a store?
You can, but I don’t recommend it. Pre-crushed candy canes are often ground too fine, which means they’ll dissolve into the chocolate instead of giving you that satisfying crunch. Crushing your own gives you more control over the texture.
Why did my chocolate topping turn out streaky or white?
That’s called “bloom,” and it happens when chocolate is exposed to temperature fluctuations or moisture. Using coconut oil or shortening in the chocolate helps prevent this. If it happens, don’t worry—the bars are still safe to eat and taste fine, they just won’t look as pretty.
Can I make these bars vegan?
Yes, with some modifications. Use vegan cream cheese (like Kite Hill), a plant-based heavy cream alternative (coconut cream works well), and vegan butter for the crust. Make sure your chocolate is dairy-free. The texture will be slightly different—a bit denser—but still delicious.
How far in advance can I make these?
These bars are perfect for making ahead. You can prepare them up to 3 days in advance and store them in the refrigerator. They also freeze beautifully for up to 3 months. Just make sure to wrap them tightly to prevent freezer burn.
Pin This Recipe!
Easy Peppermint Bark Cheesecake Bars: No-Bake Holiday Recipe
- Total Time: 6 hours 30 minutes (includes chilling)
- Yield: 16 bars 1x
Description
These no-bake peppermint bark cheesecake bars feature a crunchy chocolate wafer crust, a light and creamy peppermint cheesecake filling, and a snappy dark chocolate topping studded with crushed candy canes. Perfect for holiday parties and stress-free entertaining.
Ingredients
- 2 cups (200g) chocolate wafer crumbs (or 24 chocolate sandwich cookies, finely crushed)
- 6 tablespoons (85g) unsalted butter, melted
- 2 tablespoons (25g) granulated sugar
- Pinch of salt
- 16 ounces (452g) full-fat cream cheese, softened to room temperature
- 1/2 cup (100g) granulated sugar
- 1 teaspoon vanilla extract
- 1/2 teaspoon peppermint extract
- 1 cup (240ml) heavy whipping cream, cold
- Pinch of salt
- 1 cup (170g) semi-sweet or dark chocolate chips
- 1 tablespoon coconut oil or vegetable shortening
- 1/2 cup (about 60g) crushed candy canes or peppermint candies
- Optional: 1/4 cup white chocolate chips, melted, for drizzling
Instructions
- Line a 9×9-inch baking pan with parchment paper, leaving a 2-inch overhang on all sides.
- In a medium bowl, combine chocolate wafer crumbs, melted butter, 2 tablespoons sugar, and a pinch of salt. Stir until the mixture resembles wet sand and holds together when pressed.
- Press the crust mixture firmly and evenly into the bottom of the prepared pan. Use the bottom of a flat measuring cup to pack it down. Refrigerate while making the filling.
- Pour cold heavy whipping cream into a large chilled bowl. Beat with an electric mixer on medium-high speed until stiff peaks form. Set aside in the refrigerator.
- In a large mixing bowl, beat softened cream cheese on medium speed until smooth, about 2 minutes. Scrape down the sides.
- Add 1/2 cup sugar, vanilla extract, peppermint extract, and a pinch of salt. Beat on medium speed until combined and smooth, about 1 minute.
- Remove whipped cream from the refrigerator. Add one-third of the whipped cream to the cream cheese mixture and gently fold with a silicone spatula until mostly incorporated. Add the remaining whipped cream and fold until no white streaks remain. The mixture should be light and mousse-like.
- Remove the pan with the crust from the refrigerator. Spoon the cheesecake filling over the crust and spread into an even layer. Tap the pan gently on the counter to release air bubbles.
- Cover the pan tightly with plastic wrap or aluminum foil. Refrigerate for at least 6 hours, preferably overnight.
- About 30 minutes before serving, make the topping. In a double boiler or microwave-safe bowl, combine chocolate chips and coconut oil. Heat in 30-second intervals (if using microwave), stirring after each, until completely melted and smooth. Let cool for 5 minutes.
- Pour the melted chocolate over the chilled cheesecake and spread into a thin, even layer. Immediately sprinkle crushed candy canes over the chocolate. If using melted white chocolate, drizzle it over the top now.
- Return the pan to the refrigerator for at least 30 minutes, or until the chocolate is completely set and firm.
- Use the parchment overhang to lift the entire block of cheesecake out of the pan onto a cutting board. Use a sharp knife to slice into bars (4 rows by 4 rows for 16 bars). Wipe the knife clean between slices for the cleanest cuts.
Notes
Room temperature cream cheese is essential for a smooth filling. Do not microwave it. Use coconut oil in the chocolate to ensure a snappy texture. Crush candy canes to a mix of fine powder and small chunks for best texture. Start with 1/2 teaspoon peppermint extract and adjust to taste; the flavor intensifies as it chills. For clean slices, chill the cheesecake overnight and wipe the knife between cuts.
- Prep Time: 30 minutes
- Cook Time: 0 minutes
- Category: Dessert
- Cuisine: American
Nutrition
- Serving Size: 1 bar
- Calories: 285
- Sugar: 18
- Sodium: 180
- Fat: 19
- Saturated Fat: 11
- Carbohydrates: 26
- Fiber: 1
- Protein: 3
Keywords: peppermint bark, cheesecake bars, no-bake dessert, holiday dessert, peppermint cheesecake, easy dessert, Christmas dessert