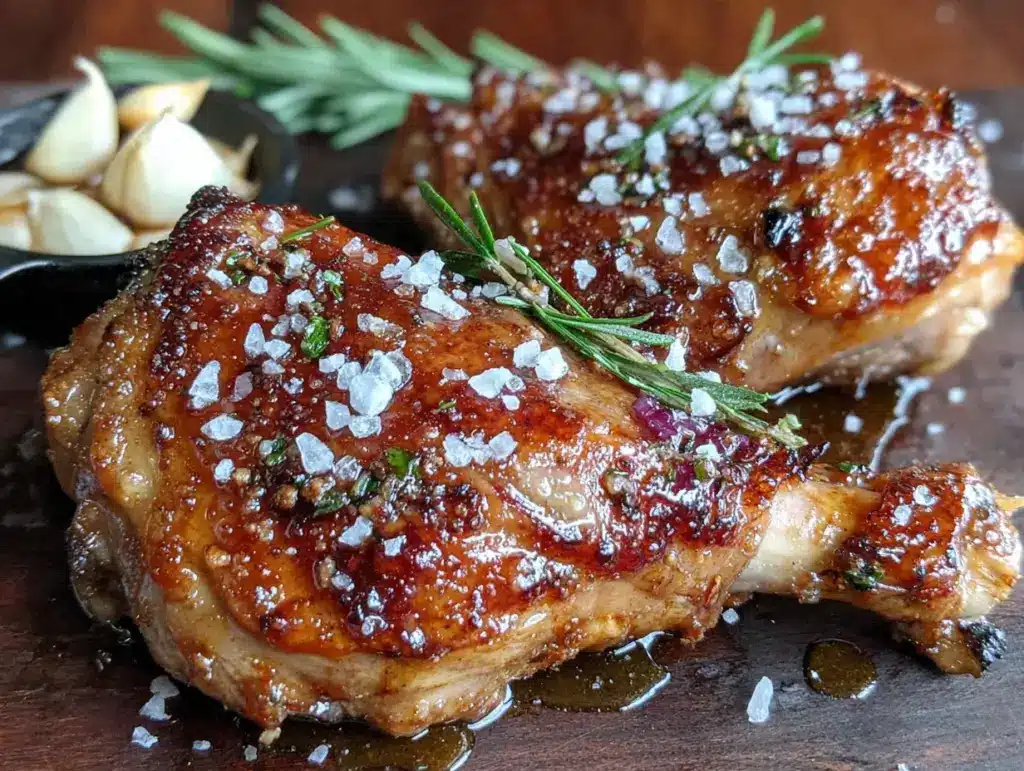
I want crispy-skinned turkey legs right now, and I have everything except the patience to wait for a whole bird. That’s the thought that hit me at 4 PM on a random Tuesday, standing in my kitchen with the fridge door open. Not Thanksgiving. Not a special occasion. Just a Tuesday where I craved that golden, crackling skin and juicy dark meat without the three-hour commitment of a full turkey. And honestly? That craving led me to one of the best kitchen discoveries I’ve made in years.
These crispy garlic herb butter roasted turkey legs are exactly what you need when you want the drama of a holiday meal without the production. They look impressive, taste like something you’d order at a fancy restaurant, and come together with ingredients you likely already have in your pantry. The secret is all in the prep work and the butter situation. We’re talking a generous coating of garlic herb butter worked right under the skin, a hot oven to start, and a little patience while that skin transforms into something almost glass-like. It’s the kind of recipe that makes you feel like a genius with very little effort.
I’ve tested this method about seven times now, tweaking temperatures and butter ratios until I got it just right. The first time, I pulled the legs out too early and the skin was chewy. Disappointing. The second time, I forgot to pat them dry enough and ended up with steamed skin. Also disappointing. But that third time? Pure magic. The skin shattered when I bit into it, and the meat was so tender it practically fell off the bone. I knew I had something worth sharing. So here it is, my tried-and-true method for the best crispy garlic herb butter roasted turkey legs you’ll ever make at home.
Why You’ll Love This Recipe
Let me tell you why these turkey legs deserve a spot in your regular rotation. I’ve tested this recipe more times than I care to admit, and every single time, the results are consistently incredible. Here’s what makes them special:
- Incredibly Crispy Skin : The combination of a hot oven start and herb butter under the skin creates that shatteringly crisp texture everyone fights over at the holiday table. No sad, rubbery skin here.
- Juicy, Flavorful Meat : Dark meat turkey legs stay moist and tender thanks to the fat content and the butter basting. You get rich, garlicky flavor in every single bite.
- Quick Enough for Weeknights : While a whole turkey takes hours, these legs are ready in about an hour. Perfect for when you want that Thanksgiving feeling on a random Tuesday.
- Simple Ingredients : Butter, garlic, fresh herbs, salt, pepper. That’s it. No weird specialty items or hard-to-find spices.
- Impressive Presentation : Individual turkey legs look stunning on a plate. They’re naturally portion-controlled and feel special, like something from a medieval feast or a fancy holiday dinner.
- Family-Approved : My kids, who usually pick at turkey breast, devour these legs. Something about eating off the bone makes it more fun, I guess.
This isn’t just another roasted turkey recipe. The technique of working the herb butter directly under the skin is what sets it apart. It flavors the meat from the inside out while the outside gets perfectly browned and crispy. I learned this trick from a chef friend years ago, and it’s never let me down. If you’ve ever been disappointed by dry, bland turkey, this recipe will change your mind completely.
What Ingredients You Will Need
This recipe keeps things simple with ingredients that pack a serious flavor punch. Most of these are pantry staples or easy to find at any grocery store.
- Turkey Legs (4 legs, about 1 pound each) – Look for legs that are similar in size so they cook evenly. Fresh or thawed frozen both work well. I prefer getting them from the butcher counter where they’re usually meatier.
- Unsalted Butter (1/2 cup, 1 stick, softened) – Using unsalted butter lets you control the salt level. Make sure it’s truly softened to room temperature so it spreads easily under the skin.
- Garlic (6 cloves, minced) – Fresh garlic is non-negotiable here. The jarred stuff just doesn’t have the same punch. I’ve used up to 8 cloves when I’m feeling extra garlicky.
- Fresh Rosemary (2 tablespoons, finely chopped) – Woody and aromatic, rosemary pairs beautifully with turkey. Strip the leaves from the stem before chopping.
- Fresh Thyme (1 tablespoon, leaves stripped from stems) – Earthy and slightly floral, thyme adds depth without overpowering.
- Fresh Parsley (2 tablespoons, finely chopped) – Bright and fresh, parsley balances the richer herbs. Flat-leaf Italian parsley is my preference.
- Kosher Salt (2 teaspoons) – I use Diamond Crystal kosher salt. If you’re using table salt, reduce to 1 teaspoon.
- Black Pepper (1 teaspoon, freshly ground) – Freshly ground makes a real difference here. Pre-ground pepper lacks that aromatic kick.
- Olive Oil (1 tablespoon) – A little oil helps the skin brown and crisp. Use a good quality extra virgin if you have it.
- Chicken or Turkey Broth (1/2 cup) – For the bottom of the roasting pan. This prevents drippings from burning and creates a little steam for moisture.
Ingredient Tips : I recommend using fresh herbs here. Dried herbs won’t give you the same vibrant flavor, and the texture is different when worked into butter. That said, if fresh herbs are unavailable, use half the amount of dried. For the butter, I like Kerrygold or any European-style butter with higher fat content. It makes a noticeable difference in richness and browning.
Substitution Options : If you can’t find turkey legs, chicken legs or thighs work with adjusted cooking times. Use ghee instead of butter for a dairy-free version. Sage can replace rosemary for a more traditional poultry flavor. And if you’re out of fresh herbs, a teaspoon of dried Italian seasoning mixed into the butter will still taste good, just not as bright.
Equipment Needed
You don’t need a ton of fancy equipment for this recipe, but a few key tools make the process smoother.
- Large Baking Sheet or Roasting Pan – A rimmed baking sheet works perfectly. You want something with sides to catch the drippings. I use a half-sheet pan for four legs.
- Wire Rack – This is crucial for crispy skin. Placing the legs on a rack allows air to circulate underneath, preventing the bottom from getting soggy. An oven-safe cooling rack works great.
- Instant-Read Thermometer – Don’t skip this. Turkey needs to reach 165°F in the thickest part, and guessing leads to overcooked meat. I use a Thermapen, but any reliable thermometer works.
- Small Bowl – For mixing the herb butter. Nothing fancy needed.
- Chef’s Knife and Cutting Board – For mincing garlic and chopping herbs. A sharp knife makes this task so much easier.
- Kitchen Tongs – For handling the hot legs when you flip or baste them. Silicone-tipped tongs won’t scratch your pan.
- Pastry Brush or Spoon – For basting the legs with pan juices during cooking. A brush gives more even coverage.
Budget-Friendly Alternatives : If you don’t have a wire rack, you can crumple aluminum foil into snake shapes and place the legs on top. It’s not as stable, but it works in a pinch. No instant-read thermometer? You can check doneness by piercing the thickest part and checking if the juices run clear, but a thermometer is much more reliable and worth the small investment.
Preparation Method
Alright, let’s get cooking. I’ve broken this down into clear steps with all the little details I’ve learned from making these legs more times than I can count.
- Preheat Your Oven to 425°F (220°C) – A hot oven is essential for crispy skin. Position the rack in the middle of the oven. Give it a full 20 minutes to come to temperature. While it heats, you’ll prepare the legs.
- Pat the Turkey Legs Completely Dry – This step is non-negotiable. Use paper towels and really press into all the crevices. Any moisture on the skin will steam instead of crisp. I usually go through 3-4 paper towels per leg. Let them sit uncovered on a plate for 10 minutes after drying to air-dry slightly.
- Make the Garlic Herb Butter – In a small bowl, combine the softened butter, minced garlic, chopped rosemary, thyme, parsley, 1 teaspoon of kosher salt, and 1/2 teaspoon of black pepper. Mash everything together with a fork until well combined. The mixture should be spreadable but not melted. Taste a tiny bit on your finger – it should taste distinctly herby and garlicky.
- Loosen the Skin – This is the most important technique. Using your fingers, gently work your way under the skin of each turkey leg. Start at the top of the leg and slide your fingers between the skin and the meat, being careful not to tear the skin. You want to create a pocket that runs over the meaty part of the leg. It feels a little weird at first, but you’ll get the hang of it.
- Apply the Herb Butter Under the Skin – Take about 2 tablespoons of the herb butter and push it under the loosened skin of each leg. Use your fingers to spread it evenly over the meat, pressing from the outside to distribute it. This is where the magic happens – the butter melts into the meat as it cooks, keeping it moist and flavorful while the skin crisps up on top.
- Rub the Outside of the Legs – Rub the remaining herb butter all over the outside of the legs. Don’t forget the undersides. Drizzle with the olive oil and season with the remaining salt and pepper. Give them a good rub to make sure everything is evenly coated.
- Arrange on the Wire Rack – Place the wire rack inside your baking sheet. Arrange the turkey legs on the rack, leaving a little space between each one for air circulation. Pour the chicken broth into the bottom of the pan, being careful not to splash the legs. The broth will steam and keep the drippings from burning.
- Roast at 425°F for 20 Minutes – This initial high-heat blast starts the crisping process. Don’t open the oven door during this time. You want all that heat trapped inside. After 20 minutes, the skin should be starting to turn golden brown.
- Reduce Heat and Continue Roasting – Lower the oven temperature to 375°F (190°C). Continue roasting for another 25-30 minutes. About halfway through this stage, baste the legs with the pan juices using your pastry brush or a spoon. This adds flavor and helps the skin brown evenly.
- Check Internal Temperature – After the total cooking time (about 45-50 minutes), insert your instant-read thermometer into the thickest part of the meat, avoiding the bone. You’re looking for 165°F (74°C). If the legs are smaller, they might cook faster. Larger legs might need an extra 5-10 minutes. The skin should be deep golden brown and crispy to the touch.
- Rest Before Serving – This step is crucial. Transfer the legs to a cutting board or platter and let them rest for 10 minutes. Don’t skip this. Resting allows the juices to redistribute throughout the meat. If you cut into them immediately, all those delicious juices will run out onto the board, leaving you with drier meat.
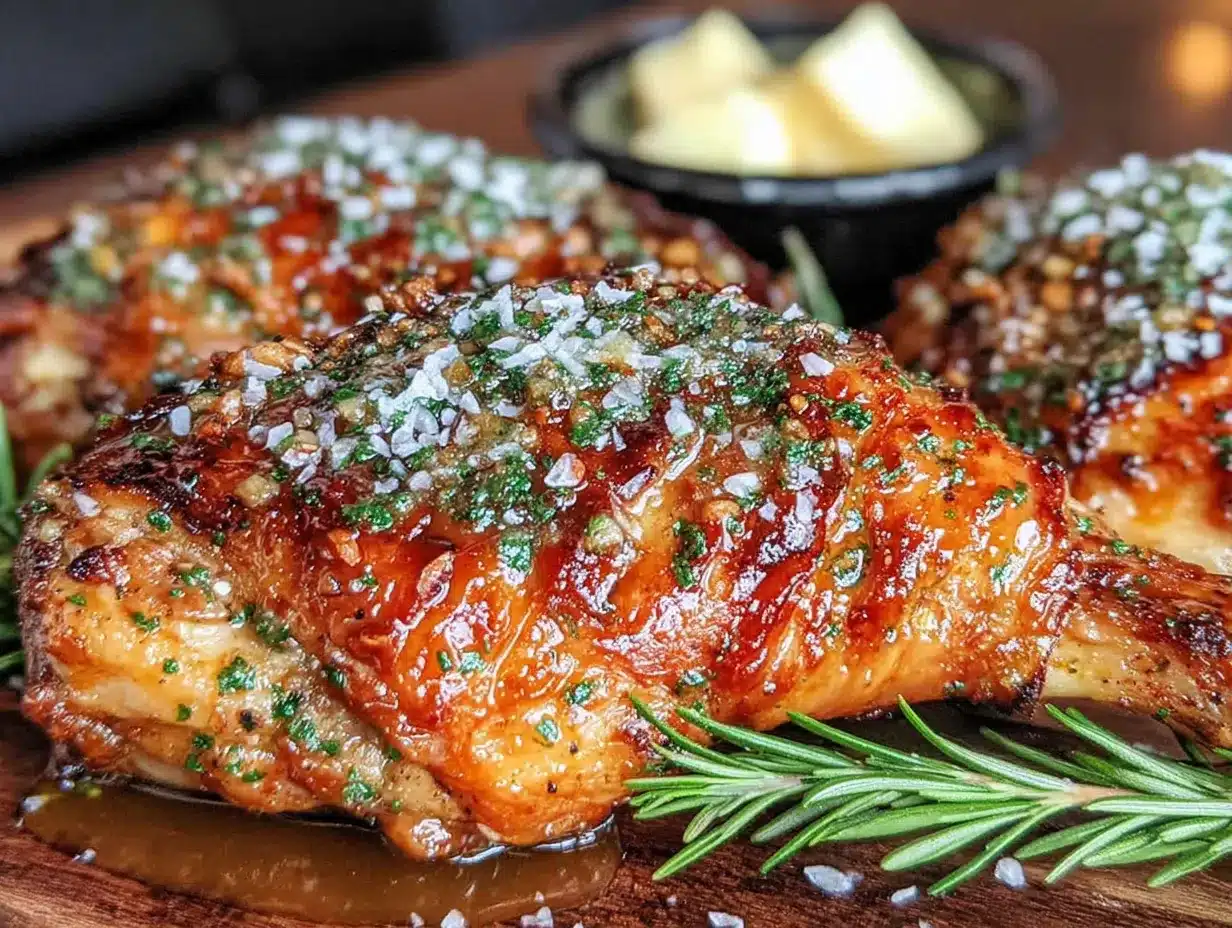
- Serve and Enjoy – Arrange the legs on a serving platter. Spoon any remaining pan juices over the top if you’d like. The skin should be gloriously crispy, and the meat should be tender enough to pull apart with a fork. Watch everyone grab for seconds.
Pro Tip : If your skin isn’t quite as crispy as you’d like after the cooking time is up, switch the oven to broil for the last 2-3 minutes. Watch it closely – it can go from perfect to burnt very quickly. I’ve done this when I wanted extra crunch, and it works beautifully.
Cooking Tips & Techniques
I’ve made plenty of mistakes with roasted turkey legs so you don’t have to. Here’s what I’ve learned the hard way.
The Drying Secret – The single biggest factor in crispy skin is dryness. I learned this after my first batch came out with pale, rubbery skin. Now I pat the legs dry, then let them sit uncovered in the fridge for an hour if I have time. The fridge air dries out the surface even more. If you’re short on time, just use extra paper towels and be thorough.
Don’t Overcrowd the Pan – I made this mistake when I tried to cook six legs on one pan. They were crowded together, and the skin never got properly crispy. Give each leg at least an inch of space on all sides. If you’re cooking more than four legs, use two pans or cook in batches.
Temperature Management – The two-temperature method is key. Starting hot gives you that initial sear on the skin. Dropping the temperature allows the inside to cook through without burning the outside. I’ve tried cooking them at a steady 375°F the whole time, and the skin just doesn’t get as crispy. Trust the process.
Basting Matters – I used to skip basting because I was lazy. Don’t be like me. Basting with the pan juices halfway through adds moisture and flavor to the meat while helping the skin develop that rich golden color. It takes thirty seconds and makes a noticeable difference.
Watch for Hot Spots – All ovens have hot spots. About 20 minutes in, check if some legs are browning faster than others. If so, rotate the pan or swap the legs around. Even cooking is worth the small effort.
The Resting Rule – I know you’re hungry. I know the house smells amazing. But that 10-minute rest is non-negotiable. Cut into them too soon, and you’ll lose all those juices. I’ve done it. I regretted it. Learn from my impatience.
Variations & Adaptations
One of the best things about this recipe is how easily it adapts. Here are some variations I’ve tried and loved.
Spicy Cajun Version – Replace the rosemary and thyme with 2 teaspoons of Cajun seasoning and 1/2 teaspoon of cayenne pepper. The herb butter gets a smoky, spicy kick that’s incredible with the rich turkey meat. I made this for a game day party, and people went crazy for it. Serve it alongside some cozy crockpot chili with pumpkin and black beans for the ultimate comfort food spread.
Lemon Herb Variation – Add the zest of one lemon to the herb butter and squeeze half a lemon over the legs before roasting. The bright citrus cuts through the richness and adds a fresh dimension. This version is perfect for spring or summer when you want something lighter.
Honey Garlic Glaze – After the initial 20-minute high-heat roast, brush the legs with a mixture of 2 tablespoons honey, 1 tablespoon melted butter, and 1 teaspoon minced garlic. Continue roasting as directed. The honey caramelizes on the skin, creating a sweet and savory crust that’s absolutely addictive.
Air Fryer Adaptation – Yes, you can make these in an air fryer! Preheat to 375°F. Prepare the legs the same way with herb butter under the skin. Cook for 25-30 minutes, flipping halfway through. The air circulation makes the skin incredibly crispy. You might need to work in batches depending on your air fryer size.
Dairy-Free Option – Replace the butter with a high-quality vegan butter or ghee (if you tolerate it). The technique works the same way. I’ve used Miyoko’s vegan butter with excellent results. The flavor is slightly different but still delicious.
Herb Swap – Don’t have rosemary and thyme? Use sage and marjoram for a more traditional poultry flavor. Or try tarragon and chives for a French-inspired twist. The butter is a blank canvas for whatever herbs you have on hand.
Serving & Storage Suggestions
These turkey legs are versatile enough for casual dinners or special occasions. Here’s how to serve and store them.
Serving Temperature – Serve the legs hot, straight from the oven after their rest. The skin is at its crispiest right away. If you need to hold them for a bit, keep them in a warm oven (200°F) on the wire rack uncovered. Covering them will soften the skin.
Presentation Ideas – Arrange the legs on a large wooden board or platter with fresh herb sprigs scattered around. For a holiday table, surround them with roasted vegetables like carrots and Brussels sprouts. Individual plates with one leg per person look dramatic and satisfying.
What to Serve With Them – These legs pair beautifully with mashed potatoes, roasted root vegetables, or a simple green salad. The rich, savory flavor of the turkey complements sweet sides like perfect brown butter sage mashed sweet potatoes. For a complete meal, add some easy cranberry orange glazed turkey breast if you’re feeding a crowd. A crisp white wine like Sauvignon Blanc or a light red like Pinot Noir pairs wonderfully.
Storage Instructions – Leftover turkey legs keep well in the refrigerator for up to 4 days. Store them in an airtight container. The skin will soften in the fridge, but the flavor will still be excellent. I actually love cold leftover turkey leg meat sliced onto sandwiches the next day.
Reheating Methods – To restore some crispiness, reheat the legs in a 350°F oven for 10-15 minutes. Place them on a wire rack over a baking sheet to allow air circulation. Avoid the microwave – it will make the skin rubbery and the meat tough. If you have an air fryer, reheat at 350°F for 5-7 minutes for the best results.
Freezer Tips – You can freeze cooked turkey legs for up to 3 months. Let them cool completely, wrap tightly in plastic wrap and then foil, and place in a freezer bag. Thaw overnight in the refrigerator before reheating. The texture won’t be quite as perfect as fresh, but it’s still delicious for soups, casseroles, or sandwiches.
Flavor Development – The herb flavor actually deepens overnight. Leftover meat is fantastic in a turkey salad sandwich or chopped into a hearty soup. I’ve even used shredded leftover meat in creamy white chicken chili with excellent results. Don’t throw away those bones either – they make amazing stock.
Nutritional Information & Benefits
While these turkey legs are definitely a treat, they also offer some solid nutritional benefits when enjoyed as part of a balanced diet.
Estimated Nutrition Per Serving (1 leg with skin) :
Calories: 380 | Protein: 35g | Fat: 26g | Carbohydrates: 2g | Fiber: 0g | Sugar: 0g | Sodium: 680mg
Health Benefits – Turkey legs are an excellent source of high-quality protein, which supports muscle health and keeps you feeling full. Dark meat contains more iron and zinc than white meat, which is great for energy and immune function. The garlic in this recipe offers anti-inflammatory properties, while fresh herbs provide antioxidants. The butter adds vitamin A and healthy fats that help absorb fat-soluble vitamins from other foods in your meal.
Dietary Considerations – This recipe is naturally gluten-free and low-carb, making it suitable for keto, paleo, and gluten-free diets. For dairy-free, substitute the butter with vegan butter or ghee (which is technically dairy but often tolerated by those with lactose sensitivity). The recipe contains no nuts, eggs, or soy unless you add them through substitutions.
Potential Allergens – This recipe contains dairy (butter). If you have a dairy allergy, use a dairy-free butter alternative. Always check your specific ingredient labels if you have severe allergies.
My Personal Perspective – I believe in balance. These turkey legs are indulgent, but they’re made with real, whole ingredients. The protein keeps you satisfied, and the herbs add flavor without extra calories. I serve them alongside plenty of vegetables to round out the meal. It’s the kind of cooking that feels luxurious but is actually pretty straightforward and nourishing.
Frequently Asked Questions
Can I use frozen turkey legs for this recipe?
Yes, but you need to thaw them completely first. Thaw frozen turkey legs in the refrigerator for 24-48 hours before cooking. Never cook them from frozen – the outside will burn before the inside is cooked through. Pat them extra dry after thawing since they’ll release more moisture.
Why is my turkey skin not getting crispy?
This usually happens for one of three reasons: the legs weren’t dried thoroughly before cooking, the oven wasn’t hot enough, or the legs were crowded on the pan. Make sure you pat the skin completely dry, preheat the oven fully, and give each leg space. Using a wire rack also helps air circulate underneath.
How do I know when the turkey legs are done?
The most reliable method is using an instant-read thermometer. Insert it into the thickest part of the meat without touching the bone. You’re looking for 165°F (74°C). The juices should run clear when you pierce the meat, and the skin should be deep golden brown and crispy. If you don’t have a thermometer, cut into the thickest part and check that the meat is no longer pink and the juices run clear.
Can I make these ahead of time?
You can prepare the herb butter up to 3 days ahead and keep it refrigerated. You can also season the legs with the herb butter up to 24 hours in advance and refrigerate them uncovered – this actually helps dry out the skin for even better crispiness. Just bring them to room temperature for 30 minutes before roasting. I wouldn’t recommend fully cooking them ahead of time, as the skin will soften during reheating.
What can I do with leftover turkey leg meat?
So many things! Shred the meat for tacos, enchiladas, or quesadillas. Chop it up for turkey salad sandwiches with grapes and walnuts. Add it to soups, stews, or casseroles. I love using leftovers in a simple turkey pot pie or mixing it into a creamy pasta. The bones make fantastic stock – just simmer them with aromatics for a few hours.
Conclusion
These crispy garlic herb butter roasted turkey legs have become a staple in my kitchen, and I think they’ll become one in yours too. They deliver everything you want from a roasted turkey – that incredible crispy skin, juicy tender meat, and rich savory flavor – without the fuss of a whole bird. Whether you’re making them for a holiday dinner, a special occasion, or just a Tuesday night when you’re craving something delicious, they never disappoint.
I love how flexible this recipe is. You can stick with the classic herb butter or play around with different flavors and adaptations. The technique is forgiving enough for beginners but produces results that impress even experienced cooks. And honestly, there’s something deeply satisfying about pulling a perfectly roasted turkey leg off the bone. It feels primal and celebratory all at once.
I’d love to hear how these turn out for you. Did you try a variation? Did your family fight over the last leg? Drop a comment below and let me know. And if you’re looking for more comforting, family-friendly recipes, check out some of my other favorites on the blog. Happy cooking, friends!
Pin This Recipe!
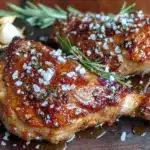
Best Crispy Garlic Herb Butter Roasted Turkey Legs
- Total Time: 1 hour
- Yield: 4 servings 1x
Description
These crispy garlic herb butter roasted turkey legs deliver shatteringly crisp skin and juicy, flavorful dark meat in about an hour. Perfect for a weeknight craving or a holiday table without the fuss of a whole bird.
Ingredients
- 4 turkey legs (about 1 pound each)
- 1/2 cup (1 stick) unsalted butter, softened
- 6 cloves garlic, minced
- 2 tablespoons fresh rosemary, finely chopped
- 1 tablespoon fresh thyme leaves
- 2 tablespoons fresh parsley, finely chopped
- 2 teaspoons kosher salt (or 1 teaspoon table salt)
- 1 teaspoon freshly ground black pepper
- 1 tablespoon olive oil
- 1/2 cup chicken or turkey broth
Instructions
- Preheat your oven to 425°F (220°C) with the rack in the middle. Allow 20 minutes for full preheating.
- Pat the turkey legs completely dry with paper towels, pressing into all crevices. Let them sit uncovered for 10 minutes to air-dry.
- In a small bowl, combine softened butter, minced garlic, chopped rosemary, thyme, parsley, 1 teaspoon kosher salt, and 1/2 teaspoon black pepper. Mash with a fork until well combined.
- Using your fingers, gently loosen the skin of each turkey leg, starting at the top and sliding between skin and meat to create a pocket without tearing.
- Push about 2 tablespoons of herb butter under the skin of each leg, spreading evenly over the meat. Rub remaining butter all over the outside of the legs.
- Drizzle with olive oil and season with remaining salt and pepper. Rub to coat evenly.
- Place a wire rack inside a large baking sheet. Arrange legs on the rack with space between each. Pour broth into the bottom of the pan without splashing the legs.
- Roast at 425°F for 20 minutes without opening the oven door.
- Reduce oven temperature to 375°F (190°C). Continue roasting for 25-30 minutes, basting with pan juices halfway through.
- Check internal temperature with an instant-read thermometer in the thickest part, avoiding bone. It should read 165°F (74°C).
- Transfer legs to a cutting board or platter and let rest for 10 minutes before serving.
- Serve hot, spooning pan juices over the top if desired.
Notes
For extra crispy skin, pat legs dry and refrigerate uncovered for 1 hour before cooking. If skin isn’t crispy enough after roasting, broil for 2-3 minutes, watching closely. Resting for 10 minutes is essential for juicy meat.
- Prep Time: 15 minutes
- Cook Time: 45 minutes
- Category: Main Course
- Cuisine: American
Nutrition
- Serving Size: 1 turkey leg
- Calories: 380
- Sodium: 680
- Fat: 26
- Saturated Fat: 12
- Carbohydrates: 2
- Protein: 35
Keywords: crispy turkey legs, garlic herb butter, roasted turkey legs, turkey legs recipe, easy turkey dinner