
The first time I really paid attention to the lunchbox struggle, I was standing in my kitchen at 6:47 AM, staring into the open fridge like it held the secrets to the universe. My kid was supposed to have a turkey and cheese wrap, but the deli meat was about to turn, the tortillas were stale, and I was already running late for a work call. That frantic, half-awake scramble — the one where you end up throwing in a sad string cheese and calling it a day — is exactly where this recipe was born. It wasn’t a moment of inspiration. It was a moment of desperation, honestly.
I wanted something I could grab without thinking. Something that wouldn’t get soggy by noon. Something my kid would actually eat without negotiation. So I started testing. I made wraps, froze them, thawed them, and took notes on what worked and what turned into a mushy mess. This recipe for Easy Freezer-Friendly Turkey and Cheese Lunchbox Wraps is the result of those early-morning experiments. It’s the lunch I wish I’d had back then — reliable, tasty, and ready to go when you’re not.
There’s a quiet kind of relief in knowing tomorrow’s lunch is already handled. It’s a small thing, but it changes the whole morning vibe. No rush, no guilt, just a wrap that holds up and tastes like it was made fresh. That’s the promise here.
Why You’ll Love This Recipe
Let’s be real — most lunchbox recipes sound great until you actually try to freeze them. But these wraps? They’re different. I’ve tested them over and over, and they come out of the freezer tasting just as good as the day you made them. No sad, soggy tortillas. No dry turkey. Just a solid, satisfying lunch that makes your morning routine way smoother.
- Quick & Easy: You can prep a whole batch in under 15 minutes. Seriously, it’s faster than making a single sandwich.
- Simple Ingredients: You probably already have everything in your fridge. No fancy grocery trips required.
- Perfect for Busy Mornings: Grab one from the freezer, toss it in a lunchbox, and you’re done. No assembly needed.
- Crowd-Pleaser: My kids, my husband, even my picky neighbor’s kid — they all gobble these up.
- Unbelievably Delicious: The trick is in the layering. A little cream cheese acts as a barrier, so the tortilla stays soft and the turkey stays juicy. It’s genius, honestly.
What makes this recipe stand out from the hundreds of wrap recipes out there? It’s the method. I use a thin spread of cream cheese on the tortilla before adding the turkey and cheese. That simple step keeps everything from getting soggy when it thaws. No weird textures, no watery filling. Just a perfect wrap every time.
This isn’t just another lunch idea. It’s the kind of recipe that makes you feel like you’ve got your life together — even when you don’t. It’s comfort food in a lunchbox, ready whenever you need it.
What Ingredients You Will Need
This recipe uses simple, everyday ingredients to create a lunch that’s both satisfying and freezer-friendly. The key is choosing the right components that hold up well to freezing and thawing without turning into a mushy mess.
- Large flour tortillas (10-inch) — Go with sturdy flour tortillas, not the soft taco size. They need to be big enough to hold the filling and roll tightly. I prefer Mission or Guerrero brands for the best texture after freezing.
- 8 oz cream cheese, softened — This is your secret weapon. The cream cheese acts as a moisture barrier, preventing the turkey juices from soaking into the tortilla. Let it sit out for 20 minutes before spreading so it’s easy to work with.
- 1 lb thinly sliced deli turkey breast — Look for oven-roasted or smoked turkey. Avoid honey-roasted or flavored varieties, as the extra sugar can make the wrap soggy after thawing. I like Boar’s Head or Hillshire Farm for consistent quality.
- 8 slices provolone or Swiss cheese — These cheeses melt beautifully and have a mild flavor that kids love. You can also use cheddar or mozzarella if that’s what you have on hand.
- 1 cup fresh spinach leaves (optional) — Adds a pop of color and a little nutrition. If your kids are picky, you can skip this or use finely shredded lettuce instead.
- 1/4 cup mayonnaise — A thin layer adds moisture and flavor without making the wrap soggy. Use full-fat for best results.
- Salt and black pepper to taste — Just a pinch to season the cream cheese spread.
Substitution Notes: If you’re dairy-free, use a plant-based cream cheese and dairy-free cheese slices. For a lower-carb option, swap the flour tortillas for large lettuce wraps or low-carb tortillas. You can also use ham or roast beef instead of turkey — just make sure it’s thinly sliced.
Equipment Needed
You don’t need any fancy gadgets for this recipe, which is part of the beauty. Here’s what you’ll need:
- Cutting board — A large one for assembling the wraps.
- Butter knife or offset spatula — For spreading the cream cheese evenly.
- Sharp knife — For slicing the wraps in half (a serrated knife works best).
- Plastic wrap or parchment paper — To wrap each individual wrap tightly before freezing.
- Freezer-safe zip-top bags — For storing the wrapped wraps. I like the gallon-size bags.
- Baking sheet (optional) — If you want to flash-freeze the wraps before bagging them, a baking sheet lined with parchment paper helps them freeze individually so they don’t stick together.
If you don’t have plastic wrap, you can use reusable beeswax wraps or aluminum foil. Just make sure the wrap is completely sealed to prevent freezer burn. I’ve used both methods, and honestly, plastic wrap is the easiest for keeping them airtight.
Preparation Method

Making these wraps is almost too easy. The whole process takes about 15 minutes, and you’ll have a week’s worth of lunches ready to go.
- Soften the cream cheese: Take the cream cheese out of the fridge about 20 minutes before you start. You want it soft enough to spread easily without tearing the tortilla. If you’re in a hurry, microwave it for 10-15 seconds — but watch it carefully so it doesn’t melt.
- Lay out your tortillas: Place one tortilla flat on your cutting board. Spread about 2 tablespoons of the softened cream cheese over the entire surface, leaving a 1-inch border around the edges. This cream cheese layer is what keeps the wrap from getting soggy later.
- Add the mayo: Spread a thin layer of mayonnaise over the cream cheese. Don’t go overboard — just a light smear. Season with a tiny pinch of salt and pepper.
- Layer the turkey: Place 3-4 slices of turkey on the bottom third of the tortilla, slightly overlapping. Don’t pile it too high, or the wrap will be hard to roll.
- Add the cheese: Lay 1-2 slices of cheese on top of the turkey. If you’re using spinach, scatter a small handful over the cheese now.
- Roll it up tight: Fold the sides of the tortilla inward, then roll from the bottom up, keeping it as tight as you can without tearing the tortilla. Think of it like rolling a burrito — snug but not suffocating.
- Wrap individually: Place the rolled wrap on a piece of plastic wrap and roll it up tightly, twisting the ends to seal. This step is crucial for preventing freezer burn.
- Freeze: Place the wrapped wraps in a freezer-safe zip-top bag. Squeeze out as much air as possible before sealing. Label the bag with the date — these will keep for up to 3 months.
- Thaw and serve: When you’re ready to eat, take a wrap out of the freezer the night before and let it thaw in the fridge. In the morning, it’s ready to toss in a lunchbox. You can also thaw it at room temperature for about 2 hours.
Pro tip: If you’re packing these for a school lunch, slice the wrap in half after thawing. It’s easier for little hands to handle, and it looks way more appetizing than a whole wrap.
Cooking Tips & Techniques
I’ve made a lot of mistakes with freezer wraps over the years, so let me save you the trouble. Here are the things I wish I’d known from the start.
Don’t overfill the wrap. I know it’s tempting to pile on the turkey and cheese, but too much filling makes the wrap impossible to roll and prone to falling apart after thawing. Stick to 3-4 slices of turkey and one slice of cheese per wrap. You’ll thank me later.
Use room-temperature cream cheese. Cold cream cheese is a nightmare to spread evenly, and it can tear your tortilla. Let it sit out for 20 minutes, or microwave it in 10-second bursts until it’s soft but not melted. The texture should be like soft butter.
Roll it like a burrito. Fold the sides in first, then roll from the bottom. This keeps all the filling inside and prevents the ends from leaking. If you skip the side folds, you’ll end up with a messy, open-ended wrap.
Freeze them individually first. If you have time, place the wrapped wraps on a baking sheet and freeze them for an hour before bagging them. This flash-freeze step keeps them from sticking together, so you can grab just one at a time.
Label everything. I can’t tell you how many times I’ve found a mystery bag in the freezer and had no idea what was inside. Write the date and contents on the bag with a permanent marker. Future you will be grateful.
Thaw in the fridge overnight. This is the safest and most reliable method. The wrap will thaw evenly, and the cream cheese barrier will keep the tortilla from getting soggy. If you’re in a rush, you can thaw it at room temperature for 2 hours, but don’t leave it out longer than that.
Variations & Adaptations
One of the best things about this recipe is how customizable it is. Here are some of my favorite variations:
- Spicy Southwest Wrap: Swap the cream cheese for pepper jack cheese, add a few slices of jalapeño, and use chipotle mayo instead of regular. The heat thaws beautifully — no weird textures.
- Mediterranean Wrap: Use roasted red pepper hummus instead of cream cheese, add sliced cucumbers, kalamata olives, and feta cheese. This one’s great for adults who want something a little lighter.
- Breakfast Wrap: Use scrambled eggs, cooked breakfast sausage, and cheddar cheese. Freeze them the same way, and you’ve got a grab-and-go breakfast that’s way better than a fast-food sandwich.
- Low-Carb Wrap: Swap the flour tortilla for a large lettuce wrap or a low-carb tortilla. The cream cheese layer is even more important here — it helps the lettuce hold together.
- Veggie-Packed Wrap: Add shredded carrots, bell peppers, or thinly sliced zucchini. Just make sure to pat them dry with a paper towel first, so they don’t release too much moisture during thawing.
I’ve tried all of these, and my personal favorite is the Southwest version. The pepper jack cheese adds just enough kick to wake up your taste buds, and the chipotle mayo gives it a smoky depth that’s hard to resist.
Serving & Storage Suggestions
These wraps are designed to be eaten cold or at room temperature, which makes them perfect for lunchboxes. But if you want to serve them warm, you can pop them in the microwave for 20-30 seconds after thawing. Just be careful not to overheat them, or the tortilla will get chewy.
For a complete lunch, pair the wrap with some fresh fruit, a handful of baby carrots, and a yogurt cup. It’s a balanced meal that’s easy to pack and even easier to eat.
Storage: These wraps will keep in the freezer for up to 3 months. Make sure they’re tightly wrapped in plastic wrap and sealed in a freezer bag to prevent freezer burn. If you notice any ice crystals forming, that’s a sign the wrap wasn’t sealed properly. Eat it within a week of noticing.
Thawing: The best method is to move a wrap from the freezer to the fridge the night before you plan to eat it. It will be perfectly thawed by morning. If you forget, you can thaw it at room temperature for about 2 hours, but don’t leave it out longer than that for food safety reasons.
Reheating: If you want to eat it warm, unwrap the thawed wrap and microwave it on a plate for 20-30 seconds. You can also toast it in a panini press for a few minutes — that gives the tortilla a nice crispy texture.
Nutritional Information & Benefits
Here’s a rough estimate of the nutritional breakdown for one wrap (using the basic turkey and cheese version with a 10-inch flour tortilla):
- Calories: ~380
- Protein: 28g
- Carbohydrates: 32g
- Fat: 14g
- Fiber: 2g
- Sugar: 3g
These numbers will vary depending on the exact brands and amounts you use, but it’s a solid, balanced lunch that won’t leave you crashing by 2 PM.
The turkey provides lean protein that keeps you full, while the cream cheese and cheese add a little fat for satiety. If you’re watching your sodium, look for low-sodium deli turkey and skip the added salt. For a lower-carb option, use low-carb tortillas — they’ll drop the carbs to about 15g per wrap.
If you’re packing these for kids, they’re a great way to sneak in some protein and calcium without a fight. My kids don’t even notice the spinach when I add it, which is a win in my book.
Conclusion
These Easy Freezer-Friendly Turkey and Cheese Lunchbox Wraps have honestly been a game-changer in my kitchen. They’re the kind of recipe that makes you feel like you’ve got your life together — even on the most chaotic mornings. No more scrambling to pack lunch at the last minute, no more sad, soggy sandwiches. Just a perfectly rolled wrap that tastes fresh and satisfies every time.
What I love most is how customizable they are. You can make a batch for the whole family, or you can mix it up with different fillings to keep things interesting. They’re perfect for school lunches, work lunches, road trips, or even a quick dinner when you’re too tired to cook.
I’d love to hear how these work out for you. Drop a comment below and let me know what fillings you tried — or if you have a favorite variation I haven’t thought of. And if you found this helpful, share it with a friend who’s tired of the lunchbox struggle. Trust me, they’ll thank you.
Happy prepping, friends.
Frequently Asked Questions
Can I use whole wheat tortillas instead of flour?
Absolutely. Whole wheat tortillas work great, though they can be a little more prone to cracking when you roll them. Just make sure they’re at room temperature before you start, and don’t overfill them.
How long do these wraps last in the freezer?
They’ll stay fresh for up to 3 months if they’re properly wrapped and sealed. After that, the texture might start to degrade, but they’re still safe to eat for up to 6 months.
Can I use a different type of cheese?
Yes! Provolone, Swiss, cheddar, mozzarella, or even pepper jack all work well. Just avoid cheeses that are too soft or crumbly, like fresh mozzarella or feta, as they can make the wrap mushy.
Do I have to thaw the wraps before eating?
Technically, you can eat them frozen — but the texture won’t be great. I highly recommend thawing them in the fridge overnight for the best experience. If you’re in a rush, let them sit at room temperature for 2 hours.
Can I add vegetables like bell peppers or onions?
Yes, but make sure to pat them dry with a paper towel first. Vegetables release moisture when they thaw, which can make your wrap soggy. Dried vegetables like roasted red peppers or sun-dried tomatoes are a safer bet.
Pin This Recipe!
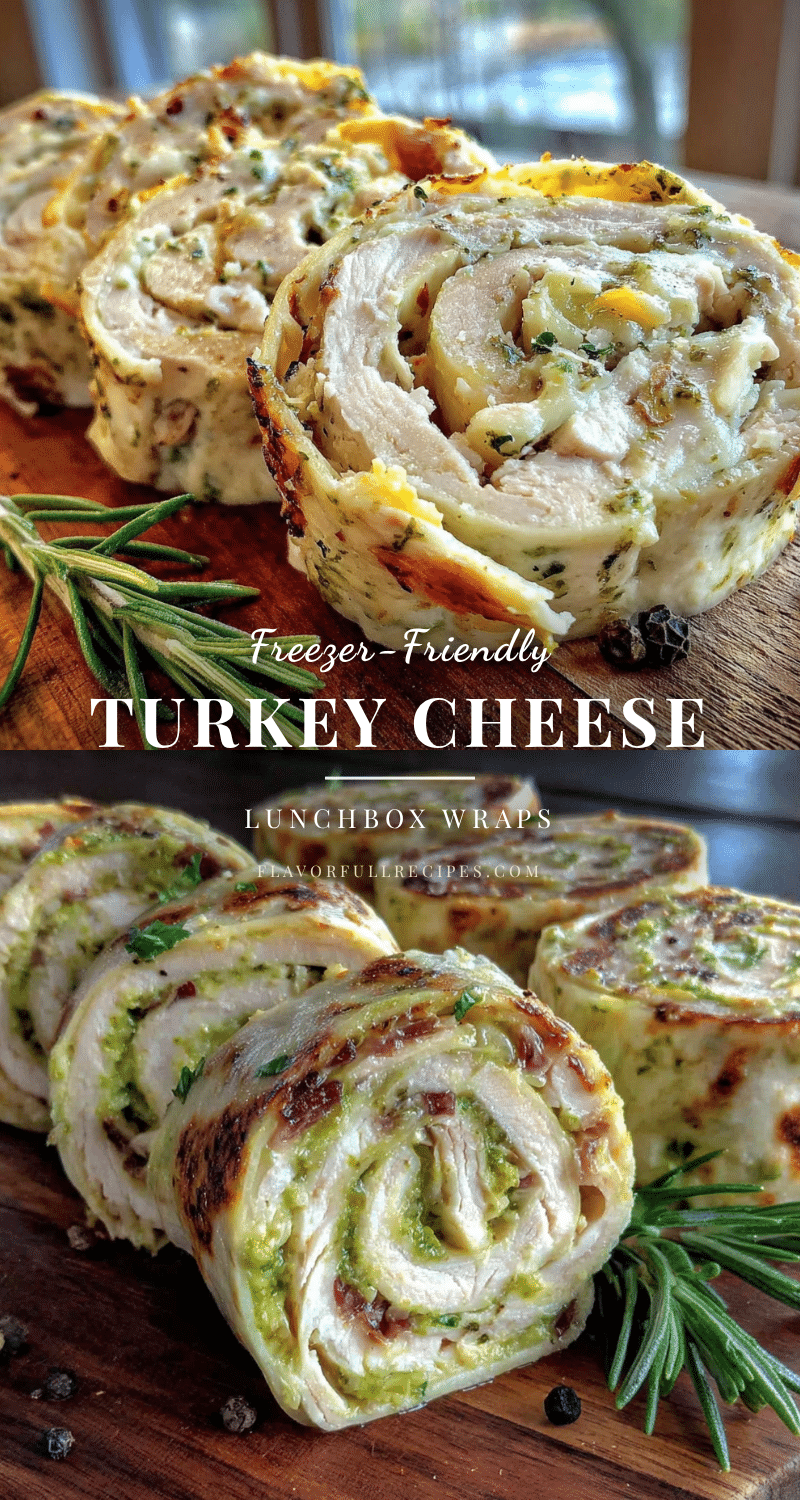

Easy Freezer-Friendly Turkey and Cheese Lunchbox Wraps
- Total Time: 15 minutes
- Yield: 4 servings 1x
Description
These freezer-friendly turkey and cheese wraps are perfect for busy mornings. Made with a cream cheese barrier to prevent sogginess, they thaw perfectly and taste fresh.
Ingredients
- 4 large flour tortillas (10-inch)
- 8 oz cream cheese, softened
- 1 lb thinly sliced deli turkey breast
- 8 slices provolone or Swiss cheese
- 1 cup fresh spinach leaves (optional)
- 1/4 cup mayonnaise
- Salt and black pepper to taste
Instructions
- Soften the cream cheese: Take the cream cheese out of the fridge about 20 minutes before you start. You want it soft enough to spread easily without tearing the tortilla. If you’re in a hurry, microwave it for 10-15 seconds — but watch it carefully so it doesn’t melt.
- Lay out your tortillas: Place one tortilla flat on your cutting board. Spread about 2 tablespoons of the softened cream cheese over the entire surface, leaving a 1-inch border around the edges. This cream cheese layer is what keeps the wrap from getting soggy later.
- Add the mayo: Spread a thin layer of mayonnaise over the cream cheese. Don’t go overboard — just a light smear. Season with a tiny pinch of salt and pepper.
- Layer the turkey: Place 3-4 slices of turkey on the bottom third of the tortilla, slightly overlapping. Don’t pile it too high, or the wrap will be hard to roll.
- Add the cheese: Lay 1-2 slices of cheese on top of the turkey. If you’re using spinach, scatter a small handful over the cheese now.
- Roll it up tight: Fold the sides of the tortilla inward, then roll from the bottom up, keeping it as tight as you can without tearing the tortilla. Think of it like rolling a burrito — snug but not suffocating.
- Wrap individually: Place the rolled wrap on a piece of plastic wrap and roll it up tightly, twisting the ends to seal. This step is crucial for preventing freezer burn.
- Freeze: Place the wrapped wraps in a freezer-safe zip-top bag. Squeeze out as much air as possible before sealing. Label the bag with the date — these will keep for up to 3 months.
- Thaw and serve: When you’re ready to eat, take a wrap out of the freezer the night before and let it thaw in the fridge. In the morning, it’s ready to toss in a lunchbox. You can also thaw it at room temperature for about 2 hours.
Notes
The cream cheese layer is crucial to prevent sogginess. For best results, thaw in the fridge overnight. If adding vegetables, pat them dry first to avoid excess moisture.
- Prep Time: 15 minutes
- Cook Time: 0 minutes
- Category: Lunch
- Cuisine: American
Nutrition
- Serving Size: 1 wrap
- Calories: 380
- Sugar: 3
- Sodium: 800
- Fat: 14
- Saturated Fat: 6
- Carbohydrates: 32
- Fiber: 2
- Protein: 28
Keywords: freezer-friendly, turkey wraps, lunchbox, meal prep, easy lunch, kid-friendly