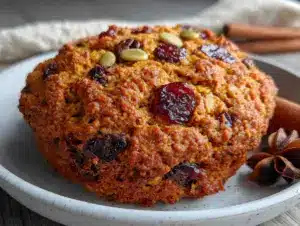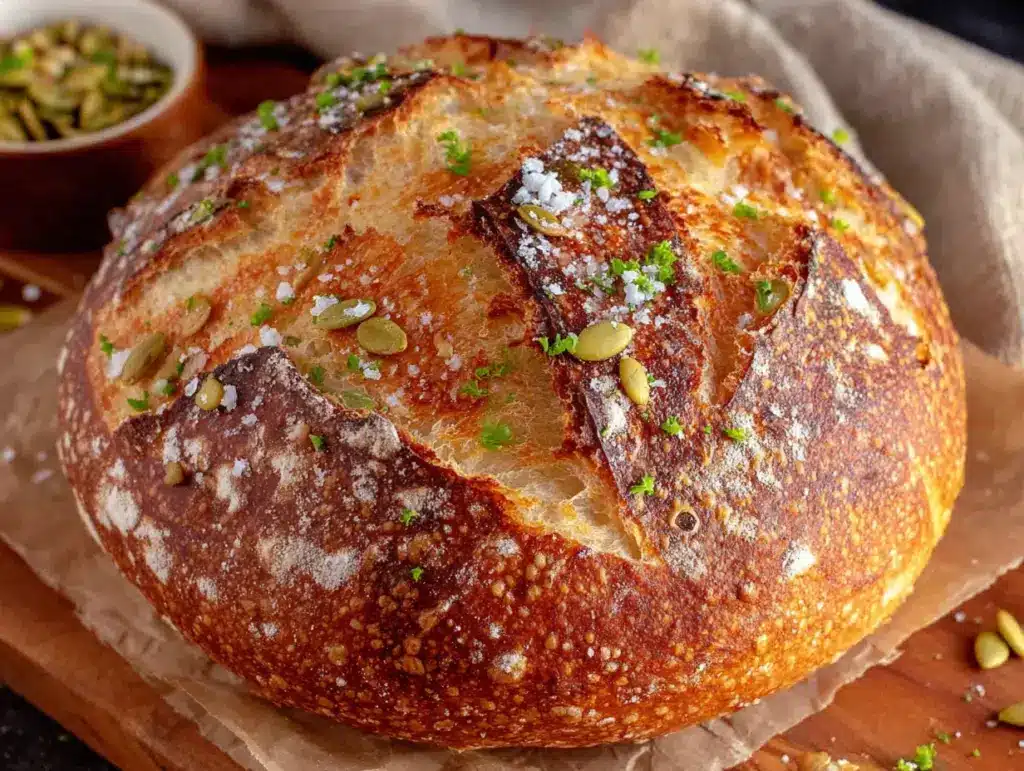
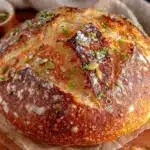
“This tastes like the bread version of fall,” my husband said, grabbing another slice before I’d even finished photographing it. I just laughed because honestly, he wasn’t wrong. I’d been tinkering with my standard sourdough recipe for weeks, trying to capture that perfect balance of tangy, earthy pumpkin flavor without turning the loaf into a dense brick. And there it was, still warm from the oven, with a crust that cracked like autumn leaves underfoot.
The thing about pumpkin sourdough is it sounds simple enough. You add pumpkin puree, you get pumpkin bread. But anyone who’s tried knows the struggle. Too much moisture and your dough turns into a sticky mess that refuses to hold shape. Too little and you lose that soft, tender crumb you’re chasing. I ruined three batches before I figured out the trick (it’s about reducing the water and treating the puree like a liquid ingredient, not a flavor add-in).
This best pumpkin sourdough bread with pepitas is the result of all those failed loaves and late-night notes scribbled on scrap paper. It’s the one I keep coming back to, the one that disappears fastest at our table. The pepitas on top aren’t just for looks either—they add this little crunch that makes each slice feel special. And the color. Let me tell you, the color alone is worth the effort. That deep golden-orange crumb with flecks of seeds running through it? Pure fall magic in bread form.
Why You’ll Love This Recipe
I’ve tested this recipe more times than I care to admit, and here’s what makes it stand out from every other pumpkin bread you’ll find online. First off, it uses real sourdough starter—not yeast packets—which gives it that signature tang that plays so beautifully with the sweet, earthy pumpkin. The fermentation process also makes the bread easier to digest, which I’ve noticed makes a real difference for folks who usually feel heavy after eating bread.
- Perfectly Balanced Flavor : Neither too tangy nor too sweet. The pumpkin mellows the sourdough bite just enough while the pepitas add a subtle nuttiness.
- Amazing Texture : Crispy, crackly crust with a soft, tender crumb that stays moist for days. No dry, crumbly slices here.
- Simple Ingredients : You probably already have most of these in your pantry. No weird additives or hard-to-find specialty flours.
- Great for Fall Baking : This bread fills your kitchen with the coziest aroma while it bakes. It’s basically aromatherapy you can eat.
- Versatile : Toast it for breakfast, use it for sandwiches, or just eat it plain with butter. It works for everything.
What really sets this recipe apart is the technique. Instead of just dumping pumpkin puree into the dough, I’ve adjusted the hydration levels so the crumb stays light and open rather than dense and gummy. The pepitas get toasted right on top during baking, which brings out their flavor without any extra work. And because this uses a long, cold fermentation, you get that complex sourdough flavor that deepens overnight. It’s the kind of bread that makes you slow down and actually taste what you’re eating.
What Ingredients You Will Need
The beauty of this recipe is how simple the ingredient list is. Most of these are standard sourdough staples with a few fall-inspired additions. Here’s what you’ll need and why each one matters.
- All-Purpose Flour : 500 grams. I prefer King Arthur or Bob’s Red Mill for consistent results. Bread flour also works but gives a slightly chewier crumb.
- Active Sourdough Starter : 150 grams, fed and bubbly. Make sure it’s at its peak activity—usually 4-6 hours after feeding—for the best rise and flavor.
- Pumpkin Puree : 200 grams. Not pumpkin pie filling! Look for 100% pure pumpkin puree. Libby’s is my go-to, but store brands work fine too.
- Water : 100 grams. Yes, less than usual. The pumpkin adds significant moisture, so we reduce the water to compensate.
- Toasted Pepitas : 80 grams for the dough, plus 2 tablespoons for topping. I buy raw pepitas and toast them lightly before adding to the dough.
- Brown Sugar : 50 grams. Light or dark both work. Dark brown sugar adds deeper molasses notes that pair beautifully with pumpkin.
- Salt : 10 grams. Fine sea salt preferred. Don’t skip this—it balances the sweetness and enhances the fermentation flavors.
- Pumpkin Pie Spice : 2 teaspoons. You can use store-bought or make your own with cinnamon, nutmeg, ginger, and cloves.
- Olive Oil : 30 grams. Adds tenderness to the crumb and helps with browning. You can substitute melted butter if preferred.
For the pepitas, I recommend buying them raw and toasting them yourself. Pre-toasted pepitas can sometimes be over-salted or stale. Just spread them on a baking sheet at 350°F for 5-7 minutes until they start to pop and smell nutty. Let them cool completely before adding to the dough. And if you’re feeling adventurous, try swapping half the pepitas for pumpkin seeds—they’re actually the same thing, just without the green hull.
One thing I learned the hard way: don’t use fresh pumpkin puree unless you’ve strained it overnight. Fresh pumpkins have way more water than canned, and that extra moisture will turn your dough into a sticky disaster. Stick with canned for consistent results, or if you must use fresh, wrap the puree in cheesecloth and let it drain in the fridge for at least 8 hours.
Equipment Needed
You don’t need a fancy bakery setup for this bread. Here’s what I use and what you can substitute if needed.
- Kitchen Scale : Absolutely essential for sourdough. Measuring by volume just isn’t accurate enough. A simple digital scale costs about $15 and changes everything.
- Large Mixing Bowl : Glass or stainless steel works best. Avoid plastic if possible—it can hold onto odors and oils.
- Dutch Oven : 5-6 quart size. This creates steam for that perfect crust. No dutch oven? Use a heavy baking sheet with a metal bowl inverted over the bread.
- Banneton or Proofing Basket : 9-inch round or 10-inch oval. A colander lined with a floured kitchen towel works perfectly as a substitute.
- Bench Scraper : Makes handling sticky dough so much easier. A plastic dough scraper costs under $5.
- Lame or Sharp Knife : For scoring the dough. A razor blade works great if you don’t have a lame.
- Parchment Paper : For easy transfer to the dutch oven. Don’t skip this unless you enjoy cleaning burnt dough off hot cast iron.
I’ve been using the same Lodge dutch oven for years, and it’s never let me down. If you’re just starting out, check thrift stores—I found my backup one for $8 and it works perfectly. The key is having something heavy that holds heat well. And honestly, if all you have is a loaf pan, you can still make this work. The crust won’t be as dramatic, but the flavor will be just as good.
Preparation Method
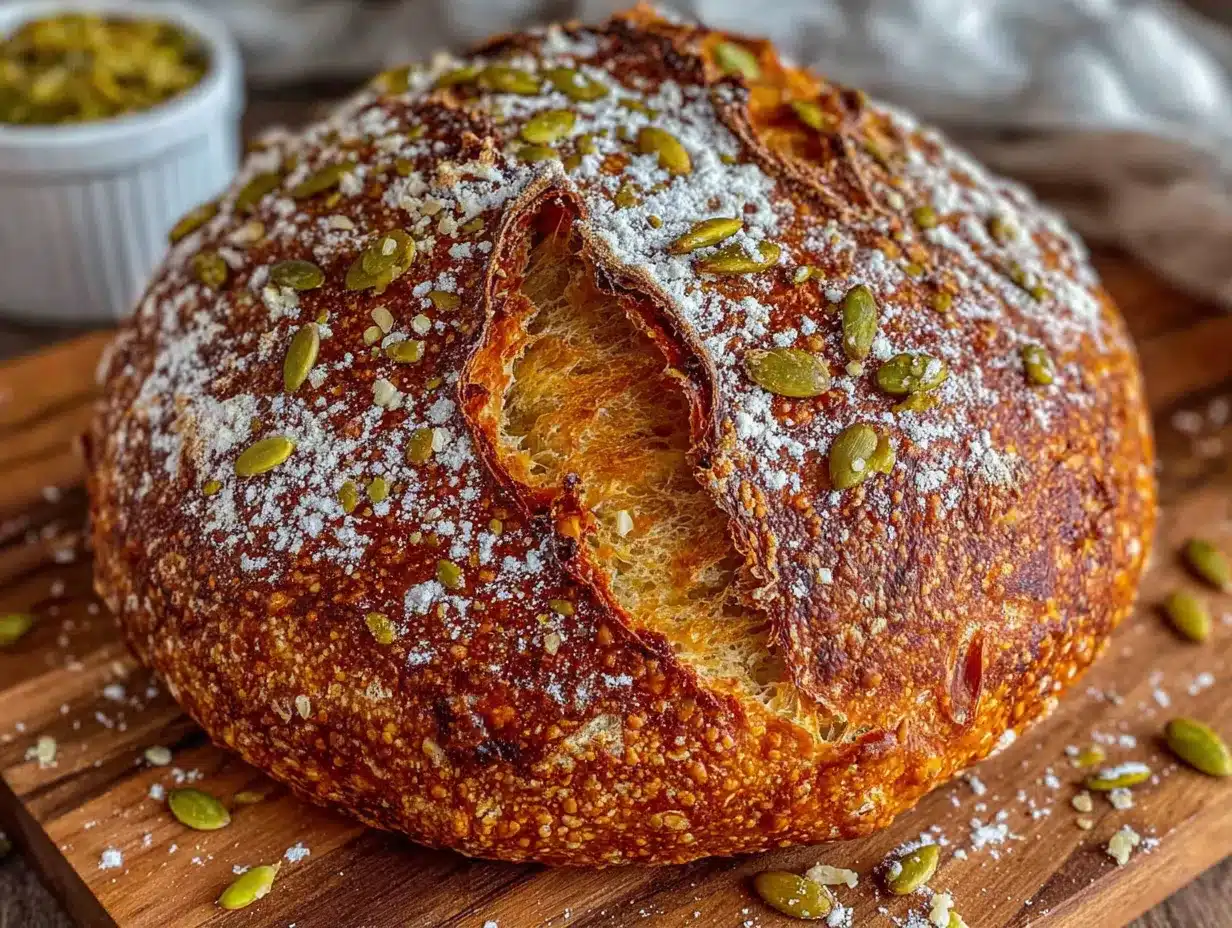
This recipe uses an overnight cold fermentation, which means most of the work happens while you sleep. The active time is only about 30 minutes, spread across two days. Here’s the full breakdown.
- Feed Your Starter : The night before you plan to mix your dough, feed your sourdough starter so it’s active and bubbly. You need 150 grams of starter at peak activity. If your starter has been in the fridge, give it two feedings 12 hours apart to wake it up properly.
- Mix the Dough : In a large bowl, combine 500 grams all-purpose flour, 150 grams active starter, 200 grams pumpkin puree, 100 grams water, 50 grams brown sugar, 30 grams olive oil, and 10 grams salt. Mix with your hands until no dry flour remains. The dough will feel quite stiff compared to regular sourdough—that’s normal because of the pumpkin.
- Rest and Fold : Cover the bowl and let it rest for 30 minutes. This is called the autolyse, and it helps the flour absorb the liquid evenly. After resting, perform your first set of stretch and folds. Wet your hands, grab one side of the dough, stretch it up, and fold it over itself. Repeat on all four sides. Do this 4 times total, with 30-minute rests between each set.
- Add the Pepitas : During the third set of folds, sprinkle 80 grams of toasted pepitas over the dough and fold them in. Keep folding until the seeds are evenly distributed. Dont worry if some fall out—you can press them back in during shaping.
- Bulk Fermentation : Let the dough rise at room temperature (70-75°F) for 4-6 hours, or until it has increased by about 50% and looks puffy with bubbles on the surface. The timing depends on your starter strength and kitchen temperature. In colder weather, this might take 8 hours. Look for visual cues, not the clock.
- Shape the Dough : Turn the dough onto a lightly floured surface. Gently shape it into a round or oval boule by folding the edges into the center and flipping it seam-side down. Use a bench scraper to create tension on the surface by dragging the dough toward you in a circular motion.
- Cold Fermentation : Place the shaped dough seam-side up in a floured banneton or lined bowl. Cover tightly with plastic wrap or a shower cap. Refrigerate for 12-18 hours. This slow cold ferment develops deep flavor and makes the dough easier to handle.
- Preheat and Prepare : The next morning, place your dutch oven in the oven and preheat to 500°F for at least 45 minutes. The longer preheat ensures the pot is screaming hot for maximum oven spring.
- Score and Top : Remove the dough from the fridge. Place a piece of parchment paper over the banneton and invert it to release the dough. Brush the top lightly with water and sprinkle the remaining 2 tablespoons of pepitas over the surface. Score the dough with a sharp lame or knife—a simple cross or single slash works beautifully. The pepitas will stick better if you press them gently into the wet surface.
- Bake : Carefully transfer the dough (using the parchment as a sling) into the hot dutch oven. Cover with the lid and bake at 500°F for 20 minutes. Reduce the temperature to 450°F, remove the lid, and bake for another 20-25 minutes until the crust is deep golden brown and the internal temperature reaches 200-205°F. The pepitas on top should be toasted and fragrant.
- Cool Completely : Transfer the bread to a wire rack and let it cool for at least 2 hours before slicing. I know it’s tempting to cut into it warm, but the interior is still setting and cutting too early will give you a gummy crumb. Patience pays off here.
A few notes from experience: if your dough feels too sticky during shaping, resist the urge to add more flour. Instead, wet your hands slightly and work quickly. The pumpkin puree makes the dough tackier than regular sourdough, but that’s what gives it that soft, moist crumb. Also, if you notice the bread browning too quickly after removing the lid, tent it loosely with foil for the remaining bake time.
Cooking Tips & Techniques
After making this bread more times than I can count, I’ve picked up a few tricks that make a real difference. First and most important: don’t rush the bulk fermentation. Pumpkin puree slows down fermentation slightly because of its natural sugars and fiber content. Your dough might take longer to rise than your usual sourdough, and that’s perfectly normal. Give it time. A properly fermented dough should feel airy and jiggly, not dense and tight.
Temperature management is huge with this recipe. If your kitchen runs cold (below 70°F), try placing the dough in your oven with just the light on. That gentle warmth speeds up fermentation without overheating it. I’ve also used the top of my refrigerator, which stays consistently warm from the motor. Just check on it every hour to make sure it’s not rising too quickly.
One mistake I made early on was overworking the dough during shaping. Pumpkin sourdough is more delicate than regular bread dough because the puree weakens the gluten structure slightly. Handle it gently. Use a light touch when shaping, and if the dough resists, let it rest for 10 minutes before trying again. Forcing it will only deflate all those beautiful bubbles you worked so hard to create.
The scoring technique matters more with this bread than with plain sourdough because the pepitas on top can interfere with the cut. Make sure your lame or knife is razor sharp. Score confidently in one smooth motion rather than sawing back and forth. And don’t worry if the pepitas scatter a bit—that just adds to the rustic look. If you want a cleaner score, you can add the pepitas after scoring by pressing them into the dough around the cut.
I had one batch where the bread came out flat as a pancake. Turns out I’d used expired pumpkin puree that had been sitting in my pantry for over a year. Always check your pumpkin’s expiration date and give it a sniff before using. Fresh puree should smell sweet and earthy, not sour or metallic. That lesson cost me a whole bag of flour and a morning’s work.
Variations & Adaptations
One of the best things about this recipe is how easily it adapts to different tastes and dietary needs. Here are some variations I’ve tried and loved.
- Gluten-Free Version : Substitute the all-purpose flour with a high-quality gluten-free bread flour blend. Cup4Cup and Bob’s Red Mill both work well. Reduce the water to 75 grams since gluten-free flours absorb differently. The texture will be denser but still delicious.
- Vegan Adaptation : This recipe is already vegan if you use olive oil instead of butter. The sourdough starter contains no dairy or eggs, so you’re good to go. Just double-check your brown sugar is vegan (some brands use bone char in processing).
- Spice It Up : For a bolder flavor, add 1 teaspoon of ground ginger and ½ teaspoon of cardamom to the dough. I tried this during a particularly chilly November and it was incredible with a smear of apple butter.
- Seedy Variation : Swap half the pepitas for sunflower seeds or chopped walnuts. The different textures and flavors add complexity. Just make sure whatever you add is toasted first for maximum flavor.
- Sweet Version : Increase the brown sugar to 75 grams and add 100 grams of dried cranberries or chopped dates along with the pepitas. This makes an amazing breakfast toast that barely needs butter.
- Savory Twist : Omit the brown sugar and pumpkin pie spice. Add 2 teaspoons of fresh rosemary, 1 teaspoon of black pepper, and an extra teaspoon of salt. This version pairs beautifully with sharp cheddar and apple slices.
My personal favorite variation is the one with dried cranberries and extra pumpkin pie spice. I made it for Thanksgiving last year and it was gone before the turkey even hit the table. Something about the tart cranberries against the sweet, spiced pumpkin just works on another level. Just make sure you chop the cranberries roughly so they distribute evenly throughout the dough.
Serving & Storage Suggestions
This bread is at its absolute best on day one, still slightly warm from the oven with a generous pat of salted butter melting into the crumb. But honestly, it’s just as good toasted the next morning for breakfast. The pepitas on top get extra crunchy in the toaster, which adds this wonderful textural contrast.
For serving, I like to slice it thick—about ¾ inch—and serve it alongside a bowl of soup or stew. It’s especially good with creamy soups like butternut squash or tomato basil. The tangy sourdough cuts through the richness perfectly. You could also use it for sandwiches, though I’d recommend toasting it first so it holds up better. A turkey and cranberry sandwich on this bread? Absolutely incredible.
Storage is straightforward. Keep the bread in a paper bag at room temperature for up to 3 days. The crust will soften slightly, but that’s part of the charm. For longer storage, wrap it tightly in plastic wrap and then foil, and freeze for up to 3 months. When you’re ready to eat it, thaw at room temperature and refresh in a 350°F oven for 10 minutes. The crust will crisp right back up.
One thing I’ve noticed is that the flavors actually deepen after the first day. The pumpkin and spice notes become more pronounced as the bread sits. So if you can resist eating it all immediately, day two might be even better than day one. The pepitas do lose some crunch after a day or two, but a quick toast brings them back to life.
Nutritional Information & Benefits
While I’m not a nutritionist, I can share what I’ve learned about the ingredients in this bread. Pumpkin is packed with vitamin A and antioxidants, which support eye health and immune function. The pepitas add protein, healthy fats, and magnesium, which is great for muscle recovery and sleep quality. And because this is naturally leavened sourdough, the fermentation process breaks down some of the gluten and phytic acid, making the nutrients more bioavailable.
Here’s an approximate nutritional breakdown per slice (assuming 12 slices per loaf):
- Calories : 220
- Protein : 7 grams
- Carbohydrates : 38 grams
- Fiber : 3 grams
- Fat : 5 grams
- Sugar : 6 grams
This bread is naturally dairy-free and egg-free, making it suitable for many dietary preferences. If you’re watching your sodium, you can reduce the salt to 8 grams without affecting the fermentation too much. And for those avoiding refined sugar, you can substitute coconut sugar or maple syrup for the brown sugar, though you’ll need to adjust the liquid slightly if using syrup.
I personally love that this bread gives me a way to enjoy something that feels indulgent while still being relatively wholesome. It’s real food made from real ingredients, and you can feel good about feeding it to your family. Plus, the fiber from the pumpkin and seeds helps keep you full longer, which makes it a great option for a satisfying breakfast or snack.
Conclusion
This best pumpkin sourdough bread with pepitas has become a fall tradition in our house, and I hope it becomes one in yours too. It’s the kind of recipe that feels special without being complicated, the kind that fills your home with warmth and your kitchen with the best possible smells. The combination of tangy sourdough, sweet pumpkin, and crunchy pepitas is something you’ll find yourself craving long after the last slice is gone.
I’d love to hear how yours turns out. Did you try any of the variations? Did you come up with your own twist? Drop a comment below and let me know. And if you’re looking for more fall baking inspiration, don’t miss my ultimate pumpkin cinnamon rolls with dreamy maple icing or these fluffy pumpkin scones with easy maple glaze. They’re both perfect for cozy autumn mornings.
Happy baking, friends. May your loaves rise high and your pepitas stay crunchy.
Frequently Asked Questions
Can I use active dry yeast instead of sourdough starter?
Yes, but the flavor will be different. Use 1 packet (7 grams) of active dry yeast dissolved in the warm water. Let it foam for 5 minutes, then proceed with the recipe. The bread will still be delicious, but it won’t have that signature sourdough tang. You can add 1 tablespoon of lemon juice or apple cider vinegar to mimic some of the acidity.
Why did my bread turn out dense and gummy?
This usually happens for one of three reasons: the dough was under-fermented, you used too much water, or you cut into it too early. Make sure your bulk fermentation goes long enough—the dough should be puffy and full of bubbles. Also, double-check your pumpkin puree isn’t too watery. If it seems thin, strain it through cheesecloth first. And please, let it cool completely before slicing!
Can I make this bread without a dutch oven?
Absolutely. Place a baking sheet on the bottom rack of your oven and add a cup of boiling water when you put the bread in. This creates steam. Bake the bread on a preheated baking stone or heavy baking sheet. The crust won’t be quite as dramatic, but the interior will be just as good. You can also use a cast iron skillet inverted over the bread to trap steam.
How do I know when my sourdough starter is active enough?
Your starter should have doubled in size within 4-6 hours of feeding, with lots of small and large bubbles on the surface and sides. It should smell pleasantly sour, like yogurt or ripe fruit. If it smells like acetone or nail polish remover, it’s hungry and needs more frequent feedings. A float test works too—drop a small spoonful in water; if it floats, it’s ready.
Can I freeze the unbaked dough for later?
Yes! After shaping, wrap the dough tightly in plastic wrap and freeze for up to 2 weeks. When you’re ready to bake, thaw it in the refrigerator overnight, then let it come to room temperature for about an hour before scoring and baking. The cold ferment will actually improve the flavor. Just note that the pepitas on top might not stick as well if you add them before freezing.
Pin This Recipe!
Best Pumpkin Sourdough Bread with Easy Pepitas Topping
- Total Time: 14-20 hours (includes overnight fermentation)
- Yield: 12 servings 1x
Description
This pumpkin sourdough bread combines tangy sourdough with sweet, earthy pumpkin and crunchy pepitas for a perfectly balanced fall loaf. With a crispy crust and soft, tender crumb, it’s ideal for breakfast, sandwiches, or simply enjoying with butter.
Ingredients
- 500 grams all-purpose flour
- 150 grams active sourdough starter
- 200 grams pumpkin puree (not pumpkin pie filling)
- 100 grams water
- 80 grams toasted pepitas, plus 2 tablespoons for topping
- 50 grams brown sugar (light or dark)
- 10 grams fine sea salt
- 2 teaspoons pumpkin pie spice
- 30 grams olive oil (or melted butter)
Instructions
- Feed your sourdough starter the night before so it’s active and bubbly; you need 150 grams at peak activity.
- In a large bowl, combine 500 grams all-purpose flour, 150 grams active starter, 200 grams pumpkin puree, 100 grams water, 50 grams brown sugar, 30 grams olive oil, and 10 grams salt. Mix with your hands until no dry flour remains.
- Cover the bowl and let it rest for 30 minutes (autolyse). Then perform 4 sets of stretch and folds, with 30-minute rests between each set.
- During the third set of folds, sprinkle 80 grams of toasted pepitas over the dough and fold them in until evenly distributed.
- Let the dough rise at room temperature (70-75°F) for 4-6 hours, or until it has increased by about 50% and looks puffy with bubbles on the surface.
- Turn the dough onto a lightly floured surface. Gently shape it into a round or oval boule by folding the edges into the center and flipping it seam-side down. Use a bench scraper to create tension.
- Place the shaped dough seam-side up in a floured banneton or lined bowl. Cover tightly and refrigerate for 12-18 hours.
- The next morning, place a dutch oven in the oven and preheat to 500°F for at least 45 minutes.
- Remove the dough from the fridge. Place a piece of parchment paper over the banneton and invert to release the dough. Brush the top lightly with water and sprinkle the remaining 2 tablespoons of pepitas over the surface. Score the dough with a sharp lame or knife.
- Carefully transfer the dough (using the parchment as a sling) into the hot dutch oven. Cover with the lid and bake at 500°F for 20 minutes. Reduce the temperature to 450°F, remove the lid, and bake for another 20-25 minutes until the crust is deep golden brown and the internal temperature reaches 200-205°F.
- Transfer the bread to a wire rack and let it cool for at least 2 hours before slicing.
Notes
Don’t rush the bulk fermentation; pumpkin puree slows it down. If dough feels sticky during shaping, wet your hands slightly instead of adding more flour. For a cleaner score, add pepitas after scoring by pressing them into the dough around the cut. Let the bread cool completely before slicing to avoid a gummy crumb.
- Prep Time: 30 minutes
- Cook Time: 40-45 minutes
- Category: Bread
- Cuisine: American
Nutrition
- Serving Size: 1 slice
- Calories: 220
- Sugar: 6
- Sodium: 200
- Fat: 5
- Saturated Fat: 0.5
- Carbohydrates: 38
- Fiber: 3
- Protein: 7
Keywords: pumpkin sourdough bread, sourdough bread, pumpkin bread, pepitas, fall baking, sourdough recipe, pumpkin sourdough