My niece stared at me, frosting smeared across her cheek. “Auntie, can we make this cake for my birthday every single year?”
I hadn’t even sat down yet. The plate in front of me held nothing but crumbs and a single rainbow sprinkle. That’s the moment I knew this vanilla birthday cake was something special. Not because I thought it was perfect—but because a seven-year-old who’d eaten her weight in supermarket sheet cakes declared it the one.
Honestly, I didn’t set out to reinvent the wheel. I just wanted a birthday cake that tasted like the one I remembered from my own childhood, but better. You know the one—the box mix cake that was always a little too sweet, a little too dry, but somehow still made you happy. I wanted that happiness, but with real butter, real vanilla, and a crumb that didn’t need a glass of milk to get down.
This recipe started on a random Tuesday. No special occasion. Just me and a craving for something nostalgic. I pulled out my stand mixer, grabbed some butter that had been sitting on the counter, and started experimenting. The first attempt was okay. The second was better. By the third, I had my sister texting me at work saying, “Whatever you’re baking, save me a piece.”
I’ve made this classic vanilla birthday cake with sprinkle frosting for birthdays, half-birthdays, and “it’s Tuesday” days. It’s the cake I bring to potlucks when I want people to actually finish dessert. It’s the one my husband requests for his birthday, even though he claims he’s “not a cake person.”
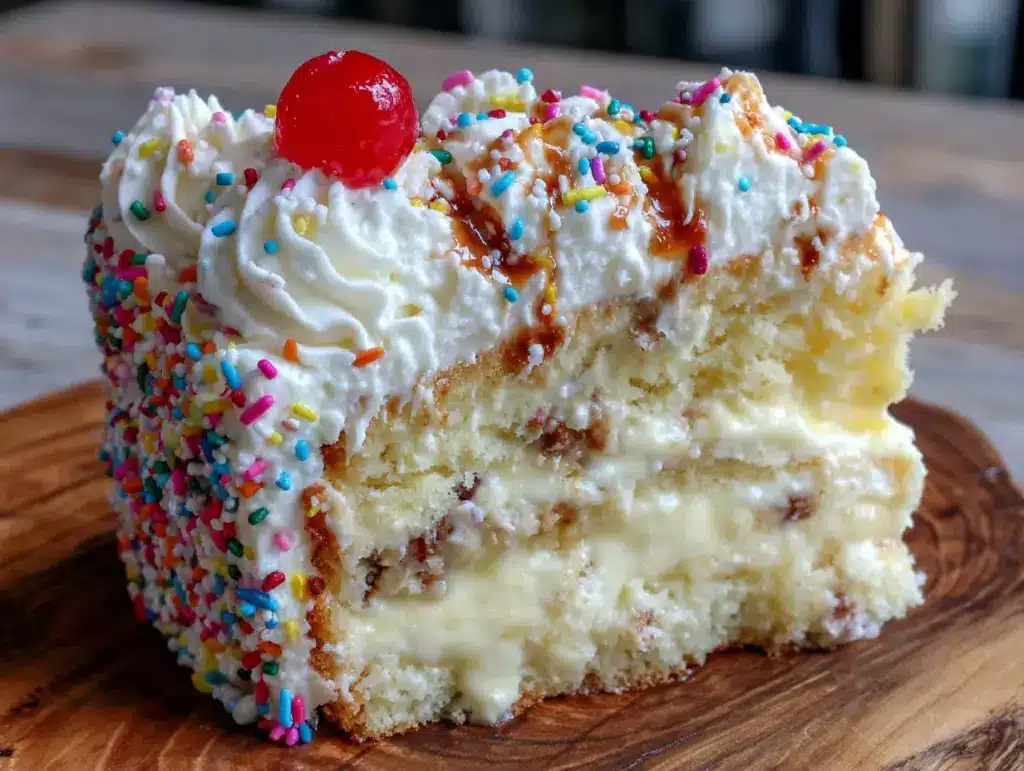
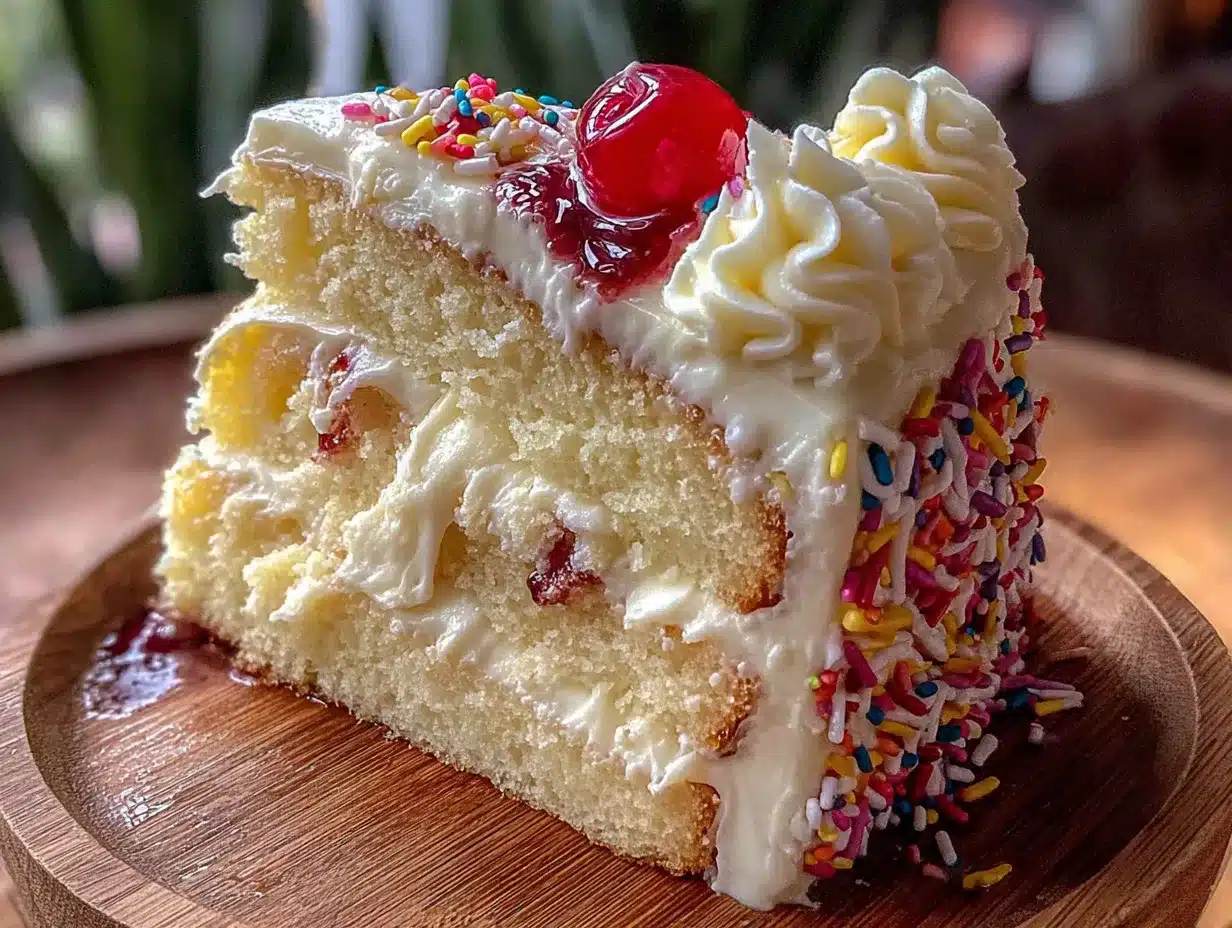
This isn’t a fancy bakery cake. It’s better than that. It’s the cake that feels like home, with buttercream so smooth you’ll want to eat it by the spoonful and sprinkles that make everything feel like a celebration. I think you’re going to love it.
Why You’ll Love This Recipe
I’ve tested this cake more times than I care to admit. Burnt edges, sunken centers, frosting that separated and looked like a science experiment gone wrong—I’ve been there. But this version? It works every single time. Here’s why it’s become my go-to:
- Perfectly Moist Every Time: The combination of buttermilk and oil keeps this cake tender for days. No dry crumbs here, I promise.
- Simple Pantry Ingredients: Nothing weird. No specialty flours or hard-to-find extracts. You probably have most of this in your kitchen right now.
- Easy for Beginners: If you can cream butter and sugar, you can make this cake. No complicated techniques required.
- Completely Customizable: Swap the sprinkles for chocolate chips, add a layer of jam, or turn it into cupcakes. This recipe adapts beautifully.
- That Perfect Buttercream: Not too sweet, not too greasy. Just silky, dreamy vanilla frosting that pipes like a dream.
What makes this different from every other vanilla cake recipe out there? It’s the texture. I spent months tweaking the ratio of butter to oil, the amount of buttermilk, and the baking temperature. The result is a cake that’s light but sturdy enough to stack, moist without being dense, and flavorful without being cloying. It’s the kind of cake that makes people close their eyes after the first bite.
This isn’t just another recipe. It’s the one you’ll bookmark, print out, and pass to your kids. It’s comfort food at its finest—a reminder that sometimes the simplest things are the most worth celebrating.
What Ingredients You Will Need
Let me walk you through what you’ll need. I’ve tested this with different brands and substitutions, so I’ll share what works best based on my experience. These ingredients come together to create a cake that’s soft, flavorful, and completely irresistible.
For the Cake
- Unsalted butter, softened (1 cup / 226g) — I use Land O’Lakes for consistent results. Make sure it’s truly room temperature, not microwaved. Softened butter should give slightly when you press it but still hold its shape.
- Granulated sugar (2 cups / 400g) — Regular white sugar works perfectly. Don’t substitute with a liquid sweetener here; the structure depends on the crystals.
- Large eggs, room temperature (4) — Cold eggs can seize the batter. Let them sit on the counter for 30 minutes, or place them in warm water for 5 minutes.
- Vanilla extract (2 teaspoons) — Use pure vanilla extract, not imitation. Trust me on this one. The flavor difference is night and day.
- All-purpose flour (3 cups / 360g) — Spoon and level your flour. Scooping directly from the bag packs in too much flour and makes the cake dry.
- Baking powder (1 tablespoon) — Make sure it’s fresh. Test it by dropping a bit into hot water; it should fizz immediately.
- Baking soda (½ teaspoon) — Balances the acidity of the buttermilk.
- Salt (1 teaspoon) — Don’t skip it. Salt enhances the sweetness and balances the flavors.
- Buttermilk, room temperature (1½ cups / 360ml) — If you don’t have buttermilk, add 1½ tablespoons of lemon juice or vinegar to regular milk and let it sit for 5 minutes. It works like a charm.
- Vegetable oil (¼ cup / 60ml) — This is my secret for extra moisture. Use a neutral oil like canola or grapeseed.
- Rainbow sprinkles (½ cup / 80g) — Use jimmies, not nonpareils. Nonpareils bleed their color into the batter. I learned this the hard way.
For the Sprinkle Frosting
- Unsalted butter, softened (1½ cups / 339g) — Again, room temperature is crucial. Cold butter won’t cream properly and will leave you with lumpy frosting.
- Powdered sugar (4 cups / 480g) — Sift it if it’s clumpy. Nobody wants lumpy frosting.
- Vanilla extract (2 teaspoons) — Pure vanilla, please.
- Heavy cream (3-4 tablespoons) — Start with 3 and add more if needed. Heavy cream gives the fluffiest texture, but whole milk works in a pinch.
- Salt (¼ teaspoon) — A tiny pinch keeps the frosting from being cloying.
- Rainbow sprinkles (⅓ cup / 50g, plus more for decorating) — Jimmies again. They hold their color and add that perfect crunch.
Equipment Needed
You don’t need a professional bakery setup for this cake. Here’s what I use and what you can substitute if needed.
- Stand mixer or hand mixer — I prefer my KitchenAid for the cake batter, but a hand mixer works perfectly for the frosting. You can even make the frosting by hand if you’re feeling strong.
- Two 9-inch round cake pans — I love my Fat Daddio’s anodized aluminum pans. They conduct heat evenly and release cakes beautifully. If you only have dark pans, reduce the oven temperature by 25°F.
- Parchment paper — Cut circles for the bottom of your pans. This guarantees your cakes won’t stick.
- Cooling rack — Essential for even cooling. If you don’t have one, you can use a wire oven rack.
- Offset spatula — Makes frosting so much easier. A butter knife works, but an offset spatula is worth the $8 investment.
- Cake stand or turntable — Not required, but a turntable makes decorating infinitely easier. I use a cheap plastic one from Amazon that’s lasted years.
- Piping bag and tip — Optional but fun. I use a Wilton 1M tip for the rosettes on top.
Preparation Method
Okay, let’s make a cake. I’ll walk you through every step, including the little things I’ve learned from my many, many attempts.
Step 1: Prep Your Pans and Oven
Preheat your oven to 350°F (175°C). Grease two 9-inch round cake pans with butter or cooking spray. Cut parchment paper circles for the bottoms and place them in the pans. Grease the parchment too. Then dust the pans with flour, tapping out the excess. This extra step might seem fussy, but I promise it’s worth it when your cakes come out perfectly.
Step 2: Cream the Butter and Sugar
In your stand mixer fitted with the paddle attachment, beat the softened butter and granulated sugar together on medium speed for 3 to 4 minutes. You’re looking for a light, fluffy texture. The mixture should look pale and almost doubled in volume. Scrape down the sides and bottom of the bowl halfway through. Don’t rush this step—proper creaming is what gives your cake structure and tenderness.
Step 3: Add Eggs and Vanilla
Add the eggs one at a time, beating well after each addition. The batter might look slightly curdled after the first egg—that’s normal. Just keep going. Add the vanilla extract and beat until combined. Scrape the bowl again.
Step 4: Combine Dry Ingredients
In a separate bowl, whisk together the flour, baking powder, baking soda, and salt. Whisking aerates the flour and distributes the leavening agents evenly. Set this aside.
Step 5: Alternate Wet and Dry Ingredients
With the mixer on low speed, add about one-third of the flour mixture to the butter mixture. Mix until just combined. Add half of the buttermilk and the vegetable oil, mixing on low until incorporated. Repeat with another third of the flour, then the remaining buttermilk, and finally the last of the flour. Mix only until the flour disappears. Overmixing develops gluten and makes the cake tough.
Step 6: Fold in the Sprinkles
Remove the bowl from the mixer. Using a rubber spatula, gently fold in the rainbow sprinkles. Fold just until they’re distributed—about 8 to 10 strokes. The batter will be thick and fluffy.
Step 7: Bake the Cakes
Divide the batter evenly between the prepared pans. I use a kitchen scale for accuracy, but you can eyeball it. Smooth the tops with a spatula. Bake for 28 to 32 minutes, or until a toothpick inserted in the center comes out clean or with a few moist crumbs. The cakes should be golden brown and pulling away from the edges slightly.
Let the cakes cool in the pans for 10 minutes. Then run a knife around the edges and turn them out onto a cooling rack. Peel off the parchment paper and let them cool completely. This is crucial—frosting a warm cake is a disaster waiting to happen.
Step 8: Make the Frosting
While the cakes cool, make the frosting. In your stand mixer with the paddle attachment, beat the softened butter on medium speed for 2 minutes until smooth and creamy. Add the powdered sugar one cup at a time, mixing on low speed to avoid a sugar cloud. Add the vanilla extract and salt. Add 3 tablespoons of heavy cream and beat on medium-high speed for 3 to 4 minutes. The frosting should be light, fluffy, and spreadable. If it’s too thick, add another tablespoon of cream. If it’s too thin, add more powdered sugar. Fold in the sprinkles by hand.
Step 9: Assemble and Frost
Place one cake layer on your serving plate. Spread about ¾ cup of frosting evenly on top. Place the second layer on top, making sure it’s centered. Apply a thin layer of frosting all over the cake—this is the crumb coat. Don’t worry about perfection here. Refrigerate the cake for 15 to 20 minutes to set the crumb coat.
Apply the remaining frosting in a thick, even layer. Use your offset spatula to create swirls or smooth sides. Top with extra sprinkles while the frosting is still soft.
Cooking Tips & Techniques
I’ve made every mistake you can imagine with this cake. Here’s what I’ve learned so you don’t have to repeat my failures.
Room temperature ingredients matter more than you think. I used to skip this step and wonder why my cakes were dense. Cold butter doesn’t cream properly. Cold eggs can seize the batter. Cold buttermilk can curdle the mixture. Take the extra 30 minutes to let everything come to room temperature. Your cake will thank you.
Don’t overmix the batter. The moment the flour disappears, stop mixing. Overmixing develops gluten, which makes your cake tough and rubbery. I’ve ruined plenty of cakes by walking away while the mixer was still running. Set a timer if you need to.
Weigh your flour if you can. A kitchen scale is the best investment you’ll make for baking. If you don’t have one, spoon the flour into your measuring cup and level it with a knife. Scooping directly from the bag can add up to 30% more flour than you need.
Rotate your pans halfway through baking. Most ovens have hot spots. Rotating the pans ensures even baking. I do this at the 15-minute mark.
Let the cake cool completely before frosting. I know it’s tempting to rush. But warm cake + cold frosting = a melty mess. I’ve learned this lesson more times than I’d like to admit.
Chill your cake before the final frosting layer. The crumb coat seals in the crumbs and makes the final layer smooth and beautiful. Fifteen minutes in the fridge makes a huge difference.
Variations & Adaptations
This recipe is incredibly versatile. Here are some of my favorite ways to change it up.
Chocolate Chip Birthday Cake
Swap the rainbow sprinkles for 1 cup of mini chocolate chips. The tiny chips distribute evenly and don’t sink to the bottom. This version is my husband’s favorite.
Lemon Birthday Cake
Add the zest of 2 lemons to the sugar and rub it in with your fingers before creaming. Replace 2 tablespoons of buttermilk with fresh lemon juice. Add 1 teaspoon of lemon extract along with the vanilla. The frosting gets a lemon twist too—add 1 tablespoon of lemon juice and a pinch of zest.
Gluten-Free Version
Substitute the all-purpose flour with a 1:1 gluten-free baking flour blend. I’ve had great results with King Arthur Measure for Measure. Add an extra tablespoon of buttermilk to compensate for the drier flour blend.
Cupcakes
This batter makes about 24 cupcakes. Bake at 350°F for 18 to 20 minutes. The frosting recipe will generously top all 24.
Strawberry Birthday Cake
Reduce the buttermilk to 1¼ cups. Puree ½ cup of freeze-dried strawberries into a powder and add it to the flour mixture. Fold in ½ cup of finely chopped fresh strawberries at the end. The frosting gets ¼ cup of strawberry puree instead of 2 tablespoons of cream.
Serving & Storage Suggestions
This cake is best served at room temperature. If you’ve refrigerated it, let it sit on the counter for 30 to 45 minutes before serving. The texture softens and the flavors become more pronounced.
For presentation, I love piling extra sprinkles on top and around the base of the cake. It looks festive without requiring any fancy piping skills. If you want to get fancy, pipe rosettes around the top edge using a star tip.
This cake pairs beautifully with a scoop of vanilla ice cream or a dollop of freshly whipped cream. For a birthday celebration, serve it with a tall glass of cold milk or a cup of hot coffee.
Storage: Cover leftover cake with plastic wrap or store it in an airtight container at room temperature for up to 3 days. If your kitchen is warm, refrigerate it for up to 5 days. Bring slices to room temperature before serving for the best texture.
Freezing: You can freeze the unfrosted cake layers for up to 3 months. Wrap each layer tightly in plastic wrap, then aluminum foil. Thaw at room temperature before frosting. The frosted cake can also be frozen for up to 2 months—just wrap it well and thaw in the refrigerator overnight.
One thing I’ve noticed: the flavors actually improve after day one. The vanilla mellows out and the texture becomes even more tender. So if you can, make this cake a day ahead.
Nutritional Information & Benefits
Let’s be real—this is a celebration cake. It’s not health food, and that’s okay. But here’s what you should know.
Per serving (1 slice, based on 12 servings): Approximately 520 calories, 28g fat, 66g carbohydrates, 5g protein, 42g sugar, 1g fiber. These values are estimates and will vary based on specific ingredients and serving sizes.
The butter provides a small amount of vitamin A and healthy fats. The eggs add protein and choline, which is important for brain health. If you use buttermilk, you’re getting a bit of calcium and probiotics.
For dietary considerations: This recipe contains dairy, eggs, and gluten. It can be made gluten-free as noted above. For a dairy-free version, substitute the butter with vegan butter, use a dairy-free milk with lemon juice for buttermilk, and use a vegan cream cheese for the frosting.
My personal philosophy? Food is about joy and connection. A slice of birthday cake isn’t going to derail your health goals. It’s about celebrating moments, big and small. So enjoy it, share it, and don’t feel guilty about it.
Conclusion
This classic vanilla birthday cake with sprinkle frosting has become my signature dessert for a reason. It’s simple enough for a beginner but impressive enough for any celebration. The crumb is tender, the frosting is silky, and those rainbow sprinkles make everything feel like a party.
I love this recipe because it’s adaptable. You can dress it up or keep it simple. You can make it for a milestone birthday or just because it’s Wednesday. It’s the cake that brings people together, that makes kids smile, that reminds adults of their own childhood birthdays.
If you make this cake, I’d love to hear about it. Leave a comment below and let me know how it turned out. Did you add your own twist? Did someone ask for the recipe? Share your story—I read every comment and I love seeing your creations.
Happy baking, friend. And remember: every day is worth celebrating with cake.
Frequently Asked Questions
Can I make this cake ahead of time?
Absolutely. You can bake the cake layers up to 2 days in advance. Wrap them tightly in plastic wrap and store at room temperature. The frosting can be made up to 5 days ahead and refrigerated in an airtight container. Let it come to room temperature and re-whip before using.
Why did my cake sink in the middle?
This usually happens for one of three reasons: the oven door was opened too early (wait until the 25-minute mark), the baking powder was expired, or the batter was overmixed. Check your baking powder by testing it in hot water before using.
Can I use this recipe for a sheet cake?
Yes. Pour the batter into a greased 9×13-inch pan and bake at 350°F for 30 to 35 minutes. The frosting recipe will cover the top generously. If you want to double the recipe for a larger crowd, use a half-sheet pan and increase the baking time to 35 to 40 minutes.
How do I get smooth frosting?
A crumb coat is your best friend. Apply a thin layer of frosting, refrigerate for 15 minutes, then apply the final layer. Use a bench scraper or a large offset spatula for smooth sides. Warm your spatula under hot water, dry it, and use it to smooth the frosting for a polished look.
Can I use salted butter instead of unsalted?
You can, but reduce the added salt in the recipe to ¼ teaspoon. Salted butter varies in salt content between brands, so it’s harder to control the final flavor. I recommend unsalted butter for consistent results.
Pin This Recipe!
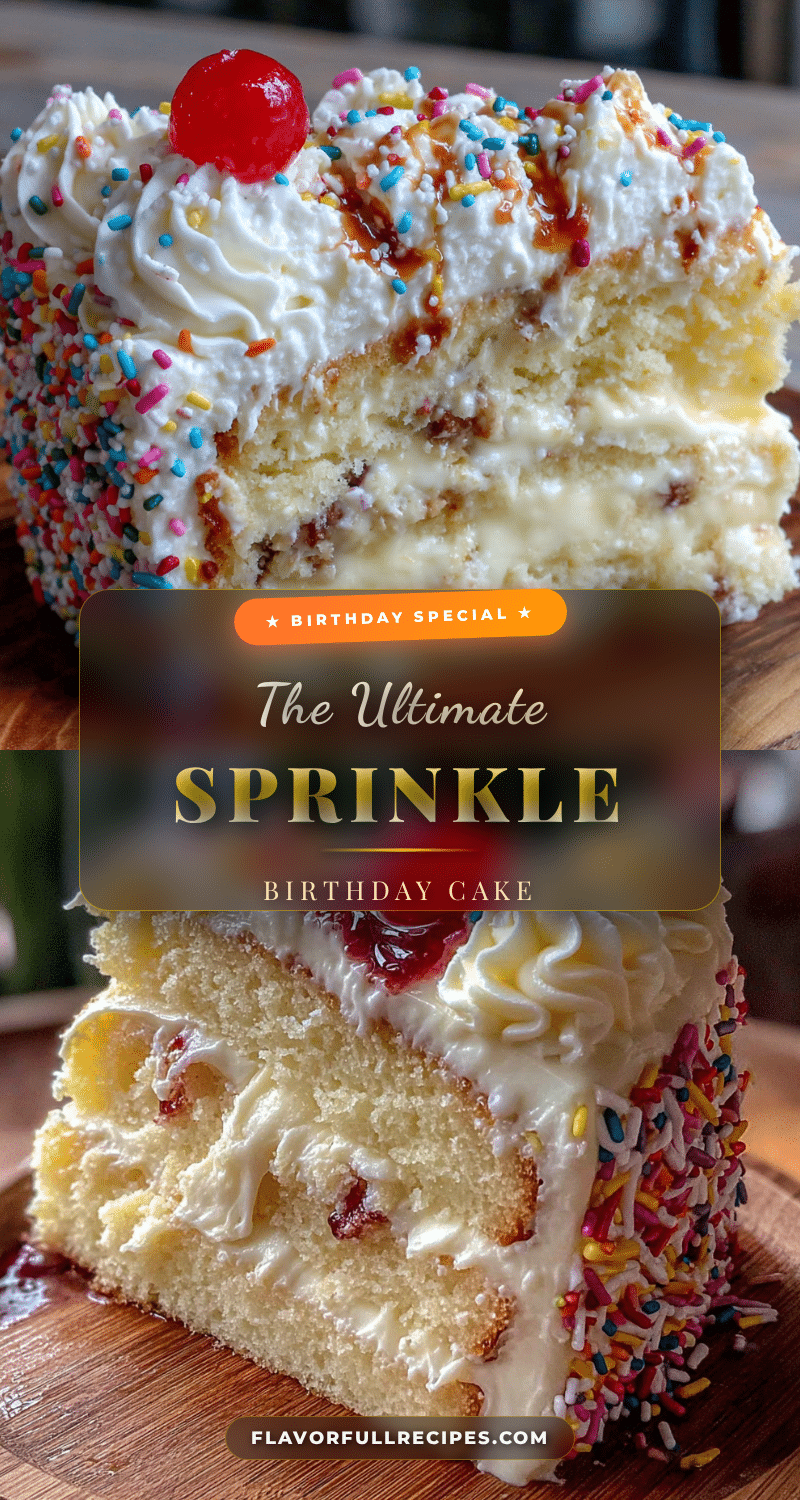
Best Classic Vanilla Birthday Cake with Sprinkle Frosting
- Total Time: 1 hour 30 minutes
- Yield: 12 servings 1x
Description
A moist, tender vanilla birthday cake with silky buttercream and rainbow sprinkles. This easy recipe uses simple pantry ingredients and is perfect for celebrations or any day that feels special.
Ingredients
- 1 cup (226g) unsalted butter, softened
- 2 cups (400g) granulated sugar
- 4 large eggs, room temperature
- 2 teaspoons pure vanilla extract
- 3 cups (360g) all-purpose flour
- 1 tablespoon baking powder
- ½ teaspoon baking soda
- 1 teaspoon salt
- 1½ cups (360ml) buttermilk, room temperature
- ¼ cup (60ml) vegetable oil
- ½ cup (80g) rainbow sprinkles (jimmies)
- 1½ cups (339g) unsalted butter, softened (for frosting)
- 4 cups (480g) powdered sugar
- 2 teaspoons pure vanilla extract (for frosting)
- 3–4 tablespoons heavy cream
- ¼ teaspoon salt (for frosting)
- ⅓ cup (50g) rainbow sprinkles (for frosting, plus more for decorating)
Instructions
- Preheat oven to 350°F (175°C). Grease two 9-inch round cake pans, line bottoms with parchment paper, grease parchment, and dust with flour.
- In a stand mixer with paddle attachment, beat softened butter and granulated sugar on medium speed for 3-4 minutes until light and fluffy. Scrape bowl halfway through.
- Add eggs one at a time, beating well after each. Add vanilla extract and beat until combined. Scrape bowl again.
- In a separate bowl, whisk together flour, baking powder, baking soda, and salt.
- With mixer on low, add one-third of flour mixture to butter mixture, mixing until just combined. Add half of buttermilk and vegetable oil, mixing on low. Repeat with another third of flour, remaining buttermilk, and final third of flour. Mix only until flour disappears.
- Remove bowl from mixer. Gently fold in rainbow sprinkles with a rubber spatula until just distributed (8-10 strokes).
- Divide batter evenly between prepared pans. Smooth tops. Bake for 28-32 minutes until a toothpick inserted in center comes out clean or with a few moist crumbs. Cool in pans for 10 minutes, then turn out onto a cooling rack. Remove parchment and cool completely.
- For frosting: In stand mixer with paddle attachment, beat softened butter on medium speed for 2 minutes until smooth. Add powdered sugar one cup at a time on low speed. Add vanilla, salt, and 3 tablespoons heavy cream. Beat on medium-high for 3-4 minutes until light and fluffy. Add more cream if needed. Fold in sprinkles by hand.
- Place one cake layer on serving plate. Spread about ¾ cup frosting evenly on top. Place second layer on top, centered. Apply a thin crumb coat of frosting all over. Refrigerate for 15-20 minutes to set.
- Apply remaining frosting in a thick, even layer. Use an offset spatula to create swirls or smooth sides. Top with extra sprinkles while frosting is soft.
Notes
Room temperature ingredients are crucial for best texture. Don’t overmix batter. Weigh flour for accuracy. Rotate pans halfway through baking. Cool cake completely before frosting. Chill cake after crumb coat for smooth final layer. Flavors improve after day one.
- Prep Time: 30 minutes
- Cook Time: 30 minutes
- Category: Dessert
- Cuisine: American
Nutrition
- Serving Size: 1 slice
- Calories: 520
- Sugar: 42
- Sodium: 380
- Fat: 28
- Saturated Fat: 17
- Carbohydrates: 66
- Fiber: 1
- Protein: 5
Keywords: vanilla birthday cake, sprinkle frosting, classic cake, homemade cake, birthday cake recipe, easy cake, buttercream frosting