My sister did not trust any ice cream recipe that didn’t require an ice cream maker. She had a fancy Cuisinart model, the kind that takes up half a shelf and needs the bowl frozen for twenty-four hours. When I told her I made salted caramel ice cream with just a whisk and a loaf pan, she actually laughed at me. “That’s not real ice cream,” she said, and I couldn’t blame her for thinking that.
I had tried no-churn recipes before, and they were… fine. Edible, sure. But they had this icy, almost grainy texture that reminded me of those cheap frozen treats you get at a gas station. The kind that melts into a puddle of sad, watery sugar. So I understood her skepticism, honestly. I shared it.
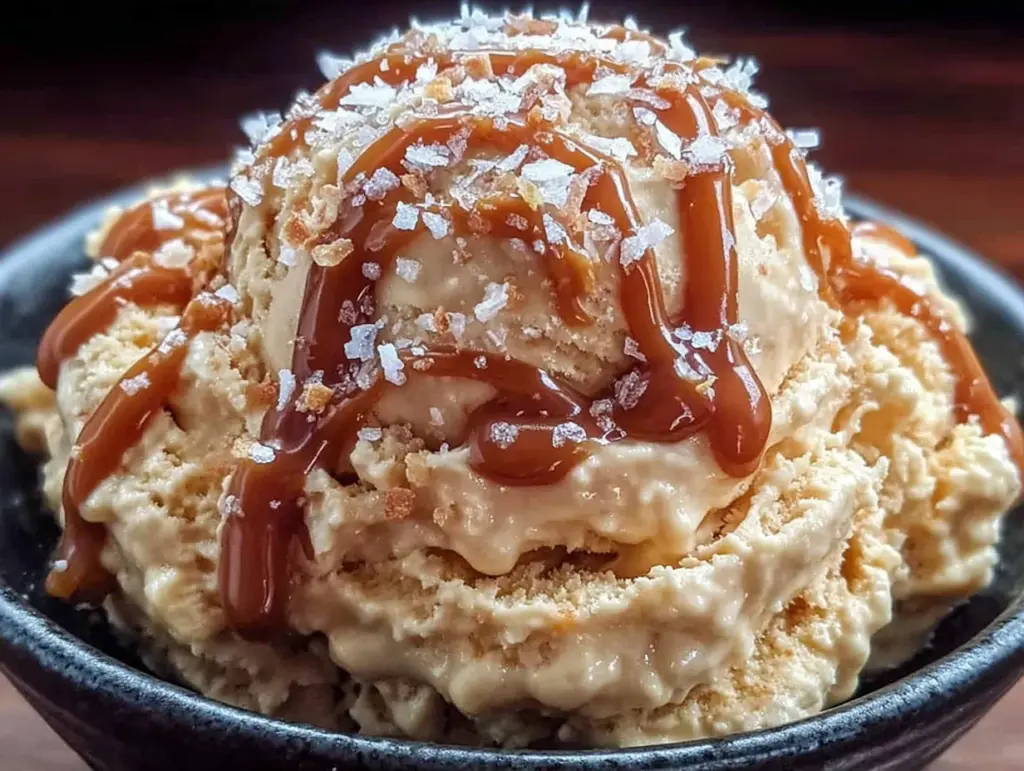
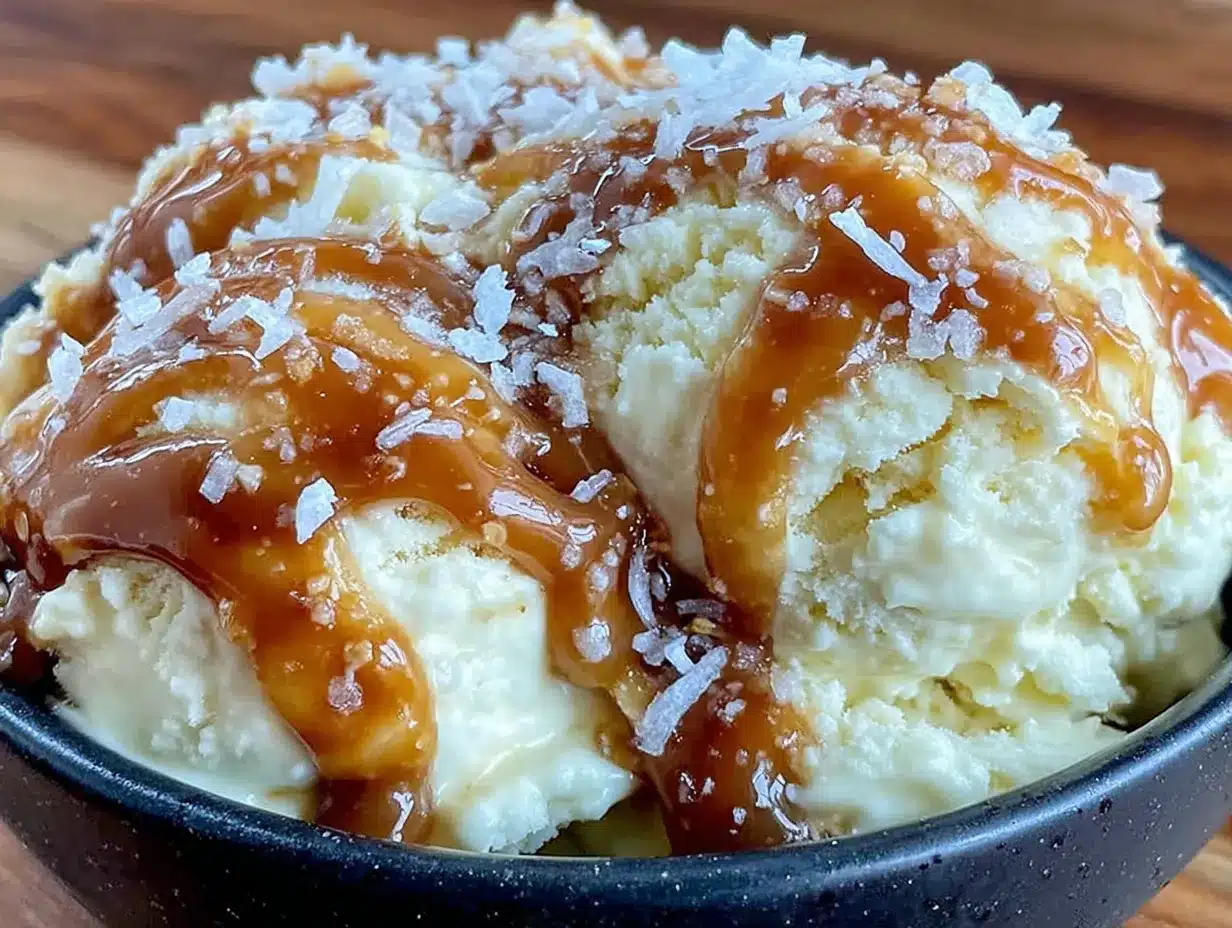
But then I started playing around with the science of it. I realized the secret wasn’t just whipping cream and hoping for the best. It was about creating a stable emulsion, something that would hold air and resist those nasty ice crystals. And the caramel? That had to be deeply, dangerously browned, with enough salt to cut through all that sweetness. I spent a whole weekend making batch after batch (my freezer looked like a dairy farm exploded), and somewhere around the third attempt, it clicked. The texture was silky, scoopable straight from the freezer, with that perfect ribbon of salted caramel running through it.
I brought a container to my sister’s house, still a little nervous. She took one bite, closed her eyes, and said, “Okay. This is real ice cream.” That was the moment I knew the recipe was ready. It’s the kind of frozen dessert that makes you forget you’re eating something made without a machine. And honestly, it’s better than most of the stuff you’d buy at the store.
Why You’ll Love This Recipe
This isn’t just another no-churn recipe you’ll find on the internet. I’ve tested this until my arm hurt from whisking, and I’ve landed on a method that genuinely works every single time. No ice crystals, no weird icy layers, just pure, creamy, decadent ice cream.
- No Machine Required: You don’t need a fancy ice cream maker or a stand mixer with a frozen bowl. Just a hand mixer or a strong whisk and some muscle power.
- Simple Pantry Ingredients: You probably have most of these items already—heavy cream, sweetened condensed milk, sugar, butter, and salt. No weird stabilizers or hard-to-find extracts.
- Deep, Complex Flavor: The caramel is made from scratch, which means you control the color and depth. We’re going for a dark amber, almost mahogany color that gives a bittersweet, toasty flavor. It’s not just sweet—it’s sophisticated.
- Perfect Texture: The combination of whipped cream and sweetened condensed milk creates a stable base that freezes beautifully. The caramel adds a slight chewiness in the ribbons, which is just divine.
- Customizable: Once you nail the base, you can add chocolate chunks, toasted nuts, or even a swirl of peanut butter. This recipe is a fantastic foundation for any flavor you dream up.
I remember the first time I made this for a dinner party. I served it alongside a warm cinnamon apple crisp, and the combination of hot, spiced fruit and cold, salty caramel was absolutely magical. Everyone asked for the recipe, and they couldn’t believe it didn’t involve an ice cream maker.
What Ingredients You Will Need
This recipe relies on a handful of high-quality ingredients to create something truly special. The magic happens when simple components are treated with care and respect. Here is what you will need to gather:
For the Salted Caramel Sauce
- 1 cup (200g) granulated sugar: Regular white sugar works best. Do not use brown sugar here, as it contains molasses and will change the flavor and texture of the caramel.
- 6 tablespoons (85g) unsalted butter, cut into pieces: I use unsalted so I can control the salt level. Make sure it’s at room temperature so it incorporates smoothly into the hot sugar.
- 1/2 cup (120ml) heavy cream, at room temperature: This is crucial. If your cream is cold, it will seize the caramel and cause it to splatter. Let it sit out for 20 minutes before you start.
- 1 teaspoon flaky sea salt (like Maldon): Plus more for sprinkling on top. The flaky salt adds little bursts of salinity that are just incredible. You can use kosher salt, but reduce the amount to 1/2 teaspoon as it’s more concentrated.
- 1 teaspoon vanilla extract: A good quality vanilla adds warmth and depth to the caramel.
For the Ice Cream Base
- 2 cups (480ml) heavy cream, cold: Look for cream with at least 36% milk fat. This is what gives the ice cream its rich, luscious texture.
- 1 can (14 ounces or 397g) sweetened condensed milk: Do not confuse this with evaporated milk. Sweetened condensed milk is thick, sweet, and essential for the creamy no-churn texture.
- 1 teaspoon vanilla extract: I prefer pure vanilla extract over imitation, but either will work in a bind.
- Pinch of fine sea salt: This balances the sweetness of the condensed milk and the caramel.
Equipment Needed
The beauty of this recipe is that you probably already own everything you need. No fancy gadgets required, just a few basic kitchen tools.
- Medium Heavy-Bottomed Saucepan: A light-colored pan is best for making caramel because you can see the color change. A stainless steel pan is ideal. Avoid non-stick if possible, as it can make it harder to see the caramel’s true color.
- Whisk: A good, sturdy whisk for making the caramel and whipping the cream.
- Large Mixing Bowl: You need a big bowl for whipping the cream. Make sure it’s very clean and dry—any grease will prevent the cream from whipping properly.
- Hand Mixer or Stand Mixer: While you can whisk the cream by hand (I’ve done it), a hand mixer makes the job much faster and easier. A stand mixer with the whisk attachment works perfectly too.
- 9×5-Inch Loaf Pan: This is the perfect size for this recipe. You can also use a 8×8-inch square pan, but the slices will be shorter.
- Parchment Paper: Lining the pan makes it incredibly easy to lift the ice cream out for slicing and serving.
- Rubber Spatula: For folding the caramel into the cream and scraping every last bit of goodness into the pan.
Preparation Method
This recipe has a few steps, but none of them are difficult. The key is to stay organized and not rush the caramel. Let’s get started.
- Make the Salted Caramel Sauce: Place the 1 cup of granulated sugar in a medium, heavy-bottomed saucepan over medium heat. Whisk constantly as the sugar begins to melt. It will clump up at first, then slowly turn into a liquid. Keep whisking until the sugar is fully melted and turns a deep amber color—think the color of a new penny or an old copper pot. This should take about 6-8 minutes. Do not walk away. Burnt sugar happens fast.
- Add the Butter: Once the sugar is a deep amber, immediately add the 6 tablespoons of unsalted butter pieces. The mixture will bubble up vigorously, which is normal. Whisk continuously until the butter is fully melted and incorporated. The caramel will be smooth and glossy.
- Add the Cream and Salt: Slowly drizzle in the 1/2 cup of room-temperature heavy cream while whisking constantly. Again, it will bubble up. Keep whisking until the sauce is smooth and uniform. Remove from the heat and stir in the 1 teaspoon of flaky sea salt and 1 teaspoon of vanilla extract.
- Cool the Caramel: Pour the caramel into a heat-safe bowl or a glass measuring cup. Let it cool at room temperature for about 20 minutes, then transfer it to the refrigerator to chill completely. It needs to be cold when you add it to the ice cream base, or it will melt the whipped cream. You can make the caramel a day ahead of time.
- Whip the Cream: In a large, clean mixing bowl, pour in the 2 cups of cold heavy cream. Using a hand mixer or a stand mixer with the whisk attachment, beat the cream on medium-high speed until stiff peaks form. This means when you lift the beaters, the cream holds its shape and doesn’t droop. Be careful not to over-whip, or you’ll end up with butter. This should take about 3-4 minutes.
- Fold in the Condensed Milk: In a separate small bowl, whisk together the 14-ounce can of sweetened condensed milk, 1 teaspoon of vanilla extract, and a pinch of fine sea salt. Gently fold this mixture into the whipped cream using a rubber spatula. Use a light hand—you want to keep as much air in the cream as possible. Fold until just combined, with no white streaks remaining.
- Layer the Ice Cream: Line your 9×5-inch loaf pan with a sheet of parchment paper, leaving some overhang on the long sides. Spoon about one-third of the cream mixture into the pan and spread it into an even layer. Drizzle about one-third of the chilled salted caramel sauce over the top. Use a knife or a skewer to gently swirl the caramel into the cream. Repeat this process two more times, ending with a final drizzle of caramel on top.
- Freeze: Sprinkle a little extra flaky sea salt over the top of the ice cream. Cover the pan tightly with plastic wrap or aluminum foil. Place it in the freezer for at least 6 hours, but preferably overnight. The longer it freezes, the firmer and more scoopable it becomes.
Cooking Tips & Techniques
I’ve made a lot of mistakes in the kitchen, and I’m happy to share them so you don’t have to repeat them. Here are some hard-learned lessons about this recipe.
- Don’t Rush the Caramel: This is the most important tip. Low and slow is the way to go. If you turn the heat up too high, the sugar will burn before it fully melts, and you’ll have a bitter, unusable mess. Be patient. Watch the color, not the clock. The moment it hits that deep amber, move fast.
- Room Temperature Ingredients Matter: I cannot stress this enough. When you add cold cream to hot caramel, it seizes up and can form hard lumps. Let your cream and butter sit out for 20-30 minutes before you start. It makes for a silky, smooth sauce every time.
- Chill the Caramel Completely: Warm caramel will melt your beautifully whipped cream into a puddle. I learned this the hard way. Make the caramel first, then pop it in the fridge while you whip the cream. It needs to be thick and cold, almost like a spreadable paste.
- Don’t Over-Whip the Cream: You want stiff peaks, but stop the second you get there. If you keep beating, the cream will separate and turn into butter and buttermilk. You’ll know you’ve over-whipped if it looks grainy and lumpy. If that happens, sadly, you have to start over.
- Use a Light Hand When Folding: The goal is to incorporate the condensed milk and caramel without deflating the cream. Use a gentle, sweeping motion with your spatula. Fold from the bottom of the bowl up and over, rotating the bowl as you go. Stop when everything is just combined.
Variations & Adaptations
This recipe is a fantastic canvas for creativity. Once you master the base, the possibilities are endless. Here are a few of my favorite variations I have tested in my own kitchen.
- Chocolate Salted Caramel: Add 1/2 cup of unsweetened cocoa powder to the sweetened condensed milk before folding it into the whipped cream. You may need to whisk it vigorously to get it smooth. The bitter chocolate pairs beautifully with the salty caramel.
- Toasted Pecan & Bourbon: Toast 1 cup of pecan halves in a dry skillet over medium heat until fragrant, about 3-4 minutes. Let them cool, then chop roughly. Add 2 tablespoons of good bourbon to the caramel sauce after you take it off the heat. Fold the pecans into the ice cream base along with the caramel.
- Dairy-Free Version: You can make this recipe dairy-free by using full-fat canned coconut cream (chilled overnight) instead of heavy cream. Use a dairy-free sweetened condensed coconut milk (like Nature’s Charm brand). The texture will be slightly different—a bit more icy—but still incredibly delicious. Make sure your caramel is dairy-free by using vegan butter and coconut cream.
- Espresso Salted Caramel: Dissolve 1 tablespoon of instant espresso powder in 1 tablespoon of hot water and let it cool. Add this to the caramel sauce along with the vanilla. The coffee flavor enhances the caramel’s depth without overpowering it.
Serving & Storage Suggestions
This ice cream is best served straight from the freezer, but it needs a few minutes at room temperature to soften slightly for the perfect scoopable texture.
- Serving: Let the ice cream sit at room temperature for about 5-10 minutes before scooping. This allows it to soften just enough to scoop easily without being meltingly soft. Serve in chilled bowls for the best experience. A sprinkle of flaky sea salt on top right before serving is a must—it adds that final pop of salty goodness.
- Pairings: This ice cream is incredible on its own, but it also shines as a topping for warm desserts. Try it on a slice of warm small batch banana bread or alongside a warm cinnamon apple crisp. The hot-cold contrast is pure magic. It also makes a fantastic affogato—just pour a shot of hot espresso over a scoop of the ice cream.
- Storage: Store the ice cream in the loaf pan, tightly covered with plastic wrap and then a layer of aluminum foil. It will keep well for up to two weeks in the freezer. After that, it may start to develop ice crystals, but it will still be perfectly safe to eat.
- Reheating the Caramel: If you have leftover caramel sauce (which is a good problem to have), you can store it in an airtight jar in the refrigerator for up to two weeks. To reheat, place the jar in a bowl of warm water or microwave it in 10-second bursts, stirring in between, until it’s pourable again.
Nutritional Information & Benefits
Let’s be honest—this is a treat. It’s not health food, and it’s not pretending to be. But knowing what’s in it can help you enjoy it mindfully.
Per serving (based on 8 servings): Approximately 420 calories, 28g fat, 38g carbohydrates, 4g protein, 180mg sodium. Please note that these are estimates and can vary based on the specific brands of ingredients you use.
The heavy cream provides a good source of vitamin A and healthy fats, which help keep you full and satisfied. The salt in the caramel is flaky sea salt, which contains trace minerals like magnesium and potassium. But honestly, the main benefit here is the pure, unadulterated joy of eating something homemade. You control the ingredients, you know there are no weird preservatives or artificial flavors, and you get the satisfaction of having made it yourself.
For a lighter option, you can use a lower-fat sweetened condensed milk, but I will warn you that the texture will not be as luxuriously creamy. Sometimes, you just have to go all in.
Conclusion
This creamy no-churn salted caramel ice cream is one of those recipes that feels like a secret weapon. It looks and tastes like you spent hours slaving over a complicated machine, but the reality is that it comes together with simple ingredients and a little bit of patience. The caramel is deeply flavorful, the texture is silky and smooth, and the salt adds that perfect finishing touch that keeps you coming back for just one more bite.
I love this recipe because it proves that you don’t need expensive equipment to make something genuinely spectacular. It’s a reminder that the best things in life are often the simplest—a little sugar, some cream, a bit of salt, and a whole lot of love. I hope you make this for yourself, for your family, or for a dinner party where you want to impress without the stress.
If you try this recipe, I would love to hear about it. Leave a comment below and let me know how it turned out. Did you add any fun mix-ins? Did you serve it with something special? Your stories and adaptations are what make this community so wonderful. Happy freezing, friends!
Frequently Asked Questions
Can I use store-bought caramel sauce instead of making it from scratch?
You can, but I really wouldn’t recommend it. Homemade caramel has a depth of flavor that store-bought stuff just cannot replicate. The process of browning the sugar creates complex, toasty notes that are essential to this recipe. Plus, store-bought caramel is often much thinner and contains preservatives that can affect the texture of the ice cream.
Why did my caramel turn into a hard, crystallized mess?
This usually happens for one of two reasons. Either you stirred the sugar too aggressively while it was melting, which introduced air and caused crystallization, or a grain of undissolved sugar splashed onto the side of the pan and fell back in. To avoid this, use a clean, dry whisk and try to stir gently. You can also brush down the sides of the pan with a wet pastry brush to prevent crystals from forming.
My ice cream is icy and not creamy. What went wrong?
The most common culprit is not whipping the cream enough. You need stiff peaks to incorporate enough air into the base, which creates a light, creamy texture. If the cream is under-whipped, the ice cream will be dense and icy. Another possibility is that your caramel was too warm when you added it, which melted the whipped cream and deflated all the air.
How long does this ice cream need to freeze before I can eat it?
I recommend at least 6 hours, but overnight is truly best. The ice cream needs time to freeze solidly throughout. If you try to scoop it too early, it will be soft and slushy. For the perfect scoopable texture, let it freeze for a full 8-12 hours.
Can I double this recipe?
Absolutely! This recipe doubles beautifully. Just make sure you have a large enough bowl to whip the cream. You can also use a 9×13-inch baking dish instead of a loaf pan. The freezing time may be slightly shorter since the ice cream will be in a thinner layer, so check it after about 4-5 hours.
Pin This Recipe!

Creamy No-Churn Salted Caramel Ice Cream: Easy Homemade Recipe
- Total Time: 6 hours 30 minutes (including freezing time)
- Yield: 8 servings 1x
Description
This creamy no-churn salted caramel ice cream is made without an ice cream maker, using just a whisk and a loaf pan. It features a deeply browned homemade caramel with flaky sea salt, creating a silky, scoopable texture with perfect ribbons of salted caramel.
Ingredients
- 1 cup (200g) granulated sugar
- 6 tablespoons (85g) unsalted butter, cut into pieces, at room temperature
- 1/2 cup (120ml) heavy cream, at room temperature
- 1 teaspoon flaky sea salt (like Maldon), plus more for sprinkling
- 1 teaspoon vanilla extract
- 2 cups (480ml) heavy cream, cold
- 1 can (14 ounces or 397g) sweetened condensed milk
- 1 teaspoon vanilla extract
- Pinch of fine sea salt
Instructions
- Make the Salted Caramel Sauce: Place the 1 cup of granulated sugar in a medium, heavy-bottomed saucepan over medium heat. Whisk constantly as the sugar begins to melt. It will clump up at first, then slowly turn into a liquid. Keep whisking until the sugar is fully melted and turns a deep amber color—think the color of a new penny or an old copper pot. This should take about 6-8 minutes. Do not walk away. Burnt sugar happens fast.
- Add the Butter: Once the sugar is a deep amber, immediately add the 6 tablespoons of unsalted butter pieces. The mixture will bubble up vigorously, which is normal. Whisk continuously until the butter is fully melted and incorporated. The caramel will be smooth and glossy.
- Add the Cream and Salt: Slowly drizzle in the 1/2 cup of room-temperature heavy cream while whisking constantly. Again, it will bubble up. Keep whisking until the sauce is smooth and uniform. Remove from the heat and stir in the 1 teaspoon of flaky sea salt and 1 teaspoon of vanilla extract.
- Cool the Caramel: Pour the caramel into a heat-safe bowl or a glass measuring cup. Let it cool at room temperature for about 20 minutes, then transfer it to the refrigerator to chill completely. It needs to be cold when you add it to the ice cream base, or it will melt the whipped cream. You can make the caramel a day ahead of time.
- Whip the Cream: In a large, clean mixing bowl, pour in the 2 cups of cold heavy cream. Using a hand mixer or a stand mixer with the whisk attachment, beat the cream on medium-high speed until stiff peaks form. This means when you lift the beaters, the cream holds its shape and doesn’t droop. Be careful not to over-whip, or you’ll end up with butter. This should take about 3-4 minutes.
- Fold in the Condensed Milk: In a separate small bowl, whisk together the 14-ounce can of sweetened condensed milk, 1 teaspoon of vanilla extract, and a pinch of fine sea salt. Gently fold this mixture into the whipped cream using a rubber spatula. Use a light hand—you want to keep as much air in the cream as possible. Fold until just combined, with no white streaks remaining.
- Layer the Ice Cream: Line your 9×5-inch loaf pan with a sheet of parchment paper, leaving some overhang on the long sides. Spoon about one-third of the cream mixture into the pan and spread it into an even layer. Drizzle about one-third of the chilled salted caramel sauce over the top. Use a knife or a skewer to gently swirl the caramel into the cream. Repeat this process two more times, ending with a final drizzle of caramel on top.
- Freeze: Sprinkle a little extra flaky sea salt over the top of the ice cream. Cover the pan tightly with plastic wrap or aluminum foil. Place it in the freezer for at least 6 hours, but preferably overnight. The longer it freezes, the firmer and more scoopable it becomes.
Notes
Don’t rush the caramel; watch the color, not the clock. Use room temperature ingredients for the caramel to prevent seizing. Chill the caramel completely before adding to the whipped cream. Don’t over-whip the cream; stop at stiff peaks. Use a light hand when folding to keep air in the cream. Let ice cream sit at room temperature for 5-10 minutes before scooping for best texture.
- Prep Time: 20 minutes
- Cook Time: 10 minutes
- Category: Dessert
- Cuisine: American
Nutrition
- Serving Size: 1 serving (based on
- Calories: 420
- Sodium: 180
- Fat: 28
- Carbohydrates: 38
- Protein: 4
Keywords: no-churn ice cream, salted caramel ice cream, homemade ice cream, easy ice cream recipe, no machine ice cream