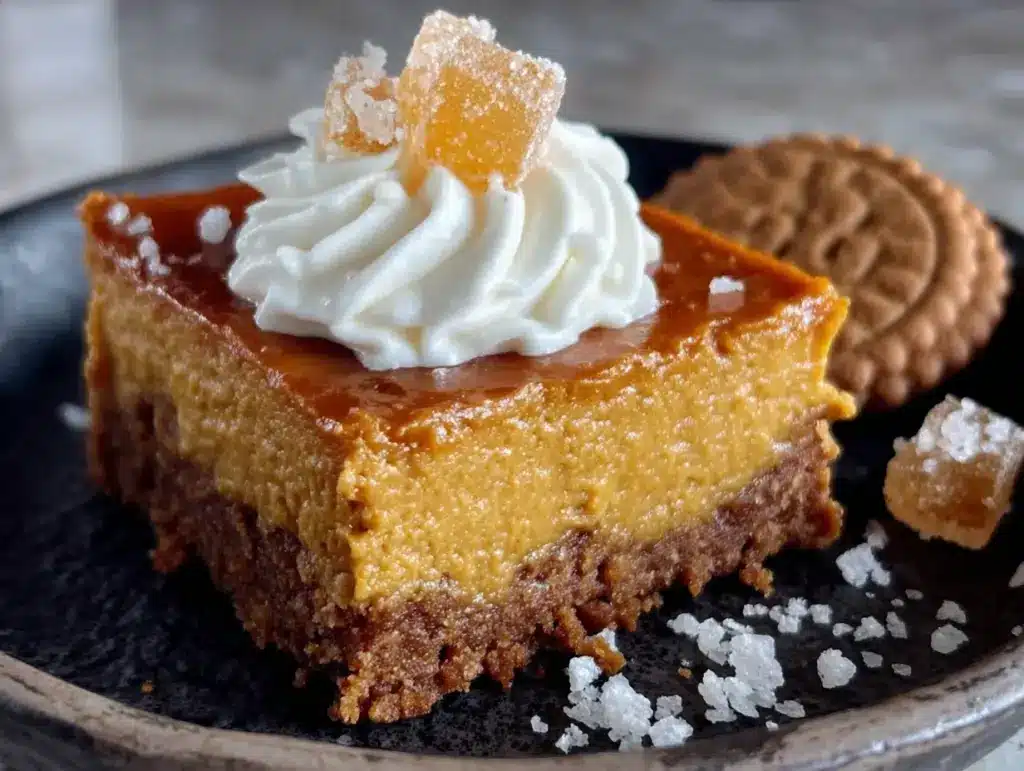
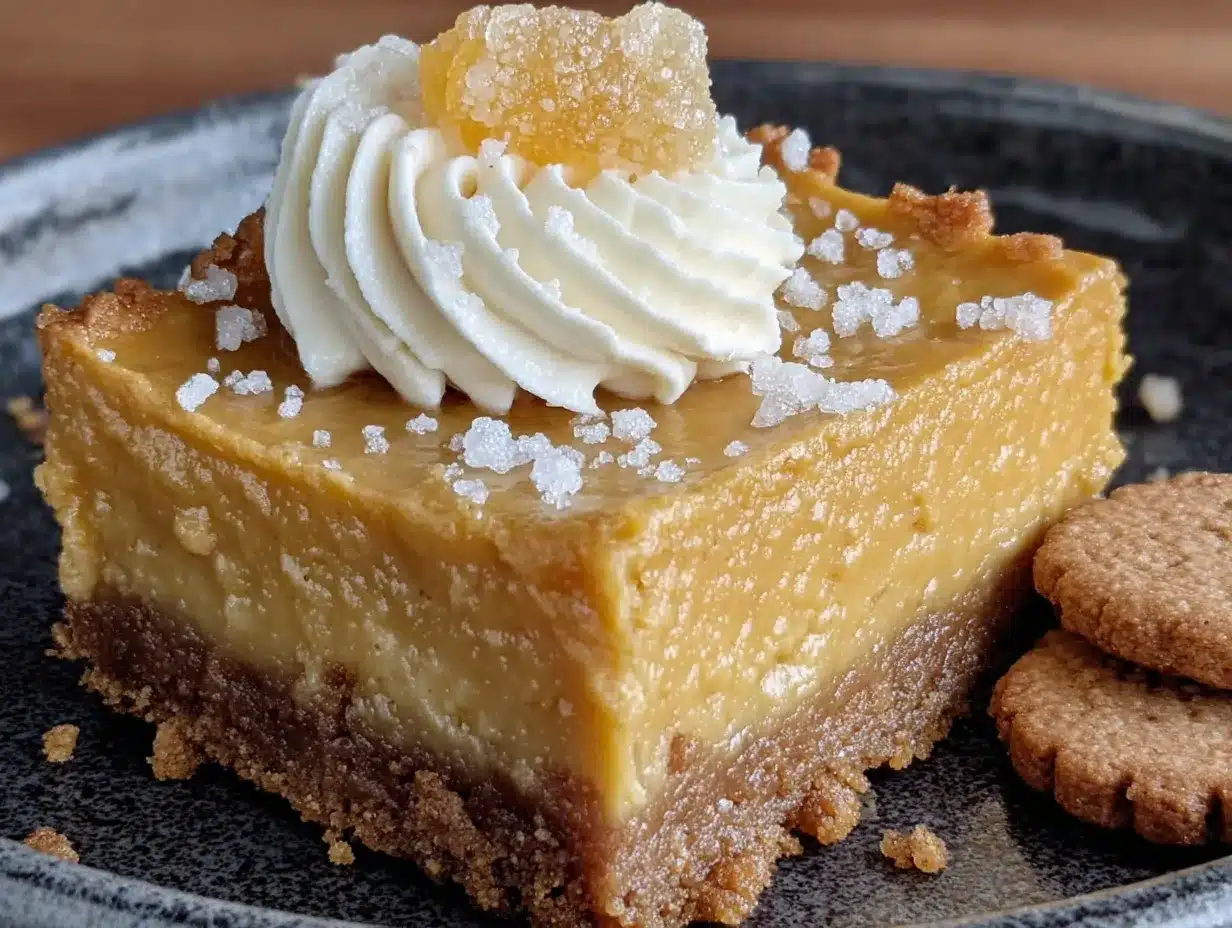
Third batch in two weeks and I finally stopped pressing the crust into the pan like I was angry at it. That was the problem, you see. I was manhandling the gingersnaps, crushing them into submission, and the bars came out tough around the edges every single time. The filling would set beautifully—silky, that deep orange against the dark crumb—but the bite would start with a crack instead of a crumble. My husband kept saying they were delicious, which is his way of telling me to calm down without actually saying it.
I wanted these to taste like the ones from that little bakery near my old apartment, the one that closed during the pandemic. They had a pumpkin cheesecake bar that was impossible to forget—creamy but not heavy, spiced just enough to feel like fall without punching you in the face with cinnamon. The crust was always tender, almost sandy, and it held together without feeling like a brick. I chased that texture for weeks. I tried different ratios of butter to crumbs. I tried baking the crust first, then adding the filling. I tried chilling the whole thing overnight and slicing it cold. And somewhere around batch number four, I stopped trying so hard. That’s when it finally worked.
The trick, I realized, was treating the crust like a partner instead of a foundation. You don’t pack it down like you’re building a house. You press it gently, evenly, and let the butter do its job. The filling is straightforward—cream cheese, pumpkin, sugar, eggs, warm spices—but the balance matters more than you’d think. Too much pumpkin and it gets wet. Too much sugar and it hides the squash. I landed on a ratio that lets the pumpkin taste like itself, with the spices and cream cheese playing backup. The gingersnap crust adds that little bite of molasses and ginger that makes the whole thing feel like a proper fall dessert, not just another pumpkin recipe.
These bars have become my go-to for everything this season. Potlucks, Friendsgiving, Tuesday nights when I need something sweet but not complicated. They slice clean, they travel well, and they actually get better after a day in the fridge. I don’t stress about the crust anymore. I just press it gently, pour the filling, and trust the process. That’s the version I’m sharing with you today.
Why You’ll Love This Recipe
I’ve tested this recipe more times than I care to admit, and every round taught me something. Here’s why I think it’s the one you’ll come back to:
- Simple Ingredients – No weird extracts, no obscure flours. Cream cheese, pumpkin puree, eggs, sugar, and a box of store-bought gingersnaps. That’s it.
- No Water Bath – I hate water baths. They leak, they’re fussy, and they take forever. This recipe doesn’t need one. The bars set perfectly in a regular oven.
- Crust That Actually Works – The gingersnap crust is forgiving, flavorful, and stays tender without falling apart. No pre-baking required.
- Perfect for Make-Ahead – These bars taste better on day two. The flavors meld, the texture firms up, and slicing gets even cleaner.
- Crowd-Pleaser – I’ve brought these to four different gatherings this fall and never brought a single piece home. Not one.
What makes these different from other pumpkin cheesecake bars? It’s the crust-to-filling ratio, honestly. Most recipes give you a thin layer of crust and a mountain of filling. I wanted equal presence—enough crust to taste it in every bite, enough filling to feel decadent without being overwhelming. The gingersnaps bring warmth that complements the pumpkin without competing. And the texture? It’s creamy but sliceable, rich but not heavy. The kind of dessert where you take one bite and just stop talking for a second.
This is comfort food that feels special without the stress. It’s the dessert you make when you want to impress people but also want to enjoy your own party. No water bath, no fuss, no drama. Just really good pumpkin cheesecake bars.
What Ingredients You Will Need
This recipe uses straightforward ingredients, but a few details make a real difference. Here’s what you’ll need and why each one matters.
For the Gingersnap Crust
- 2 cups (about 200g) gingersnap cookie crumbs – I use store-bought gingersnaps from the bakery section. Nabisco works fine, but look for ones with visible ginger pieces if you can. Pulse them in a food processor or crush them in a zip-top bag with a rolling pin. You want fine crumbs, not chunks.
- 5 tablespoons (70g) unsalted butter, melted – Salted butter works in a pinch, but unsalted lets you control the salt level. Brown butter adds incredible depth here—try it once and you’ll never go back. Just watch it carefully so it doesn’t burn.
- 2 tablespoons (25g) granulated sugar – A little extra sweetness helps the crust hold together and balances the ginger’s bite.
- Pinch of salt – Only if your butter is unsalted. The gingersnaps already have some salt, so taste your crumbs first.
For the Pumpkin Cheesecake Filling
- 16 ounces (450g) cream cheese, softened – Full-fat is non-negotiable here. Low-fat cream cheese contains more water and will make your filling runny. Let it sit on the counter for at least an hour before you start. Cold cream cheese = lumpy filling.
- 1 cup (200g) granulated sugar – Regular white sugar keeps the texture light. Brown sugar adds moisture and deeper flavor if you want to experiment, but I prefer the clean sweetness of white sugar here.
- 1 cup (245g) pumpkin puree – Not pumpkin pie filling. Look for 100% pure pumpkin. Libby’s is my go-to because it’s consistently thick and not watery. If your pumpkin puree looks loose, blot it with paper towels before using.
- 3 large eggs, room temperature – Cold eggs will seize the cream cheese and create a grainy texture. Set them out with the cream cheese or warm them in a bowl of lukewarm water for 5 minutes.
- 1 teaspoon vanilla extract – Pure vanilla, not imitation. It rounds out the spices beautifully.
- 1 teaspoon pumpkin pie spice – Store-bought is fine, but I make my own with cinnamon, nutmeg, ginger, cloves, and allspice. Homemade tastes brighter and you can adjust the ratios.
- 1/2 teaspoon ground cinnamon – Extra cinnamon because pumpkin and cinnamon are best friends.
- 1/4 teaspoon salt – Salt makes everything taste more like itself. Don’t skip it.
- 2 tablespoons (15g) all-purpose flour – This stabilizes the filling and prevents cracks. Cornstarch works too, but flour gives a slightly creamier texture.
One note on the gingersnaps: I’ve tested this with gluten-free gingersnaps and it works beautifully. Just check that your crumbs measure the same volume. And if you’re feeling ambitious, homemade gingersnaps take this crust to another level—but honestly, the store-bought version is so good that I rarely bother.
Equipment Needed
You don’t need much for these bars, which is part of why I love them. Here’s what you’ll want:
- 9×9-inch baking pan – Glass, ceramic, or metal all work. Metal gives slightly crisper edges. If you only have an 8×8 pan, the bars will be thicker and need about 5 extra minutes of baking time.
- Parchment paper – Cut two strips long enough to overhang on opposite sides. This creates a sling that lets you lift the entire block of bars out cleanly. No scraping, no broken edges.
- Food processor or zip-top bag – For crushing the gingersnaps. A food processor gives the most consistent crumbs, but a bag and rolling pin work perfectly fine. Just make sure no large chunks remain.
- Electric hand mixer or stand mixer – You can mix the filling by hand with a whisk, but it takes elbow grease and you risk overmixing. A hand mixer on low speed gives you smooth filling without incorporating too much air.
- Large mixing bowls – One for the crust, one for the filling. Nothing fancy.
- Rubber spatula – For scraping every last bit of filling into the pan. Cream cheese is expensive. Don’t waste it.
- Measuring cups and spoons – Accurate measurements matter more in baking than any other cooking. Use the spoon-and-level method for flour and sugar.
If you don’t have a 9×9 pan, a 9-inch round springform pan works too. The bars will be slightly thicker and you’ll get wedges instead of squares. Just wrap the outside of the springform in foil in case of any leaks—though this recipe doesn’t usually weep.
Preparation Method
Let’s make these bars. The process is straightforward, but I’ll walk you through each step with the little details that make a difference.
Step 1: Prep your pan and preheat the oven.
Preheat your oven to 350°F (175°C). Cut two strips of parchment paper, each about 8 inches wide and 16 inches long. Lay one strip across the bottom of your 9×9 pan, letting the ends hang over two opposite sides. Lay the second strip perpendicular to the first, so all four sides have overhang. Press the paper into the corners. Lightly grease the parchment with butter or nonstick spray—not strictly necessary, but it gives me peace of mind.
Step 2: Make the crust.
Pulse 2 cups of gingersnap cookies in a food processor until you have fine crumbs. You should have about 200 grams. Transfer to a medium bowl. Add 2 tablespoons sugar and a pinch of salt. Pour in 5 tablespoons melted butter and stir with a fork until every crumb is moistened. The mixture should look like wet sand and hold together when you squeeze it in your fist.
Step 3: Press the crust into the pan.
Here’s where I went wrong for weeks. Dump the crumbs into your prepared pan. Use the bottom of a measuring cup or a flat-bottomed glass to press them down gently. Not hard. Not like you’re trying to compact them into a solid disc. Just even pressure until the surface is flat and the crumbs hold together. Don’t press up the sides—keep the crust as an even layer on the bottom only. Place the pan in the refrigerator while you make the filling. Chilling the crust helps it set.
Step 4: Beat the cream cheese.
In a large mixing bowl, beat 16 ounces of softened cream cheese with an electric mixer on medium speed until smooth and creamy—about 2 minutes. Scrape the bowl and the beaters well. You want zero lumps at this stage. If you see small white flecks, keep beating. Lumps now mean lumpy cheesecake later.
Step 5: Add sugar and pumpkin.
Add 1 cup granulated sugar and beat on medium-low until combined. Then add 1 cup pumpkin puree and beat again until smooth. The mixture will look pale orange and glossy. Scrape the bowl again.
Step 6: Add eggs, vanilla, and spices.
In a small bowl, whisk together 1 teaspoon pumpkin pie spice, 1/2 teaspoon cinnamon, and 1/4 teaspoon salt with 2 tablespoons flour. This prevents the spices from clumping. Add the flour mixture to the cream cheese mixture and beat on low until just combined. Add 3 room-temperature eggs one at a time, beating on low after each addition until the yolk disappears. Add 1 teaspoon vanilla extract and give it one final mix. Stop as soon as everything is combined. Overmixing at this stage incorporates too much air, which causes cracks during baking.
Step 7: Pour and spread.
Remove the crust from the refrigerator. Pour the filling over the chilled crust. Use your spatula to spread it evenly to the edges. Tap the pan gently on the counter three or four times to release any air bubbles. Don’t go crazy—you don’t want to disturb the crust.
Step 8: Bake.
Place the pan on the middle rack of your preheated oven. Bake at 350°F for 40 to 45 minutes. The edges should look set and slightly puffed, but the center should still jiggle when you gently shake the pan. That slight jiggle is what gives you a creamy, not dry, texture. If the top starts browning too quickly around minute 35, tent the pan loosely with foil.
Step 9: Cool completely.
Remove the pan from the oven and place it on a wire rack. Let it cool at room temperature for 1 hour. Then transfer to the refrigerator and chill for at least 4 hours, preferably overnight. This is the hardest part, I know. But the bars need this time to set properly. Cutting them warm results in a sad, messy puddle.
Step 10: Slice and serve.
Once fully chilled, lift the bars out of the pan using the parchment sling. Place on a cutting board. Use a sharp chef’s knife to trim the edges (optional, but gives cleaner slices). Cut into 16 squares, wiping the knife clean between cuts. For the cleanest slices, run the knife under hot water and dry it before each cut.
Cooking Tips & Techniques
I learned most of these the hard way so you don’t have to. Here’s what I wish someone had told me:
Room temperature ingredients are not optional. I know it’s annoying to wait, but cold cream cheese doesn’t blend smoothly. You’ll end up with tiny white lumps that won’t bake out. Set everything on the counter an hour before you start. Set a timer if you’re forgetful like me.
Don’t overmix the filling. Once the eggs go in, you’re just combining, not aerating. Too much air creates steam bubbles that turn into cracks. Mix on low speed and stop the second the streaks disappear.
The jiggle test is your friend. Cheesecake is done when the edges are set and the center wobbles like Jell-O, not like soup. If the whole pan ripples when you shake it, it needs more time. If nothing moves, it’s overbaked. That 2-inch center jiggle is the sweet spot.
Chill overnight for best results. Four hours is the minimum, but 8 to 12 hours transforms these bars. The texture firms up, the flavors deepen, and slicing becomes effortless. I’ve made these a day ahead for every event this fall and never regretted it.
Use a hot knife for clean cuts. Run your knife under hot water, dry it, then slice. Wipe the blade clean between each cut. This gives you those beautiful, bakery-style squares with clean edges. If you’re serving a crowd, trim the outer 1/4 inch off each side first—those edges tend to be slightly drier.
One more thing: if your crust crumbles when you slice, don’t panic. It happens. Next time, add an extra tablespoon of butter to the crumbs. And if your filling cracks on top? A dollop of whipped cream fixes everything. No one has ever complained about whipped cream on cheesecake.
Variations & Adaptations
This recipe is flexible. Here are a few ways to make it your own:
Gluten-Free Version – Use gluten-free gingersnap cookies. I’ve tested this with two different brands and both worked perfectly. The crust holds together the same way, and the filling is naturally gluten-free as long as you use gluten-free flour or cornstarch.
Dairy-Free Option – Substitute the cream cheese with a high-quality dairy-free alternative. Miyoko’s and Kite Hill work best. Use vegan butter or coconut oil for the crust. The texture will be slightly softer, so chill the bars for a full 12 hours before slicing.
Pecan Gingersnap Crust – Replace 1/2 cup of the gingersnap crumbs with finely chopped pecans. Toast the pecans first for deeper flavor. This adds a lovely crunch and pairs beautifully with the pumpkin.
Maple Pumpkin Version – Replace 1/4 cup of the granulated sugar with maple syrup. Reduce the pumpkin puree by 2 tablespoons to compensate for the extra liquid. The maple flavor comes through subtly and makes these taste like a fall candle smells.
Chocolate Swirl – Melt 4 ounces of dark chocolate and drizzle it over the filling before baking. Use a knife to swirl it gently into the top layer. The chocolate and pumpkin combination is underrated—trust me on this one.
Mini Version – Press the crust into a 12-cup muffin tin lined with paper liners. Fill each cup about 3/4 full. Bake for 18 to 22 minutes. These are perfect for parties or portion control. Just let them cool completely in the tin before removing.
I’m partial to the pecan crust variation myself. I made it for this pumpkin roll recipe last year and realized the same trick works for bars. The pecans add a little texture that makes every bite interesting.
Serving & Storage Suggestions
These bars are versatile. Here’s how I serve and store them:
Serving Temperature – I prefer them cold, straight from the fridge. The texture is firmer, the flavors are cleaner, and they slice like a dream. If you like a softer cheesecake, let them sit at room temperature for 15 minutes before serving. Either way works—it’s a personal preference thing.
Presentation – A dollop of lightly sweetened whipped cream and a dusting of cinnamon makes these look fancy with zero effort. For holidays, I add a few candied pecans or a drizzle of caramel sauce. They’re beautiful on a platter with pumpkin snickerdoodle cookies for a full fall dessert spread.
What to Serve Alongside – These bars pair beautifully with hot coffee, spiced cider, or a spiked apple cider margarita if you’re feeling festive. For a cozy night in, I serve them with a cup of chai tea and call it dessert.
Refrigerator Storage – Store bars in an airtight container in the refrigerator for up to 5 days. Layer them between sheets of parchment paper so they don’t stick together. The texture actually improves after 24 hours as the flavors meld.
Freezer Storage – These freeze beautifully. Place the fully cooled and sliced bars on a baking sheet and freeze for 1 hour. Transfer the frozen bars to a freezer-safe container with parchment between layers. They keep for up to 3 months. Thaw overnight in the refrigerator before serving. Do not thaw at room temperature—they get weepy.
Reheating – I don’t recommend reheating these. They’re meant to be served cold or at room temperature. If you absolutely want a warm dessert, microwave a single bar for 10 seconds. It softens the cream cheese without melting it entirely.
Nutritional Information & Benefits
Let’s be honest: these are a treat, not a health food. But here’s the breakdown so you know what you’re working with, based on 16 servings:
- Calories: Approximately 285 per bar
- Fat: 17g
- Carbohydrates: 30g
- Protein: 5g
- Fiber: 1g
- Sugar: 22g
Pumpkin puree is a solid source of vitamin A and fiber, and cream cheese provides a small amount of calcium and protein. The gingersnaps add a touch of molasses, which contains iron and antioxidants. Is it a superfood? No. But it’s a dessert made with real ingredients, and that counts for something.
If you’re watching your sugar intake, you can reduce the sugar to 3/4 cup without major texture changes. The bars will be slightly less sweet but still delicious. For a lower-fat option, use Neufchâtel cheese instead of full-fat cream cheese. The texture will be slightly less creamy but still very good.
One bar is plenty for a serving. Two is a great way to end a rough Tuesday. I don’t judge.
Conclusion
These pumpkin cheesecake bars with gingersnap crust have become my signature fall dessert, and I didn’t plan it that way. It just happened because they’re easy enough for a Tuesday night but impressive enough for Thanksgiving. The crust is forgiving, the filling is foolproof, and the whole thing comes together without any special equipment or techniques.
What I love most about this recipe is how adaptable it is. You can dress it up with caramel and pecans, keep it simple with just a dusting of cinnamon, or play around with different crusts and swirls. It works for a crowd, it works for a quiet night, and it works for that moment when you just need something sweet and pumpkin-spiced in your life.
I’d love to hear how these turn out for you. Did you try the pecan crust? Swirl in some chocolate? Serve them with apple crisp for a double-dessert situation? Drop a comment below and let me know. And if you make them for a gathering, tag me in your photos—I genuinely get excited seeing these bars in other people’s kitchens.
Go make some. Your fall needs these.
Frequently Asked Questions
Can I use a different crust instead of gingersnaps?
Absolutely. Graham crackers work well, though the flavor will be milder. Shortbread cookies or vanilla wafers also work. Just keep the crumb-to-butter ratio the same. The gingersnaps add that warm, spicy kick that complements the pumpkin, but any cookie crust will be delicious.
Why did my cheesecake filling crack?
Cracks usually happen from overmixing or overbaking. Mix on low speed once the eggs are in, and stop as soon as everything is combined. Pull the bars out of the oven when the center still jiggles slightly. If cracks do appear, don’t stress—a layer of whipped cream hides everything.
Can I make these bars vegan?
Yes, with some adjustments. Use dairy-free cream cheese and vegan butter. Replace the eggs with a flax egg (1 tablespoon ground flaxseed mixed with 3 tablespoons water per egg) or use a commercial egg replacer. The texture will be slightly softer, so chill the bars for at least 8 hours before slicing.
How do I know when the bars are done baking?
The edges should look set and slightly puffed, and the center should jiggle like firm Jell-O when you gently shake the pan. If the entire surface ripples, it needs more time. If nothing moves, it’s overbaked. That gentle center wobble is your signal to pull them out.
Can I double this recipe for a 9×13 pan?
Yes. Double all ingredients and use a 9×13 baking pan. The baking time will increase to about 50 to 55 minutes. Use the same jiggle test to determine doneness. You’ll get about 24 bars from a doubled batch—perfect for a crowd.
Pin This Recipe!
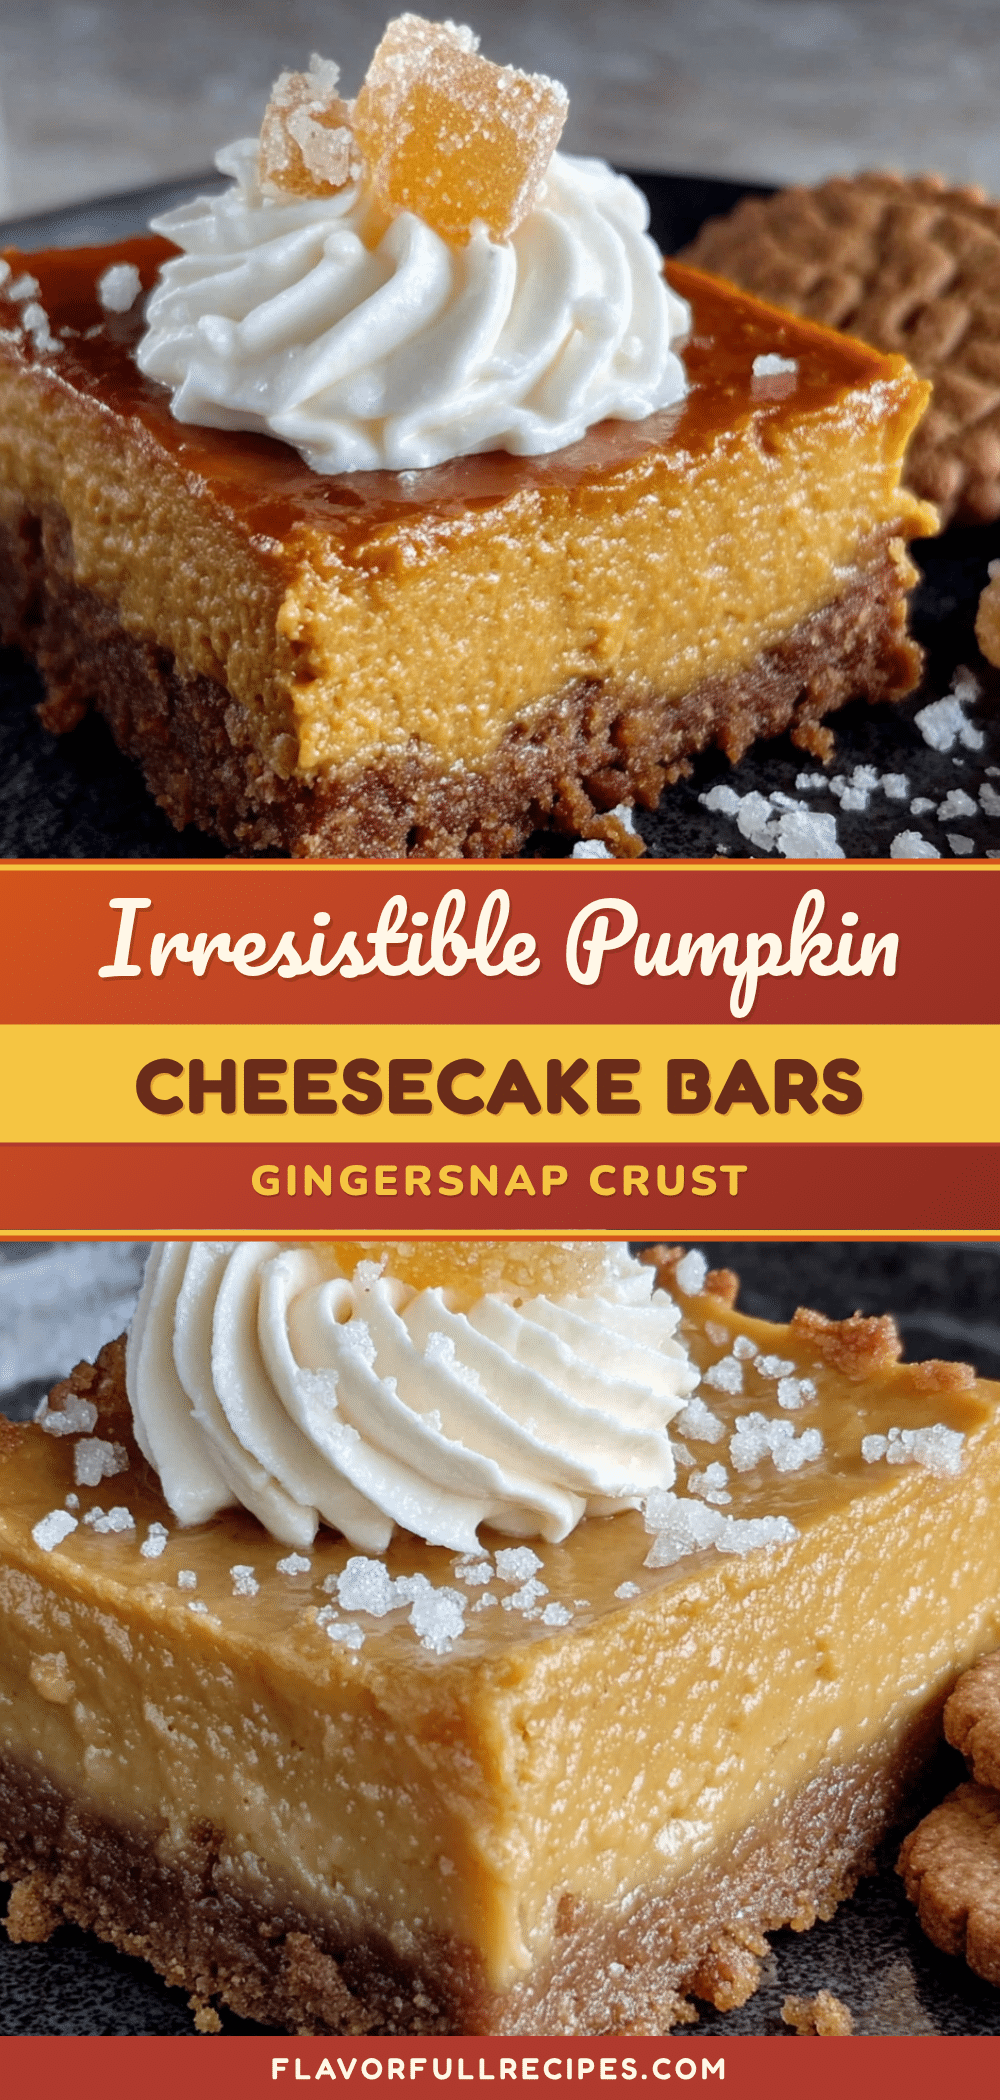
Perfect Pumpkin Cheesecake Bars with Gingersnap Crust
- Total Time: 5 hours 5 minutes (includes chilling)
- Yield: 16 servings 1x
Description
These pumpkin cheesecake bars feature a tender gingersnap crust and a creamy, spiced pumpkin filling. No water bath required, and they taste even better the next day.
Ingredients
- 2 cups (about 200g) gingersnap cookie crumbs
- 5 tablespoons (70g) unsalted butter, melted
- 2 tablespoons (25g) granulated sugar
- Pinch of salt (if using unsalted butter)
- 16 ounces (450g) cream cheese, softened
- 1 cup (200g) granulated sugar
- 1 cup (245g) pumpkin puree (not pumpkin pie filling)
- 3 large eggs, room temperature
- 1 teaspoon vanilla extract
- 1 teaspoon pumpkin pie spice
- 1/2 teaspoon ground cinnamon
- 1/4 teaspoon salt
- 2 tablespoons (15g) all-purpose flour
Instructions
- Preheat oven to 350°F (175°C). Line a 9×9-inch baking pan with parchment paper, leaving overhang on all sides. Lightly grease the parchment.
- Make the crust: Pulse gingersnap cookies in a food processor until fine crumbs form. Transfer to a bowl and stir in 2 tablespoons sugar and a pinch of salt. Pour in melted butter and stir until all crumbs are moistened.
- Press the crust mixture gently into the prepared pan using the bottom of a measuring cup. Do not pack too firmly. Refrigerate while making the filling.
- In a large bowl, beat softened cream cheese with an electric mixer on medium speed until smooth, about 2 minutes. Scrape bowl and beaters.
- Add 1 cup sugar and beat on medium-low until combined. Add pumpkin puree and beat until smooth. Scrape bowl again.
- In a small bowl, whisk together pumpkin pie spice, cinnamon, salt, and flour. Add to cream cheese mixture and beat on low until just combined.
- Add eggs one at a time, beating on low after each addition until yolk disappears. Add vanilla and mix until just combined. Do not overmix.
- Remove crust from refrigerator. Pour filling over crust and spread evenly. Tap pan gently on counter to release air bubbles.
- Bake for 40 to 45 minutes, until edges are set and center jiggles slightly when shaken. Tent with foil if top browns too quickly.
- Cool on a wire rack for 1 hour, then refrigerate for at least 4 hours, preferably overnight.
- Lift bars out using parchment sling. Trim edges if desired. Cut into 16 squares, wiping knife clean between cuts.
Notes
Room temperature ingredients are essential for a smooth filling. Do not overmix once eggs are added. Chill overnight for best texture and flavor. Use a hot knife for clean slices.
- Prep Time: 20 minutes
- Cook Time: 45 minutes
- Category: Dessert
- Cuisine: American
Nutrition
- Serving Size: 1 bar
- Calories: 285
- Sugar: 22
- Sodium: 220
- Fat: 17
- Saturated Fat: 10
- Carbohydrates: 30
- Fiber: 1
- Protein: 5
Keywords: pumpkin cheesecake bars, gingersnap crust, fall dessert, pumpkin dessert, cheesecake bars