
Sunday evening, around six o’clock, and the only thing I want is a kitchen that won’t talk back to me. The week ahead is already written on sticky notes all over my desk — meetings, school drop-offs, that thing I keep rescheduling. I need food that will show up for me without asking for anything in return. That’s when I reach for the air fryer basket and a couple of chicken breasts from the fridge. Not because I’m some meal prep guru, honestly, I’m the opposite. I’m the person who forgets to thaw the chicken until it’s too late. But this recipe? It’s the one that finally made meal prep stick for me, not as a chore but as a quiet act of kindness toward my future self.
There’s something about the air fryer that makes chicken taste like you tried harder than you actually did. The outside gets this golden, slightly crisp edge while the inside stays tender and juicy — no dry, sad chicken here. I’ve tried every method in the book over the years, from stovetop searing to slow cooking, but this one wins for sheer consistency. It works whether you’re prepping for a week of lunches or just trying to get dinner on the table without a mess. And honestly, the less cleanup the better, right?
This recipe became my anchor on those weeks when everything feels a little chaotic. It’s not fancy, and it doesn’t try to be. It just works. And that, to me, is the best kind of recipe there is. The kind you can rely on without thinking too hard. Let’s get into it.
Why You’ll Love This Recipe
I’ve tested this recipe more times than I can count, tweaking temperatures and timing until it was just right. What I found is that the air fryer does something special to chicken breast — it locks in moisture while creating that slightly crisp exterior you usually only get from pan-frying. No flipping, no splattering oil, no babysitting the stove. You just season, set, and walk away.
- Quick & Easy: From fridge to plate in under 20 minutes. That’s faster than delivery.
- Simple Ingredients: You probably have everything in your pantry right now. No weird spices or hard-to-find oils.
- Perfect for Meal Prep: Make a batch on Sunday and you’ve got protein ready for salads, bowls, wraps, or quick dinners all week.
- Crowd-Pleaser: My kids actually ask for this chicken. That never happened with the oven-baked version.
- Unbelievably Juicy: The air fryer circulates hot air so evenly that the chicken stays moist inside while getting that nice golden outside.
What makes this recipe different from the countless others out there is the technique. I’m not just throwing seasoned chicken into the basket and hoping for the best. There’s a method to how you arrange the pieces, how you season them, and how you store them afterward. I learned through trial and error (and a few rubbery batches) that a little attention to detail goes a long way. This isn’t just another air fryer chicken recipe — it’s the one I keep coming back to, week after week.
This is the kind of recipe that makes you feel like you’ve got your life together, even when you don’t. It’s reliable, forgiving, and genuinely delicious. That first bite after a long day? Worth every minute of prep.
What Ingredients You Will Need
This recipe uses simple, everyday ingredients to deliver big flavor without the fuss. You don’t need a specialty grocery run or a dozen different spices. Just a handful of staples that work together beautifully.
- Boneless, skinless chicken breasts (4 pieces, about 1.5 lbs or 680g total): Look for breasts that are similar in thickness so they cook evenly. If some are thicker, you can butterfly them or pound them gently to an even thickness. I prefer organic when possible, but conventional works just fine.
- Olive oil (2 tablespoons, 30ml): Helps the seasoning stick and promotes that golden crust. Avocado oil works too if that’s what you have.
- Garlic powder (1 teaspoon): Adds savory depth without burning in the air fryer like fresh garlic sometimes does.
- Onion powder (1 teaspoon): Rounds out the flavor profile. Don’t skip it — it makes a difference.
- Smoked paprika (1 teaspoon): My secret weapon. It adds a subtle smokiness that makes the chicken taste like it spent hours on the grill. I recommend the Simply Organic brand for the best flavor.
- Salt (1 teaspoon): Use fine sea salt for even distribution. Kosher salt works too, but you might need a bit more.
- Black pepper (½ teaspoon): Freshly ground is always better, but pre-ground works in a pinch.
- Dried oregano (½ teaspoon): Optional, but adds a lovely herbaceous note that pairs well with most cuisines.
- Lemon juice (1 tablespoon, 15ml): Brightens everything up. I add this after cooking to keep the chicken from getting soggy.
For the meal prep bowls, you’ll also want:
- Cooked rice or quinoa (2 cups, about 300g): Brown rice, white rice, or quinoa all work. I usually go with jasmine rice for the texture.
- Steamed or roasted vegetables (2 cups, about 300g): Broccoli, bell peppers, zucchini, or green beans are my go-tos. Whatever you have in the fridge works.
- Optional toppings: A sprinkle of sesame seeds, fresh herbs, or a drizzle of your favorite sauce.
Substitution guidance: Need a gluten-free option? This recipe already is. Dairy-free? Absolutely. Low-carb? Skip the rice and double up on veggies. The seasoning blend is endlessly adaptable — try adding cumin and chili powder for a Tex-Mex vibe, or Italian seasoning for a Mediterranean twist.
Equipment Needed
You don’t need a fully stocked kitchen to make this work. Here’s what you’ll actually use:
- Air fryer (any size): I use a 5.8-quart model, but smaller ones work fine — just cook in batches so you don’t overcrowd the basket. Overcrowding is the number one mistake people make, and it leads to steamed, not crispy, chicken.
- Meat thermometer: This is non-negotiable if you want perfectly cooked chicken every time. The ThermoPro digital instant-read thermometer is my favorite — it’s affordable and accurate. Chicken breast should reach 165°F (74°C) internally.
- Tongs: For flipping the chicken halfway through. Silicone-tipped ones won’t scratch your air fryer basket.
- Cutting board and sharp knife: For slicing the cooked chicken. A dull knife will shred the meat instead of cutting cleanly.
- Mixing bowl: For tossing the chicken with oil and seasonings.
- Meal prep containers (4-5): Glass or BPA-free plastic with tight-fitting lids. I like glass because it doesn’t stain or hold odors.
If you don’t have a meat thermometer yet, honestly, just get one. It’s a game-changer for poultry. I ruined so many chicken breasts before I finally bought one, thinking I could tell by look or feel. Spoiler: I couldn’t.
Preparation Method
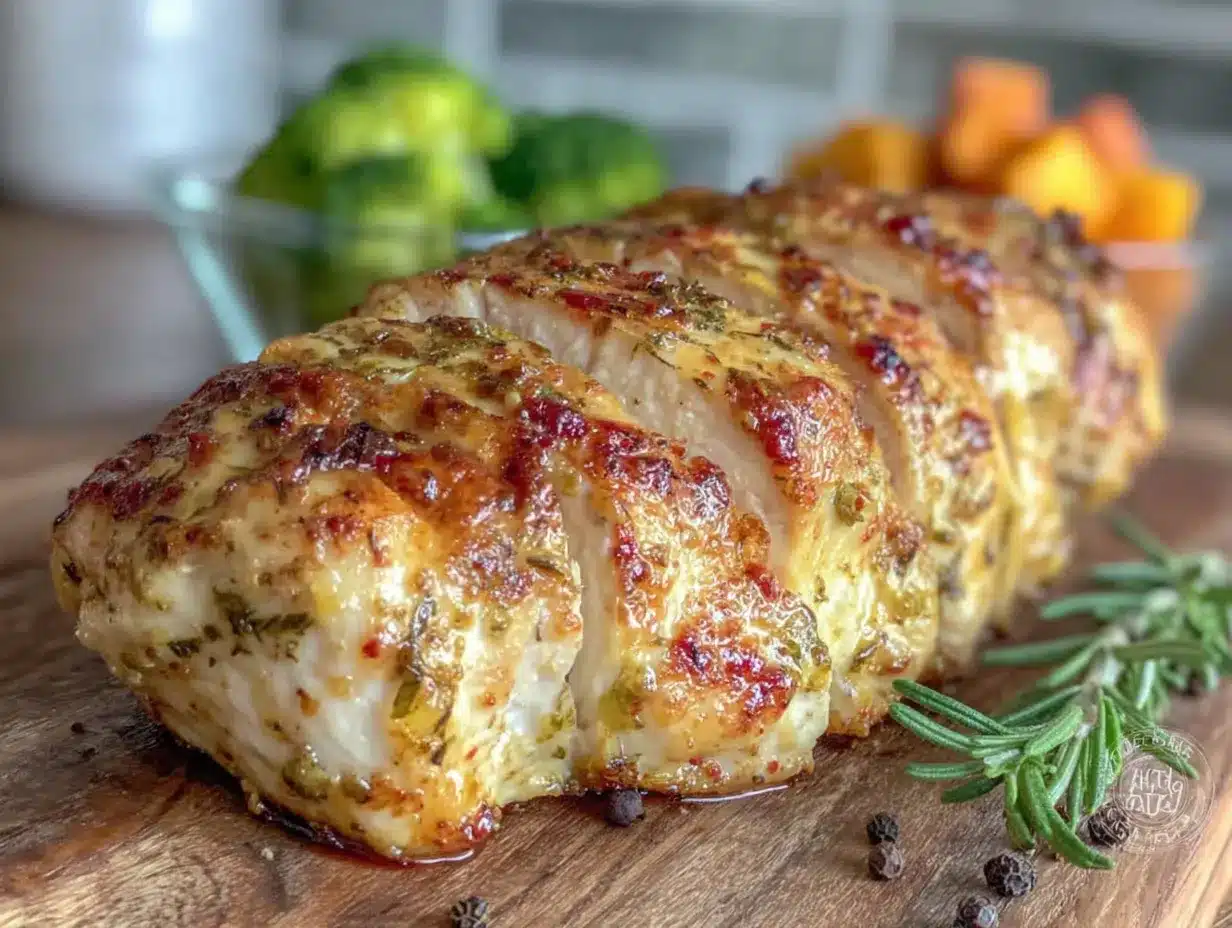
Let’s walk through this step by step. I’ll include all the little details I wish someone had told me when I started.
- Prep the chicken (5 minutes): Pat the chicken breasts dry with paper towels. This is crucial — excess moisture creates steam, and steam prevents browning. If any pieces are noticeably thicker than others, place them between two sheets of plastic wrap and gently pound them to about ¾ inch thickness with a rolling pin or heavy pan. You want even pieces for even cooking.
- Season the chicken (3 minutes): In a large mixing bowl, combine the olive oil, garlic powder, onion powder, smoked paprika, salt, pepper, and oregano if using. Add the chicken breasts and toss until every piece is well coated. Use your hands to massage the seasoning in — it’s the best way to make sure it sticks. Let it sit at room temperature for 10 minutes while your air fryer preheats. (Don’t skip the resting time; cold chicken straight from the fridge cooks unevenly.)
- Preheat the air fryer (3 minutes): Set your air fryer to 375°F (190°C) and let it preheat for about 3 minutes. Preheating gives you that immediate sizzle when the chicken hits the basket, which helps create a nice crust.
- Arrange the chicken (2 minutes): Place the seasoned chicken breasts in the air fryer basket in a single layer. Make sure they’re not touching or overlapping — leave a little space between each piece for air to circulate. If your air fryer is small, cook in batches. It’s better to take an extra 10 minutes than to end up with steamed chicken.
- Air fry (12-15 minutes): Cook at 375°F (190°C) for 6 minutes, then flip each piece with tongs and cook for another 6-9 minutes. The total time depends on the thickness of your chicken. At the 12-minute mark, start checking the internal temperature with your meat thermometer. Insert it into the thickest part of the breast. You’re looking for 165°F (74°C). If it’s not there yet, cook in 1-minute increments and check again.
- Rest the chicken (5 minutes): This is so important. Transfer the cooked chicken to a cutting board and let it rest for at least 5 minutes before slicing. Resting allows the juices to redistribute throughout the meat. If you slice right away, all those juices run out onto the board, and you’re left with dry chicken. I learned this the hard way more times than I’d like to admit.
- Slice and portion (5 minutes): Slice the chicken against the grain into even strips or cubes, depending on how you plan to use it. Against the grain means cutting perpendicular to the natural lines of the muscle fibers. This makes each bite more tender. If you’re not sure which direction the grain runs, look for the faint lines running along the surface — cut across those.
- Assemble your meal prep bowls (10 minutes): Divide your cooked rice or quinoa evenly among 4-5 containers. Add a portion of steamed or roasted vegetables to each. Top with the sliced chicken. Drizzle a little fresh lemon juice over the chicken for brightness. Seal the containers and refrigerate.
A note on timing: The whole process takes about 35 minutes from start to finish, including resting time. Most of that is hands-off while the air fryer does the work. Perfect for a Sunday afternoon when you want to set yourself up for the week without spending hours in the kitchen.
Cooking Tips & Techniques
Over the years, I’ve made every mistake in the book with air fryer chicken. Here’s what I’ve learned so you don’t have to repeat my errors.
Don’t overcrowd the basket. I know it’s tempting to throw all the chicken in at once to save time, but it never works out. The air fryer needs space to circulate hot air around each piece. When the basket is packed, the chicken steams instead of roasting, and you lose that beautiful golden exterior. Cook in batches if you need to. Your future self will thank you.
Pat the chicken dry. This seems like a small step, but it makes a huge difference. Wet chicken creates steam, and steam is the enemy of crispiness. Take an extra 30 seconds to blot each piece with paper towels before seasoning. You’ll notice the difference in the final texture.
Use a meat thermometer. I cannot stress this enough. Chicken breast is notoriously easy to overcook, and the margin between perfectly juicy and dry is about 5 degrees. An instant-read thermometer removes the guesswork completely. I keep mine in the drawer next to the air fryer so I never forget to use it.
Let the chicken rest. This isn’t just a suggestion — it’s a rule. If you slice into the chicken immediately after cooking, all the juices flood out onto the cutting board, and you’re left with dry, sad meat. Five minutes of patience makes all the difference. Use that time to steam some veggies or set out your meal prep containers.
Season generously. Chicken breast is lean and mild, so it needs a good amount of seasoning to shine. Don’t be shy with the salt and spices. The oil helps everything stick, so make sure each piece is well coated. I sometimes double the seasoning if I’m feeling extra hungry.
Multitask smartly. While the chicken is cooking, I steam my vegetables on the stovetop and portion out my rice into containers. That way, by the time the chicken is rested and sliced, everything else is ready to go. The whole process flows smoothly if you plan ahead.
One more thing — if your chicken comes out a little dry one time, don’t give up. It happens to everyone. Adjust your cooking time slightly next batch, check the temperature earlier, and remember that each air fryer runs a little differently. You’ll find the sweet spot for yours with practice.
Variations & Adaptations
This recipe is a fantastic base, but it’s also endlessly adaptable. Here are some of my favorite variations:
Spicy Southwest: Add 1 teaspoon of chili powder, ½ teaspoon of cumin, and a pinch of cayenne to the seasoning mix. Serve with black beans, corn salsa, and a dollop of Greek yogurt. This version is perfect for turkey taco meal prep bowls if you want to switch up your protein.
Lemon Herb: Swap the smoked paprika for dried thyme and rosemary. Add the zest of one lemon to the seasoning mix, and squeeze fresh lemon juice over the finished chicken. This pairs beautifully with roasted asparagus and healthy high-protein chicken and rice meal prep bowls.
Honey Garlic: After cooking, brush the chicken with a mixture of 1 tablespoon of honey, 1 teaspoon of soy sauce (or tamari), and 1 minced garlic clove. Return to the air fryer for 1 minute to caramelize. Watch it closely so the honey doesn’t burn.
Mediterranean: Add 1 teaspoon of dried oregano and ½ teaspoon of dried basil to the seasoning. Serve over couscous with cucumber, tomato, olives, and a drizzle of tzatziki. This is my go-to when I want something fresh and light.
Allergen-friendly: This recipe is naturally gluten-free, dairy-free, and nut-free. For a lower-sodium version, reduce the salt to ½ teaspoon and rely on the other spices for flavor. If you’re avoiding nightshades, skip the paprika and use turmeric and cumin instead.
I once made a batch with a heavy hand on the smoked paprika and ended up with a version that reminded me of barbecue chicken. It wasn’t what I planned, but it was delicious. Don’t be afraid to experiment — that’s how new favorites are born.
Serving & Storage Suggestions
This chicken is incredibly versatile. Here’s how to serve and store it for the best results.
Serving: The chicken is best served warm, but it’s also delicious cold in salads or wraps. For meal prep bowls, I like to keep the components separate and reheat only what I’m eating. The chicken holds up well to reheating, but the vegetables stay crisper if they’re not sitting in sauce all week.
Storage: Store the sliced chicken in airtight containers in the refrigerator for up to 4 days. I don’t recommend freezing this particular preparation, as the texture can become slightly watery upon thawing. If you must freeze, do so before slicing and wrap each breast individually in plastic wrap, then place in a freezer bag. Thaw overnight in the refrigerator.
Reheating: The air fryer is also the best tool for reheating. Place the chicken in the air fryer at 350°F (175°C) for 3-4 minutes, until warmed through. This restores some of the original crispiness. You can also reheat in the microwave for 1-2 minutes, but the texture won’t be as good. For meal prep bowls, I microwave the rice and veggies together, then add the chicken on top and reheat separately if I want it crispy.
Flavor development: Here’s something interesting — the chicken actually tastes better on day two or three. The flavors meld and deepen as it sits in the fridge. So if you’re meal prepping for the week, know that Tuesday’s lunch will be even more flavorful than Sunday’s dinner. I always look forward to midweek leftovers for this reason.
Presentation tip: When assembling your bowls, arrange the components in sections rather than mixing everything together. It looks more appealing and keeps textures distinct. A sprinkle of fresh herbs or sesame seeds on top adds a nice finishing touch.
Nutritional Information & Benefits
Here’s a rough estimate for one serving of the chicken alone (about 6 ounces or 170g cooked), without rice and vegetables:
- Calories: 280
- Protein: 42g
- Fat: 10g
- Carbohydrates: 1g
- Fiber: 0g
- Sugar: 0g
When you add rice and vegetables, a complete meal prep bowl comes in around 450-550 calories with a solid balance of protein, carbs, and healthy fats. The exact numbers depend on your specific ingredients and portions.
Health benefits: Chicken breast is one of the leanest sources of high-quality protein, which supports muscle repair, satiety, and overall body function. The olive oil provides heart-healthy monounsaturated fats, and the spices — especially paprika and garlic — offer antioxidants and anti-inflammatory properties. Pairing the chicken with colorful vegetables adds fiber, vitamins, and minerals to round out the meal.
Dietary considerations: This recipe is naturally gluten-free, dairy-free, and low-carb. It fits well into most eating plans, including paleo, Whole30 (skip the rice), and keto (serve with extra veggies instead of grains). If you’re watching sodium, reduce the salt to ½ teaspoon or use a salt-free seasoning blend.
Potential allergens: None of the common allergens are present in this recipe, but always check your spice blends for hidden additives if you have sensitivities.
I love that this recipe makes me feel good about what I’m eating without requiring a lot of effort. It’s real food, simply prepared, and that’s something I can get behind any day of the week.
Conclusion
This easy air fryer chicken breast meal prep recipe has genuinely changed how I approach my week. It’s not complicated, it doesn’t require a dozen ingredients, and it delivers consistent results every single time. Whether you’re a seasoned meal prepper or someone who’s never planned a meal in advance, this recipe meets you where you are.
What I love most about it is the freedom it gives me. When lunchtime rolls around and I’m tired and hungry, I don’t have to think. I just grab a container, reheat it, and eat something that actually tastes good. No decision fatigue, no takeout temptation, no settling for a sad desk salad. Just good food that I made for myself, because I deserve it.
Try this recipe and make it your own. Add your favorite spices, swap in different vegetables, play with the seasonings until it feels like yours. That’s the beauty of a simple, solid base — it’s a canvas for whatever you’re craving.
I’d love to hear how it goes for you. Drop a comment below and let me know what variations you tried, or tag me in your meal prep photos. Happy cooking, friends. You’ve got this.
Frequently Asked Questions
Can I use frozen chicken breasts in the air fryer?
Yes, but you’ll need to adjust the cooking time significantly. Cook frozen chicken breasts at 375°F (190°C) for about 20-25 minutes, flipping halfway through. Always check the internal temperature to ensure it reaches 165°F (74°C). The texture won’t be quite as good as fresh, but it works in a pinch.
How do I prevent the chicken from sticking to the air fryer basket?
Lightly spray the basket with cooking spray or brush it with a thin layer of oil before adding the chicken. The oil in the seasoning also helps prevent sticking. If you’re still having trouble, try using parchment paper liners designed for air fryers — just make sure they don’t block the airflow.
Can I use chicken thighs instead of breasts?
Absolutely. Boneless, skinless chicken thighs work beautifully in the air fryer. They’re more forgiving than breasts because they have a higher fat content, so they stay moist even if you overcook them slightly. Cook at the same temperature for about 10-12 minutes, or until they reach 165°F (74°C).
Why is my air fryer chicken dry?
Dry chicken is usually the result of overcooking or not letting the chicken rest. Use a meat thermometer to avoid overcooking, and always let the chicken rest for 5 minutes after cooking. Also, make sure you’re not overcrowding the basket, which can cause uneven cooking and lead to some pieces drying out while others are still undercooked.
How long does meal prepped chicken last in the fridge?
Properly stored in airtight containers, cooked chicken will stay fresh for 3-4 days in the refrigerator. I recommend eating it by day 4 for the best quality. If you want to keep it longer, you can freeze individual portions, though the texture may change slightly upon thawing.
Pin This Recipe!
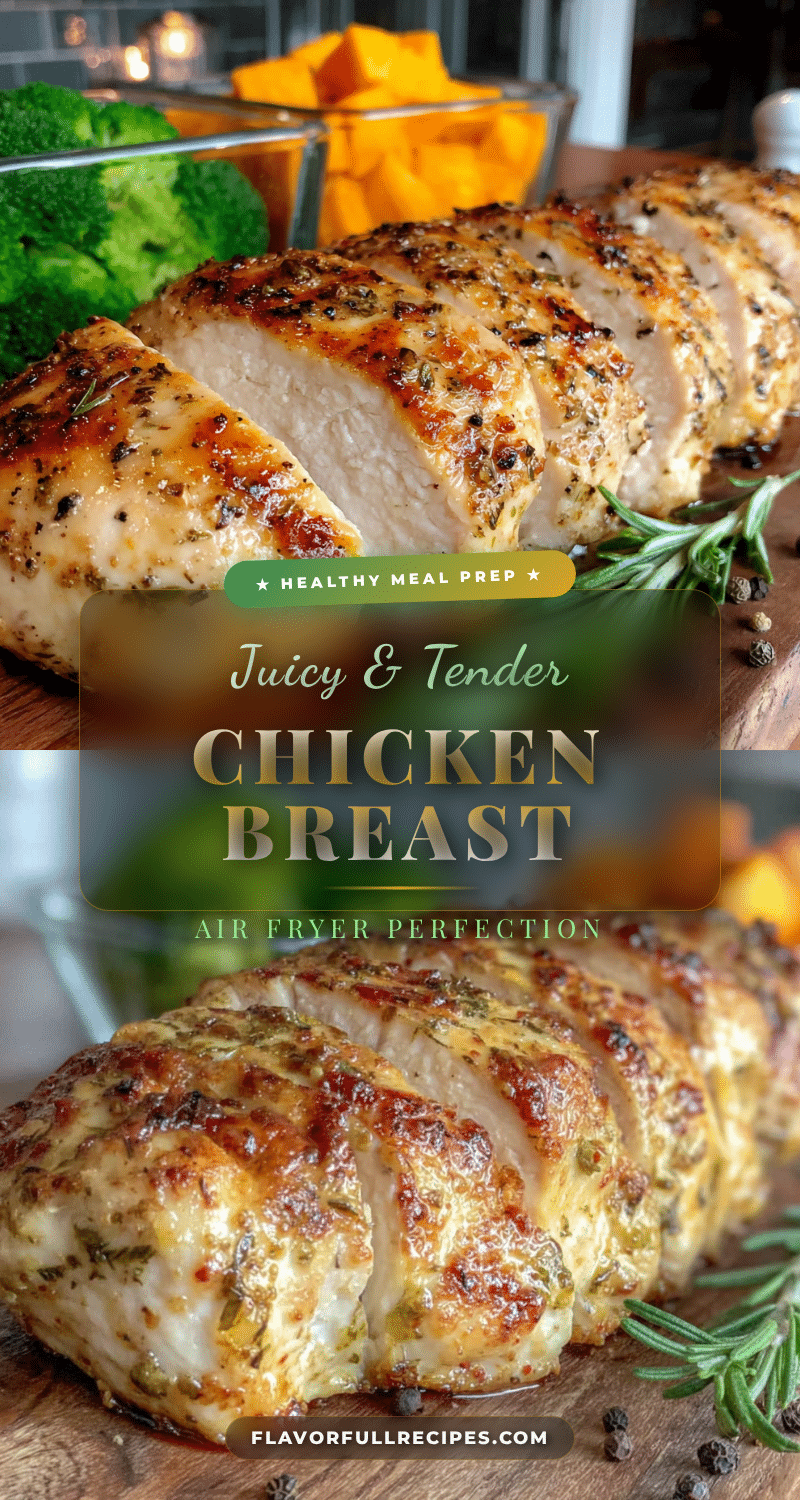
Easy Air Fryer Chicken Breast Meal Prep Best Healthy Recipe
- Total Time: 35 minutes
- Yield: 4-5 servings 1x
Description
This easy air fryer chicken breast recipe is perfect for meal prep, delivering juicy, flavorful chicken with a golden, slightly crisp exterior in under 20 minutes. It’s a reliable, forgiving recipe that makes healthy eating effortless all week long.
Ingredients
- 4 boneless, skinless chicken breasts (about 1.5 lbs or 680g total)
- 2 tablespoons olive oil (30ml)
- 1 teaspoon garlic powder
- 1 teaspoon onion powder
- 1 teaspoon smoked paprika
- 1 teaspoon fine sea salt
- ½ teaspoon black pepper (freshly ground preferred)
- ½ teaspoon dried oregano (optional)
- 1 tablespoon lemon juice (15ml, added after cooking)
- 2 cups cooked rice or quinoa (about 300g, for meal prep bowls)
- 2 cups steamed or roasted vegetables (about 300g, for meal prep bowls)
- Optional toppings: sesame seeds, fresh herbs, or favorite sauce
Instructions
- Prep the chicken: Pat the chicken breasts dry with paper towels. If pieces are uneven in thickness, place between plastic wrap and gently pound to about ¾ inch thickness.
- Season the chicken: In a large mixing bowl, combine olive oil, garlic powder, onion powder, smoked paprika, salt, pepper, and oregano (if using). Add chicken and toss until well coated. Let sit at room temperature for 10 minutes while air fryer preheats.
- Preheat the air fryer: Set air fryer to 375°F (190°C) and preheat for about 3 minutes.
- Arrange the chicken: Place seasoned chicken breasts in the air fryer basket in a single layer, ensuring they are not touching or overlapping. Cook in batches if necessary.
- Air fry: Cook at 375°F (190°C) for 6 minutes, then flip each piece with tongs and cook for another 6-9 minutes. Check internal temperature at the 12-minute mark; it should reach 165°F (74°C). Cook in 1-minute increments if needed.
- Rest the chicken: Transfer cooked chicken to a cutting board and let rest for at least 5 minutes before slicing.
- Slice and portion: Slice the chicken against the grain into even strips or cubes.
- Assemble meal prep bowls: Divide cooked rice or quinoa evenly among 4-5 containers. Add a portion of vegetables to each. Top with sliced chicken. Drizzle with fresh lemon juice. Seal containers and refrigerate.
Notes
Don’t overcrowd the air fryer basket to ensure even cooking and crispiness. Pat chicken dry before seasoning to avoid steaming. Use a meat thermometer for perfectly cooked chicken (165°F/74°C). Let chicken rest for 5 minutes after cooking to retain juices. The chicken tastes even better on day two or three as flavors meld. For reheating, use the air fryer at 350°F (175°C) for 3-4 minutes to restore crispiness.
- Prep Time: 10 minutes
- Cook Time: 15 minutes
- Category: Main Course
- Cuisine: American
Nutrition
- Serving Size: 1 meal prep bowl (ab
- Calories: 450550
- Sodium: 600
- Fat: 10
- Saturated Fat: 2
- Carbohydrates: 1
- Protein: 42
Keywords: air fryer chicken, meal prep, healthy chicken recipe, easy chicken breast, air fryer recipe, high protein, gluten free, dairy free


