
The way the caramel catches the afternoon light—that’s what gets me every time. I mean, honestly, I’ve made these brown butter apple crisp bars more times than I can count, and I still find myself staring at that glossy, golden drizzle as it pools in the crevices of the crumb topping. It’s not just dessert. It’s a visual promise of what’s about to happen to your taste buds.
I stumbled onto this recipe almost by accident last fall. I had a bag of Honeycrisp apples that were starting to look a little sad, and a half-stick of butter I’d browned on a whim for something else. The smell of that nutty, toasted butter just sort of hung in the air, and I thought—what if I built a bar around that? Not a pie, not a crisp, but something you could pick up with your hands and still feel fancy about.
So I started messing around. First batch was too soggy. Second batch, the topping fell off. But the third? That was the one. The apples softened just right, the brown butter seeped into the oat crust, and the caramel drizzle tied it all together like a little bow. I brought them to a weekend thing at my sister’s house and they disappeared before the main course even hit the table.
These brown butter apple crisp bars aren’t complicated, but they feel special. That’s the thing I love most about them. They’re the kind of dessert that makes people close their eyes after the first bite, and then immediately ask for the recipe. And honestly, that never gets old.
Why You’ll Love This Recipe
Let me tell you why these bars have become my go-to fall dessert. I’ve tested this recipe about seven times now, tweaking the butter temperature, the apple thickness, the salt level in the caramel. It’s been through the wringer, and it came out perfect.
- Brown Butter Magic : That nutty, toasted flavor adds a depth you just can’t get from regular melted butter. It’s the secret weapon here, and once you try it, you’ll want to brown butter for everything.
- Perfect Texture Combo : You get a buttery, crunchy oat crust, a soft, cinnamon-spiced apple filling, and a crumbly streusel topping. Every bite has three different textures going on.
- No Fuss Assembly : No rolling pins, no pie crust drama, no blind baking. You press the crust in, layer the apples, sprinkle the topping, and bake. That’s it.
- Make Ahead Friendly : These bars actually taste better the next day. The flavors meld together overnight, and the caramel soaks into the apples just enough to make everything extra special.
- Portable Dessert : Unlike a pie that demands a plate and a fork, these bars are sturdy enough to pack in lunchboxes or take to potlucks. I’ve sent them with my kids in their easy DIY bento lunch box for picky kindergartners and they came back empty.
What really sets these bars apart is the caramel drizzle. It’s not that sticky, cloying stuff from a jar. It’s a simple homemade caramel that’s buttery and salted just right. And it takes about five minutes to make. Honestly, once you drizzle that over the top, you’ll feel like a pastry chef.
This is the kind of dessert that makes you look like you spent hours in the kitchen when really, you just followed a few simple steps. It’s comfort food that feels a little bit fancy, and that’s my favorite kind of recipe to share.
What Ingredients You Will Need
This recipe uses simple, pantry-friendly ingredients that come together to create something truly special. The brown butter is the hero here, but every component plays its part.
For the Crust & Topping
- 1 cup (2 sticks) unsalted butter — You’ll brown this, so don’t skip that step. I prefer Kerrygold or any European-style butter for the best nutty flavor.
- 1 ½ cups all-purpose flour — Spoon and level it. Don’t scoop straight from the bag or you’ll end up with a dry crust.
- 1 ½ cups old-fashioned rolled oats — Not the quick-cooking kind. The big flakes give the topping that perfect crunchy texture.
- 1 cup packed light brown sugar — Adds moisture and that deep molasses note that pairs so well with apples.
- ½ cup granulated sugar — Balances the brown sugar and helps the crust hold together.
- 1 teaspoon baking powder — Gives the topping a little lift so it’s not too dense.
- ½ teaspoon salt — Don’t skip it. Salt makes the apples taste more appley and the butter taste more buttery.
- 1 teaspoon ground cinnamon — The classic apple pie spice. I use Saigon cinnamon for a stronger flavor.
- ½ teaspoon ground nutmeg — Freshly grated if you have it. It makes a real difference.
For the Apple Filling
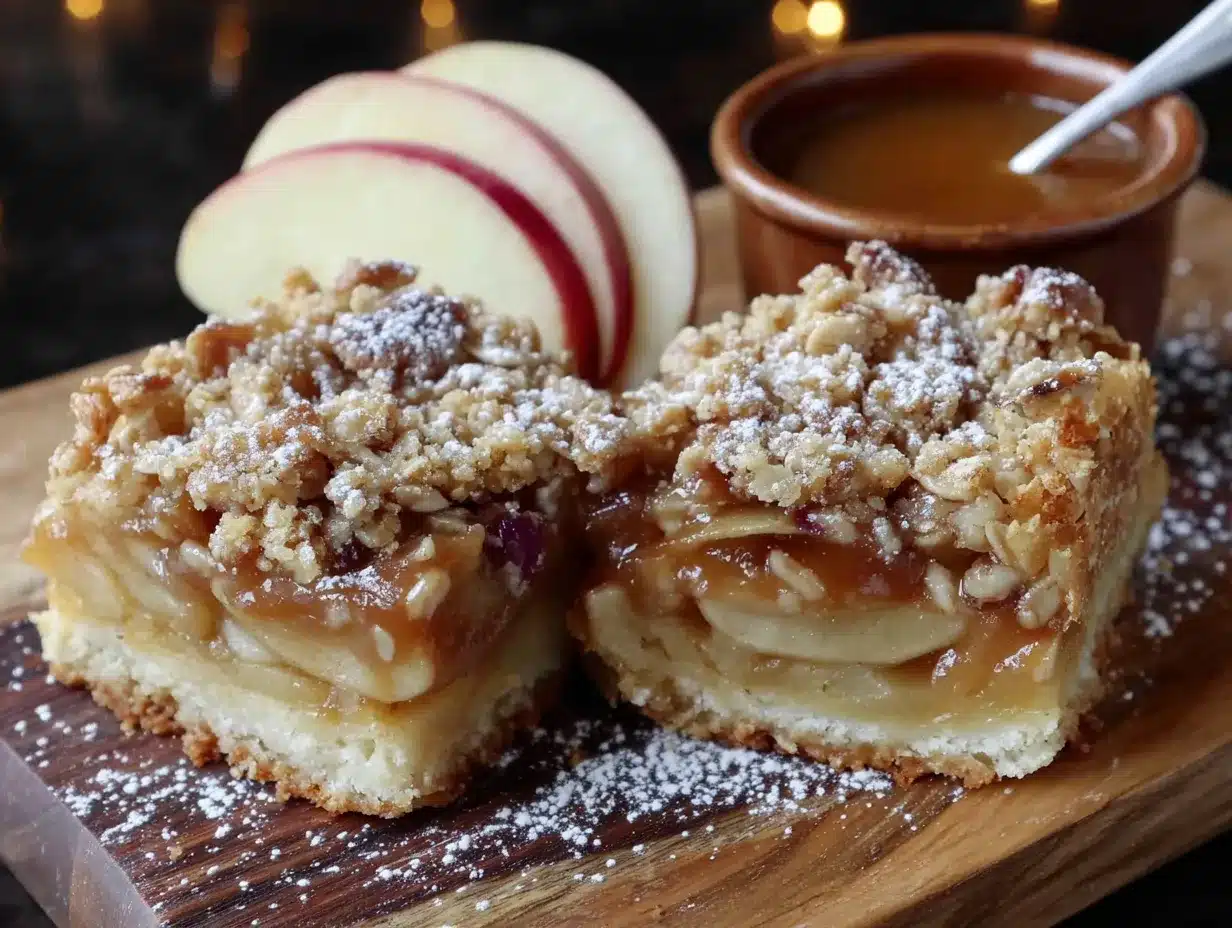
- 4 medium apples — I use a mix of Honeycrisp and Granny Smith. The Honeycrisp adds sweetness and stays firm, while the Granny Smith gives that tart balance. Peeled, cored, and diced into ½-inch pieces.
- 2 tablespoons all-purpose flour — Helps thicken the fruit juices so the filling isn’t runny.
- 2 tablespoons granulated sugar — Just enough to coax out the natural sweetness.
- 1 teaspoon lemon juice — Keeps the apples from browning and brightens the flavor.
- ½ teaspoon ground cinnamon — Because you can never have too much cinnamon with apples.
For the Caramel Drizzle
- ½ cup packed light brown sugar — The base of the caramel. Don’t substitute dark brown sugar here; it’s too intense.
- ¼ cup heavy cream — Adds richness and helps the caramel stay smooth.
- 3 tablespoons unsalted butter — Cut into small pieces so it melts evenly.
- ¼ teaspoon vanilla extract — Pure, not imitation. It rounds out the flavor.
- Pinch of flaky sea salt — Maldon or similar. That little crunch of salt on top is everything.
If you’re looking for a different kind of apple dessert, my best homemade skillet peach cobbler with cinnamon biscuits is another family favorite, though obviously that one uses peaches instead of apples.
Equipment Needed
You don’t need a fancy kitchen to make these bars, but a few specific tools make the process smoother.
- 9×13-inch baking pan — Glass or metal both work. If using glass, reduce the oven temperature by 25°F.
- Parchment paper — Line the pan with two overlapping sheets so you can lift the bars out cleanly. This is non-negotiable for me.
- Saucepan — For browning the butter. A light-colored pan helps you see the color change.
- Small saucepan — For the caramel drizzle. A heavy-bottomed one prevents scorching.
- Mixing bowls — One large, one medium.
- Chef’s knife and cutting board — For dicing the apples evenly.
- Wooden spoon or silicone spatula — For stirring the brown butter and the caramel.
- Whisk — For combining the dry ingredients.
- Measuring cups and spoons — Accurate measurements matter in baking.
If you don’t have a 9×13 pan, you can use a 8×8 pan and double the baking time, but the bars will be thicker and might need an extra 10-15 minutes. I’ve done it in a pinch and it worked, but the texture isn’t quite the same.
Preparation Method
Let me walk you through this step by step. I’ve included all the little details I wish someone had told me the first time I made these.
- Preheat your oven to 350°F (175°C). Line a 9×13-inch baking pan with parchment paper, leaving about 2 inches of overhang on the long sides. This makes lifting the bars out so much easier later.
- Brown the butter. Cut the 2 sticks of butter into pieces and place them in a light-colored saucepan over medium heat. Stir constantly with a wooden spoon. The butter will melt, then foam, then start to sizzle. After about 5-7 minutes, you’ll see brown specks forming at the bottom and the butter will smell nutty and toasty. The moment it turns a golden-amber color, remove it from the heat and pour it into a heatproof bowl to stop the cooking. Don’t walk away during this step—brown butter can go from perfect to burnt in about 30 seconds.
- Make the crust and topping mixture. In a large bowl, whisk together the flour, oats, brown sugar, granulated sugar, baking powder, salt, cinnamon, and nutmeg. Pour the warm brown butter over the dry ingredients and stir with a fork until the mixture looks like wet sand and clumps together when pressed. It should hold its shape when squeezed in your fist.
- Press the crust. Reserve about 1 ½ cups of the oat mixture for the topping. Transfer the rest to the prepared pan. Press it down firmly and evenly into the bottom. I use the bottom of a measuring cup to really pack it in. This is your crust, so make sure it’s compacted well.
- Bake the crust. Place the pan in the oven and bake for 12 minutes. It should be just set and lightly golden around the edges. Remove it from the oven and let it cool slightly while you prepare the apples.
- Prepare the apple filling. In a medium bowl, toss the diced apples with the flour, sugar, lemon juice, and cinnamon. Make sure every piece is coated. The flour will help absorb the apple juices as they bake, so don’t skip it.
- Layer the apples. Spread the apple mixture evenly over the pre-baked crust. Don’t pile them too high in the center—try to keep an even layer so they cook uniformly.
- Add the topping. Sprinkle the reserved oat mixture over the apples. Use your fingers to break up any large clumps and distribute it evenly. It should cover the apples completely, with some peaks and valleys for texture.
- Bake the bars. Return the pan to the oven and bake for 35-40 minutes, until the topping is golden brown and the apple filling is bubbly around the edges. If the topping is browning too quickly, tent the pan loosely with foil for the last 10 minutes.
- Cool completely. This is the hardest part. Let the bars cool in the pan on a wire rack for at least 2 hours. The filling needs time to set, and if you try to cut them warm, they’ll fall apart. I learned this the hard way on my first attempt.
- Make the caramel drizzle. While the bars cool, combine the brown sugar, heavy cream, and butter in a small saucepan over medium heat. Stir constantly until the butter melts and the mixture comes to a gentle boil. Let it bubble for 1 minute, then remove from heat. Stir in the vanilla and a pinch of flaky sea salt. Let it cool for about 10 minutes—it will thicken as it cools.
- Drizzle and serve. Once the bars are completely cool, lift them out of the pan using the parchment overhang. Drizzle the caramel over the top using a spoon or a squeeze bottle. Let the caramel set for about 5 minutes before slicing into squares.
Cooking Tips & Techniques
I’ve made these bars enough times to know where things can go wrong. Here are the lessons I learned the hard way so you don’t have to.
Don’t rush the brown butter. I know it’s tempting to crank up the heat, but medium heat is your friend. Low and slow gives you more control, and you can actually see the color change. I once tried to speed things up and ended up with burnt butter that tasted bitter. The whole batch was ruined.
Chop your apples evenly. This matters more than you think. If some pieces are bigger than others, they won’t cook at the same rate. You’ll end up with mushy spots and crunchy spots in the same bar. Aim for ½-inch cubes, and take your time with it.
Let the bars cool completely. I know, I know. The smell is incredible and you want to dig in immediately. But if you cut them while they’re still warm, the filling will ooze out and the crust will crumble. Trust me on this—2 hours of patience pays off with clean, beautiful squares.
Toast the oats for extra crunch. If you have an extra 5 minutes, spread the oats on a baking sheet and toast them in the 350°F oven for about 5-7 minutes before adding them to the crust mixture. It gives the topping a deeper, nuttier flavor that pairs beautifully with the brown butter.
Use a squeeze bottle for the caramel. This is a game-changer. Instead of drizzling from a spoon and getting uneven lines, pour the caramel into a squeeze bottle. You get perfect, thin ribbons that look professional. I bought a set of squeeze bottles for my easy smoked sausage skewers with peppers and now I use them for everything.
Don’t overmix the crust. When you add the brown butter to the dry ingredients, stir just until combined. Overmixing develops the gluten and makes the crust tough. You want it tender and crumbly, not like a hockey puck.
Variations & Adaptations
One of the best things about this recipe is how flexible it is. Here are some variations I’ve tried and loved.
Gluten-Free Version: Substitute the all-purpose flour with a 1:1 gluten-free baking flour blend. Make sure it contains xanthan gum for structure. The oats should be certified gluten-free if you’re sensitive. I tested this with Bob’s Red Mill 1:1 and the texture was almost identical to the original.
Vegan Adaptation: Use vegan butter for browning (Miyoko’s works great), substitute the heavy cream with full-fat coconut cream, and use a plant-based butter for the caramel. The flavor is slightly different, but the texture holds up beautifully. I made these for a friend’s vegan potluck and they disappeared fast.
Pear and Ginger Variation: Swap the apples for firm Bosc pears and add 1 teaspoon of fresh grated ginger to the filling. The ginger adds a warm, slightly spicy kick that pairs wonderfully with the brown butter. This is my go-to version in late winter when apples start to get mealy.
Nutty Crunch Twist: Add ½ cup of chopped pecans or walnuts to the topping mixture. Toast them first for maximum flavor. The crunch against the soft apples is seriously addictive. I did this for a Thanksgiving trial run and my family demanded it become the official version.
Low-Sugar Option: Reduce the brown sugar in the crust to ¾ cup and use a sugar substitute like Swerve in the filling. The caramel drizzle is harder to lighten, but you can skip it or use a sugar-free caramel sauce. The bars will still be delicious, just less sweet.
Serving & Storage Suggestions
These bars are versatile enough for any occasion, from a casual afternoon snack to a holiday dessert table.
Serving Temperature: I prefer these bars at room temperature. The crust stays crisp, the apples are soft but not mushy, and the caramel is perfectly set. If you want to serve them warm, pop an individual bar in the microwave for about 10 seconds. Don’t go longer or the caramel will liquefy and run off.
Presentation Ideas: Cut the bars into 12 even squares. For a prettier look, wipe the knife clean between cuts. Arrange them on a wooden board or a white platter and drizzle a little extra caramel on top just before serving. A light dusting of flaky sea salt makes them look bakery-level.
Perfect Pairings: A scoop of vanilla bean ice cream is the classic choice, but I also love these with a dollop of lightly sweetened whipped cream or a drizzle of heavy cream. For a cozy fall drink pairing, serve them with hot apple cider or a chai latte. They’re also fantastic alongside a cup of black coffee in the morning—not that I’ve ever eaten one for breakfast. Okay, maybe I have.
Storage Instructions: Store leftover bars in an airtight container at room temperature for up to 3 days. If your kitchen is warm, refrigerate them to keep the caramel from getting too soft. Layer parchment paper between the bars to prevent them from sticking together.
Freezing Tips: These bars freeze beautifully. Wrap individual squares tightly in plastic wrap, then place them in a freezer-safe bag or container. They’ll keep for up to 3 months. To thaw, let them sit at room temperature for about 30 minutes. The caramel might separate slightly, but a quick re-drizzle fixes that.
Flavor Development: Honestly, these bars taste even better on day two. The apples continue to soften and absorb the brown butter and cinnamon flavors. The crust also gets a little more tender. If you can resist eating them all on day one, you’re in for a treat.
These bars also make a fantastic addition to a lunchbox. I’ve packed them alongside easy make-ahead school lunch wraps for a week for a balanced midday meal that feels special.
Nutritional Information & Benefits
Let’s be honest—these are a treat, not a health food. But they do have some redeeming qualities.
Estimated Nutritional Values (per bar, based on 12 servings):
- Calories: 385
- Total Fat: 18g
- Saturated Fat: 11g
- Carbohydrates: 54g
- Fiber: 3g
- Sugar: 35g
- Protein: 4g
Health Highlights: Apples are a good source of fiber and vitamin C, especially if you leave the peel on (though I peel mine for texture). Oats provide soluble fiber that can help with heart health. The brown butter, while indulgent, is rich in vitamin A. And the cinnamon has anti-inflammatory properties—so there’s that.
Dietary Considerations: This recipe contains gluten, dairy, and nuts (if you add them). For a gluten-free version, see the variations section above. For a dairy-free version, use vegan butter and coconut cream. The caramel drizzle can be made with plant-based butter and cream, though the texture will be slightly different.
Allergen Notes: Contains wheat, dairy, and possibly tree nuts. If you’re serving these at a gathering, it’s always a good idea to label them or ask about allergies.
My Personal Take: I don’t believe in guilt when it comes to dessert. Food is about joy, connection, and pleasure. These bars are a celebration of fall flavors, and if you’re eating them mindfully and sharing them with people you love, that’s a win in my book.
Conclusion
These brown butter apple crisp bars with caramel drizzle are everything I want in a fall dessert. They’re cozy enough for a quiet night at home, but impressive enough to bring to a party and have people asking for the recipe. The brown butter adds that nutty, toasty depth that makes you wonder why you haven’t been browning butter your whole life. The apples stay soft and tender. The topping is crunchy and buttery. And that caramel drizzle? It’s the finishing touch that turns a simple bar into something truly special.
I really hope you give these a try. Don’t be intimidated by the brown butter—it’s easier than you think, and the payoff is enormous. And if you want to play around with the variations, go for it. That’s the beauty of a recipe like this. It’s a starting point, not a rulebook.
When you make them (and I know you will), come back and let me know how they turned out. Did you add nuts? Swap the apples for pears? Drizzle extra caramel because you couldn’t help yourself? I want to hear about it. Drop a comment below, share a photo, or tag me on social media. There’s nothing I love more than seeing these bars in your kitchens.
Happy baking, friends. And remember—the caramel is for drizzling, not just for licking the spoon. Well, mostly.
Frequently Asked Questions
Can I use pre-made caramel sauce instead of making my own?
You can, but the homemade caramel really does make a difference. It’s thinner and more pourable than store-bought, and the salted butter flavor pairs perfectly with the brown butter in the crust. If you’re in a hurry, warm up a good quality store-bought caramel and add a pinch of flaky salt.
Why did my crust turn out soggy?
This usually happens for one of two reasons: either the apples released too much liquid (try using firmer apples like Honeycrisp or Granny Smith), or the crust wasn’t baked long enough before adding the apples. Make sure you pre-bake the crust for the full 12 minutes, and don’t skip the flour in the apple filling—it helps absorb excess juice.
Can I make these bars ahead of time for a party?
Absolutely. In fact, I recommend it. Make the bars a day ahead, store them in the fridge, and drizzle the caramel just before serving. The flavors meld together overnight and the bars are easier to cut when they’re fully chilled. Just bring them to room temperature before serving for the best texture.
What’s the best apple variety for these bars?
I like a mix of Honeycrisp and Granny Smith. Honeycrisp holds its shape well and adds natural sweetness, while Granny Smith gives that tart contrast that balances the sweet caramel. Fuji or Pink Lady also work great. Avoid Red Delicious or McIntosh—they break down too much during baking.
How do I store leftovers and how long do they last?
Store them in an airtight container at room temperature for up to 3 days, or in the fridge for up to 5 days. Layer parchment paper between the bars to prevent sticking. If refrigerated, let them sit at room temperature for about 15 minutes before eating. They also freeze beautifully for up to 3 months—just wrap each bar individually in plastic wrap first.
Pin This Recipe!
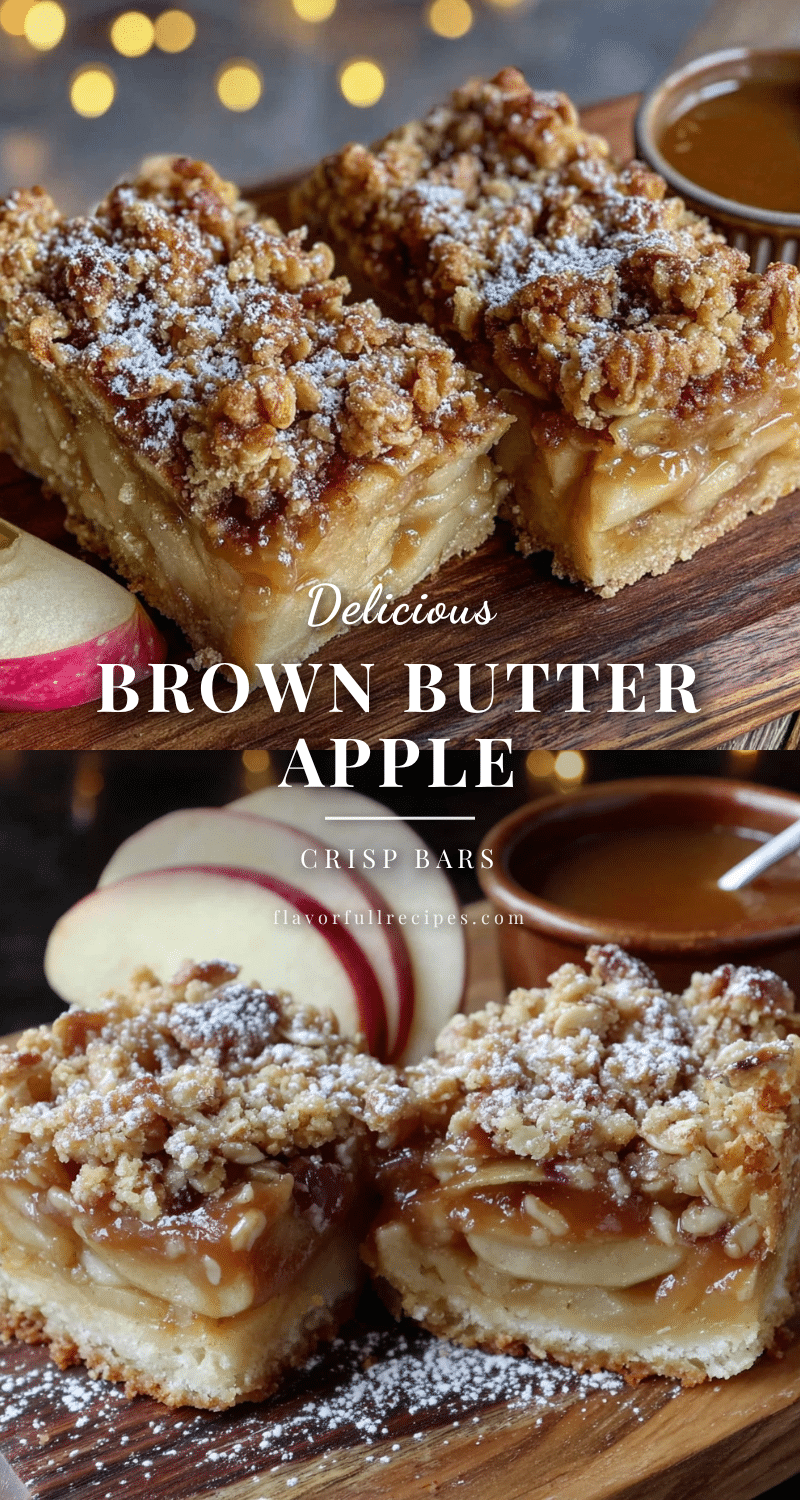
Brown Butter Apple Crisp Bars with Caramel Drizzle
- Total Time: 2 hours 47 minutes
- Yield: 12 servings 1x
Description
These brown butter apple crisp bars feature a buttery oat crust, a soft cinnamon-spiced apple filling, and a crumbly streusel topping, all finished with a homemade salted caramel drizzle. They’re the perfect portable fall dessert that tastes even better the next day.
Ingredients
- 1 cup (2 sticks) unsalted butter
- 1 ½ cups all-purpose flour
- 1 ½ cups old-fashioned rolled oats
- 1 cup packed light brown sugar
- ½ cup granulated sugar
- 1 teaspoon baking powder
- ½ teaspoon salt
- 1 teaspoon ground cinnamon
- ½ teaspoon ground nutmeg
- 4 medium apples (mix of Honeycrisp and Granny Smith), peeled, cored, and diced into ½-inch pieces
- 2 tablespoons all-purpose flour
- 2 tablespoons granulated sugar
- 1 teaspoon lemon juice
- ½ teaspoon ground cinnamon
- ½ cup packed light brown sugar
- ¼ cup heavy cream
- 3 tablespoons unsalted butter
- ¼ teaspoon vanilla extract
- Pinch of flaky sea salt
Instructions
- Preheat your oven to 350°F (175°C). Line a 9×13-inch baking pan with parchment paper, leaving about 2 inches of overhang on the long sides.
- Brown the butter: Cut the 2 sticks of butter into pieces and place them in a light-colored saucepan over medium heat. Stir constantly with a wooden spoon. The butter will melt, then foam, then start to sizzle. After about 5-7 minutes, you’ll see brown specks forming at the bottom and the butter will smell nutty and toasty. Remove from heat and pour into a heatproof bowl to stop the cooking.
- Make the crust and topping mixture: In a large bowl, whisk together the flour, oats, brown sugar, granulated sugar, baking powder, salt, cinnamon, and nutmeg. Pour the warm brown butter over the dry ingredients and stir with a fork until the mixture looks like wet sand and clumps together when pressed.
- Press the crust: Reserve about 1 ½ cups of the oat mixture for the topping. Transfer the rest to the prepared pan. Press it down firmly and evenly into the bottom using the bottom of a measuring cup.
- Bake the crust: Bake for 12 minutes until just set and lightly golden around the edges. Remove from oven and let cool slightly.
- Prepare the apple filling: In a medium bowl, toss the diced apples with the flour, sugar, lemon juice, and cinnamon until every piece is coated.
- Layer the apples: Spread the apple mixture evenly over the pre-baked crust.
- Add the topping: Sprinkle the reserved oat mixture over the apples, using your fingers to break up any large clumps and distribute evenly.
- Bake the bars: Return the pan to the oven and bake for 35-40 minutes, until the topping is golden brown and the apple filling is bubbly around the edges. If the topping is browning too quickly, tent the pan loosely with foil for the last 10 minutes.
- Cool completely: Let the bars cool in the pan on a wire rack for at least 2 hours.
- Make the caramel drizzle: While the bars cool, combine the brown sugar, heavy cream, and butter in a small saucepan over medium heat. Stir constantly until the butter melts and the mixture comes to a gentle boil. Let it bubble for 1 minute, then remove from heat. Stir in the vanilla and a pinch of flaky sea salt. Let it cool for about 10 minutes—it will thicken as it cools.
- Drizzle and serve: Once the bars are completely cool, lift them out of the pan using the parchment overhang. Drizzle the caramel over the top using a spoon or a squeeze bottle. Let the caramel set for about 5 minutes before slicing into squares.
Notes
Don’t rush the brown butter—use medium heat for control. Chop apples evenly into ½-inch cubes. Let bars cool completely before cutting to prevent crumbling. For extra crunch, toast the oats for 5-7 minutes before adding to the crust. Use a squeeze bottle for a professional-looking caramel drizzle. Bars taste even better on day two.
- Prep Time: 20 minutes
- Cook Time: 47 minutes
- Category: Dessert
- Cuisine: American
Nutrition
- Serving Size: 1 bar
- Calories: 385
- Sugar: 35
- Sodium: 200
- Fat: 18
- Saturated Fat: 11
- Carbohydrates: 54
- Fiber: 3
- Protein: 4
Keywords: brown butter, apple crisp bars, caramel drizzle, fall dessert, apple bars, oat crust, streusel topping


