
I figured the whole “one-bowl” thing was just a gimmick to sell cookbooks. It took about three batches of banana bread—and a sink full of dishes—for that assumption to fall apart completely. The first time I tried it, I was half-convinced I’d end up with a dense, sad brick because I hadn’t creamed the butter and sugar separately like my grandmother always did. But the bananas were practically screaming to be used, and I was out of patience, not just counter space.
So I mashed, stirred, and scraped everything into one bowl, trying not to think about the texture. The batter looked alarmingly thin (I actually muttered “well, this is toast” to an empty kitchen). But an hour later, I pulled out a loaf that was impossibly tender, domed perfectly on top, and smelled like a bakery had materialized in my tiny apartment. The walnuts had toasted right in the batter, adding this warm, buttery crunch that made the whole thing feel intentional, not lazy. It was the first time a shortcut actually made the food better, not just easier.
That loaf taught me something: sometimes the best recipes aren’t the ones you fuss over. They’re the ones that trust the ingredients to do the work. This Perfect One-Bowl Banana Walnut Bread is exactly that—a recipe that gives you a stunning result without demanding a lot from you. It’s the kind of bread you’ll make on a Tuesday night, just because you have a sad banana on the counter, and then you’ll wonder why you ever did it any other way.
Why You’ll Love This Recipe
Let’s be honest—banana bread is a dime a dozen. But this one? It’s different. Here’s why it’s become my go-to, and why I think it’ll become yours too.
- One Bowl, No Fuss: No mixer, no separate bowls for wet and dry ingredients. Just one bowl, a spatula, and about ten minutes of your time. It’s the kind of recipe you can make while half-listening to a podcast.
- Perfectly Moist Every Time: The secret is using really ripe bananas and a touch of yogurt (or sour cream). It keeps the crumb tender and almost creamy without being gummy. I’ve tested this with different ripeness levels, and I promise you—the browner the banana, the better the bread.
- That Walnut Crunch: Toasting the walnuts before folding them in makes a world of difference. They stay crunchy even after a few days, which is rare for nut breads. It’s a small step that pays off big time.
- Simple, Pantry Ingredients: You probably have everything already. Flour, sugar, eggs, butter, bananas. No fancy extracts or obscure flours. It’s the definition of comfort food from what you’ve got.
- Crowd-Pleaser: I’ve brought this to brunches, potlucks, and even a work meeting. It disappears fast. Kids love it, adults love it, and people always ask for the recipe. It’s unpretentious and just plain good.
Honestly, this recipe isn’t just good—it’s the kind that makes you close your eyes after the first bite. It’s comfort food reimagined: easier, faster, but with the same soul-soothing satisfaction. Perfect for impressing guests without stress, or turning a simple Tuesday into something memorable. And if you love quick breads, you should also try our moist pumpkin chocolate chip bread with brown butter glaze for another fall favorite.
What Ingredients You Will Need
This recipe uses simple, wholesome ingredients to deliver that classic banana bread flavor and a soft, tender crumb. Most of these are pantry staples, which is exactly what you want in a last-minute bake.
- Ripe Bananas (3 medium, about 1 ½ cups mashed): The browner, the better. Spotted or fully black bananas are ideal—they’re sweeter and easier to mash. If yours aren’t ripe enough, you can roast them in the oven at 300°F for 15 minutes to speed things up.
- All-Purpose Flour (1 ¾ cups, 220g): Standard AP flour works perfectly here. For a lighter texture, you can substitute up to half a cup with whole wheat pastry flour, but don’t go all whole wheat—it’ll be too dense.
- Granulated Sugar (½ cup, 100g): Just enough to sweeten without overpowering the banana flavor. I’ve used coconut sugar before, and it works, but the bread will be a bit darker and less sweet.
- Light Brown Sugar (¼ cup, 50g, packed): This adds a touch of molasses flavor and keeps the bread extra moist. Don’t skip it if you can help it—it makes a difference.
- Unsalted Butter (⅓ cup, 75g, melted): Melted butter gives the bread a rich flavor and tender crumb. I use salted butter in a pinch and just reduce the added salt to ¼ teaspoon.
- Large Eggs (2, room temperature): Room temperature eggs incorporate more easily into the melted butter, creating a smoother batter. If you forget to take them out, place them in a bowl of warm water for 5 minutes.
- Plain Yogurt or Sour Cream (¼ cup, 60g): This is my secret weapon for moisture. It adds a slight tang that balances the sweetness and keeps the bread soft for days. Greek yogurt works too, but thin it with a splash of milk first.
- Vanilla Extract (1 teaspoon): Pure vanilla is best, but imitation works fine. It rounds out all the flavors.
- Baking Soda (1 teaspoon): The only leavening agent you need. Make sure it’s fresh—if it doesn’t fizz when mixed with vinegar, toss it.
- Salt (½ teaspoon): Don’t skip this. It enhances the banana flavor and balances the sweetness.
- Ground Cinnamon (1 teaspoon): Optional, but highly recommended. It pairs beautifully with banana and adds warmth.
- Walnuts (¾ cup, 85g, chopped and toasted): I prefer toasting them in a dry skillet for 3-4 minutes until fragrant. It brings out their natural oils and keeps them crunchy in the finished bread. You can substitute pecans or even chocolate chips if you’re not a nut person.
Equipment Needed
You don’t need a lot of fancy gear for this one. Here’s what I use every time.
- Large Mixing Bowl: Any bowl will do, but a wide one makes mashing and stirring easier.
- 9×5-inch Loaf Pan: A standard size works best. If you use an 8×4 pan, you’ll need to bake it a bit longer. I love my light-colored metal pan—dark pans can brown the crust too fast.
- Parchment Paper: Not strictly necessary, but it makes lifting the bread out so much easier. Leave an overhang on two sides for handles.
- Fork or Potato Masher: For mashing the bananas. A fork works fine, but a masher is faster and gives you more control over the texture.
- Rubber Spatula: For folding everything together without overmixing.
- Cooling Rack: Essential for letting the bread cool evenly so it doesn’t get soggy on the bottom.
- Measuring Cups and Spoons: I prefer using a kitchen scale for accuracy, but standard measuring cups work perfectly fine.
If you don’t have a loaf pan, you can bake this in a 9-inch round cake pan or even as muffins (bake for 18-22 minutes). I’ve done both, and they work great.
Preparation Method

Alright, let’s get to it. This is the easiest banana bread you’ll ever make, I promise.
- Preheat and Prep: Preheat your oven to 350°F (175°C). Grease your 9×5-inch loaf pan or line it with parchment paper, leaving an overhang on the long sides. This makes lifting the bread out a breeze.
- Toast the Walnuts (Optional but Worth It): Spread the chopped walnuts on a baking sheet and toast them in the oven for 5-7 minutes, or until they smell nutty and are lightly golden. Keep an eye on them—they burn fast. Set aside to cool while you make the batter.
- Mash the Bananas: In your large mixing bowl, mash the ripe bananas with a fork or potato masher until mostly smooth. A few small lumps are fine—they add texture. You should have about 1 ½ cups of mashed banana.
- Add the Wet Ingredients: To the mashed bananas, add the melted butter, granulated sugar, brown sugar, eggs, yogurt (or sour cream), and vanilla extract. Whisk everything together until it’s well combined and smooth. Don’t worry if it looks a little thin—it’s supposed to.
- Add the Dry Ingredients: Sprinkle the flour, baking soda, salt, and cinnamon (if using) over the wet mixture. Use your spatula to gently fold everything together. Stop as soon as you don’t see any more streaks of flour. Overmixing will make the bread tough, so be gentle. The batter will be thick and slightly lumpy.
- Fold in the Walnuts: Gently fold in the toasted walnuts until they’re evenly distributed. Reserve a handful to sprinkle on top if you want a prettier loaf.
- Bake: Pour the batter into your prepared loaf pan and spread it evenly. If you reserved some walnuts, sprinkle them on top now. Bake for 55-65 minutes, or until a toothpick inserted into the center comes out clean or with just a few moist crumbs. If the top is browning too quickly (around the 40-minute mark), tent the pan loosely with foil.
- Cool: Let the bread cool in the pan on a wire rack for 15 minutes. Then use the parchment paper to lift it out and let it cool completely on the rack before slicing. This step is crucial—if you slice it while it’s warm, it’ll crumble.
The hardest part is waiting for it to cool. I know. But trust me, it’s worth it. The texture sets perfectly, and the flavors meld together in a way that’s just magical.
Cooking Tips & Techniques
I’ve made a lot of banana bread in my time, and I’ve learned a few things the hard way. Here are my best tips for getting it right every time.
- Don’t Overmix: This is the number one mistake. Once you add the flour, mix just until it disappears. Overmixing develops the gluten, which makes the bread tough and dense. You want a tender, cake-like crumb, not a chewy one.
- Check Your Baking Soda: Baking soda loses its potency over time. If your bread isn’t rising properly, your baking soda might be old. To test it, drop a teaspoon into a small bowl of vinegar—if it fizzes vigorously, it’s good to go.
- Room Temperature Ingredients Matter: Cold eggs and yogurt can seize the melted butter, creating a lumpy batter. Take them out of the fridge 30 minutes before you start. If you forget, place the eggs in a bowl of warm water for 5 minutes, and microwave the yogurt for 10 seconds.
- Use a Kitchen Scale for Flour: If you have one, weigh your flour. Scooping flour from the bag can pack it down, leading to too much flour and a dry bread. One cup of all-purpose flour should weigh about 125 grams. If you don’t have a scale, spoon the flour into your measuring cup and level it off with a knife.
- Let It Cool Completely: I know it’s tempting to cut into that warm loaf, but patience pays off. The bread continues to set as it cools. Slicing too early will give you a gummy, crumbly mess. I usually let it cool for at least an hour before I even think about cutting it.
I once forgot the sugar entirely in a batch. It was… educational. Now I always double-check my ingredients before I start mixing. Learn from my mistakes!
Variations & Adaptations
This recipe is a great base for all kinds of tweaks. Here are some of my favorite variations.
- Chocolate Chip Banana Bread: Swap the walnuts for ¾ cup of semi-sweet or dark chocolate chips. The combination of banana and chocolate is a classic for a reason. I like to toss the chips in a tablespoon of flour before folding them in to prevent them from sinking to the bottom.
- Gluten-Free Version: Substitute the all-purpose flour with a 1:1 gluten-free baking blend (like Bob’s Red Mill or King Arthur). Add ½ teaspoon of xanthan gum if your blend doesn’t already include it. The texture will be slightly more tender, but it’s still delicious.
- Vegan Banana Bread: Replace the eggs with two flax eggs (2 tablespoons ground flaxseed mixed with 6 tablespoons water, let sit for 5 minutes). Use melted coconut oil or vegan butter instead of regular butter, and swap the yogurt for a dairy-free alternative like coconut or almond milk yogurt. It works surprisingly well.
- Spiced Banana Bread: Add ½ teaspoon of ground nutmeg and ¼ teaspoon of ground cloves along with the cinnamon. It gives the bread a warm, almost holiday-like flavor that’s perfect for fall. For a deeper flavor, try our cinnamon apple cider donut bread loaf for another spiced treat.
- Nut-Free Version: If you have allergies, simply omit the walnuts. You can add ½ cup of dried cranberries, raisins, or even shredded coconut for texture instead. The bread will still be moist and delicious.
I once made a batch with chopped dark chocolate and a sprinkle of sea salt on top. It was gone within an hour. Sometimes the simplest changes make the biggest difference.
Serving & Storage Suggestions
This banana bread is wonderful on its own, but here are a few ways to make it even better.
- Serving Temperature: Serve it at room temperature for the best texture. If you want a warm slice, pop it in the microwave for 10-15 seconds or toast it lightly in a skillet with a pat of butter. The butter melts into the bread, and the edges get slightly crispy—heavenly.
- Pairings: A slice of this bread is perfect with a cup of coffee, a glass of cold milk, or a dollop of Greek yogurt for breakfast. For dessert, try it with a scoop of vanilla ice cream and a drizzle of caramel sauce. It’s also fantastic alongside a bowl of slow cooker potato soup for a cozy, comforting meal.
- Storage: Store the bread in an airtight container at room temperature for up to 4 days. If you live in a humid climate, keep it in the fridge to prevent mold. The bread actually gets more moist and flavorful on the second day, so don’t worry if you don’t finish it right away.
- Freezing: This bread freezes beautifully. Wrap the cooled loaf (or individual slices) tightly in plastic wrap, then in a layer of aluminum foil. Freeze for up to 3 months. To thaw, leave it on the counter for a few hours or pop a slice in the toaster straight from the freezer. It’s a lifesaver for busy mornings.
- Flavor Development: The flavors really deepen after a day or two. The banana flavor becomes more pronounced, and the spices meld together beautifully. If you can resist eating it all on day one, you’ll be rewarded on day two.
Nutritional Information & Benefits
Here’s the approximate nutritional breakdown for one slice (based on 10 slices per loaf). Keep in mind this is an estimate and can vary based on specific ingredients.
- Calories: ~280
- Fat: 12g
- Carbohydrates: 38g
- Fiber: 2g
- Sugar: 18g
- Protein: 5g
This bread has some surprising health benefits, too. Bananas are packed with potassium, which is great for heart health and muscle function. Walnuts are a fantastic source of omega-3 fatty acids, which support brain health. And the yogurt adds a bit of calcium and probiotics. It’s not health food, but it’s certainly a better choice than most store-bought baked goods. If you’re looking for a more balanced breakfast option, try our healthy peanut butter banana overnight oats for a quick and nutritious start to your day.
For those with dietary concerns, this recipe contains gluten, dairy, eggs, and nuts. For a gluten-free or vegan version, check the variations section above.
Conclusion
This Perfect One-Bowl Banana Walnut Bread is everything I want in a recipe: simple, forgiving, and absolutely delicious. It’s the kind of bread you’ll make again and again, whether you’re using up sad bananas on a Wednesday night or baking for a weekend brunch. The one-bowl method isn’t a gimmick—it’s a game-changer. And that tender crumb, punctuated by crunchy toasted walnuts? Pure comfort.
I hope you give this recipe a try and make it your own. Maybe you’ll add chocolate chips, or a swirl of peanut butter, or a sprinkle of cinnamon sugar on top. That’s the beauty of a good base recipe—it invites you to play. So go ahead, mash those bananas, and let me know how it turns out. Drop a comment below, share a photo, or tag me on social media. I’d love to see your creation!
Happy baking, friends. You’ve got this.
Frequently Asked Questions
Can I use frozen bananas for this recipe?
Absolutely! Frozen bananas are perfect for banana bread. Thaw them completely, then drain off any excess liquid before mashing. They’ll be extra soft and even sweeter than fresh ones.
Why did my banana bread sink in the middle?
This usually happens if the bread is underbaked or if you opened the oven door too early. Make sure to test with a toothpick before taking it out, and resist the urge to peek for the first 40 minutes of baking.
Can I make this recipe into muffins?
Yes! Divide the batter among a 12-cup muffin tin lined with paper liners. Bake at 350°F for 18-22 minutes, or until a toothpick comes out clean. You’ll get about 12-14 muffins.
How do I know when my bananas are ripe enough?
Look for bananas that are heavily spotted or even mostly brown on the outside. They should be soft to the touch and smell sweet. If they’re still yellow, they won’t mash well and won’t provide enough sweetness or moisture.
Can I add other mix-ins besides walnuts?
Definitely! Chocolate chips, dried cranberries, shredded coconut, chopped pecans, or even a swirl of Nutella all work beautifully. Just keep the total amount of mix-ins to about ¾ cup to avoid overcrowding the batter.
Pin This Recipe!
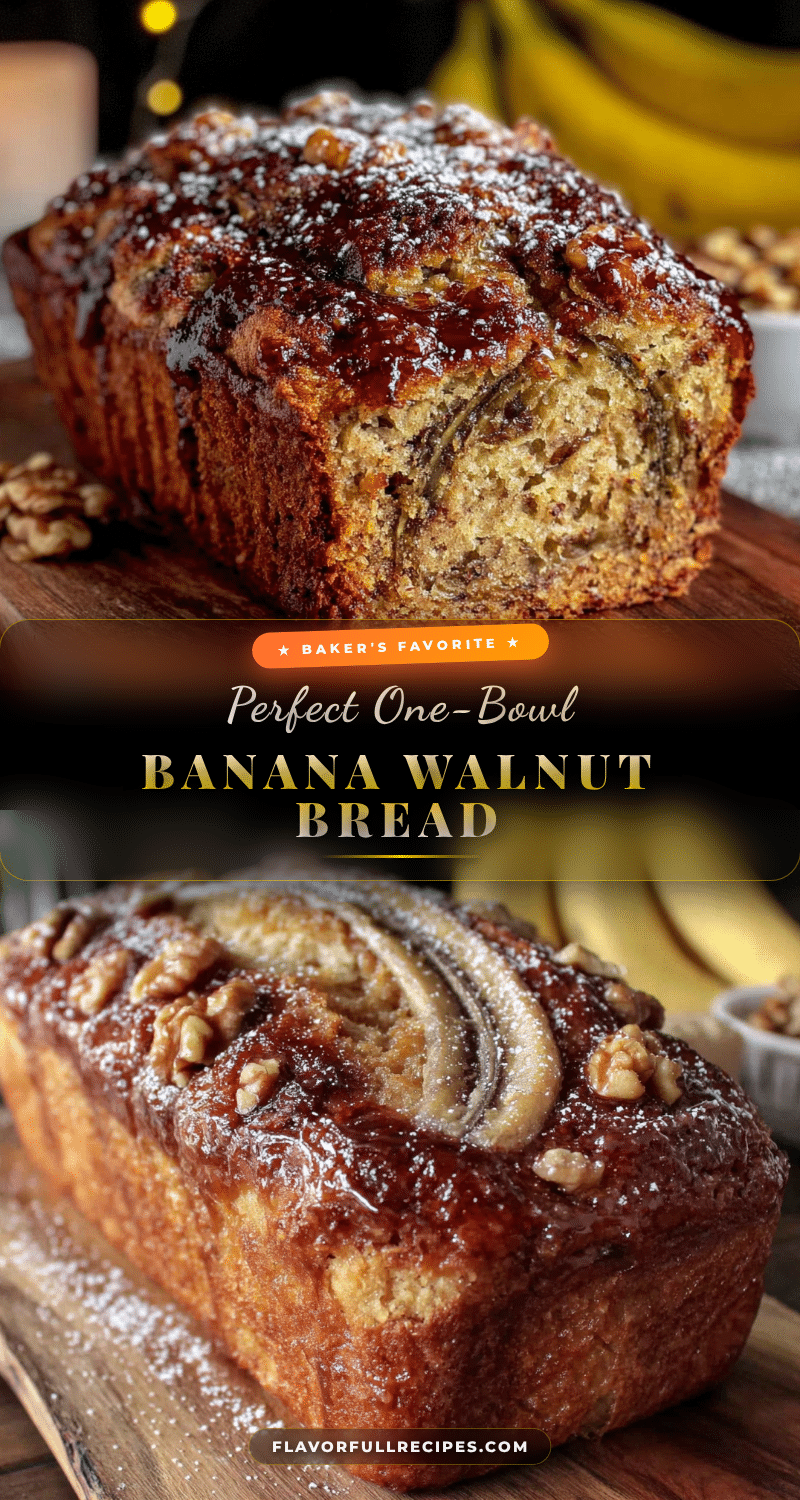
Perfect One-Bowl Banana Walnut Bread: Easy Homemade Recipe
- Total Time: 1 hour 10 minutes
- Yield: 10 servings 1x
Description
This one-bowl banana walnut bread is incredibly moist, tender, and packed with crunchy toasted walnuts. It’s the easiest, most forgiving recipe that delivers a stunning result without demanding a lot from you.
Ingredients
- 3 medium ripe bananas (about 1 ½ cups mashed)
- 1 ¾ cups all-purpose flour (220g)
- ½ cup granulated sugar (100g)
- ¼ cup light brown sugar (50g, packed)
- ⅓ cup unsalted butter (75g, melted)
- 2 large eggs (room temperature)
- ¼ cup plain yogurt or sour cream (60g)
- 1 teaspoon vanilla extract
- 1 teaspoon baking soda
- ½ teaspoon salt
- 1 teaspoon ground cinnamon (optional)
- ¾ cup walnuts (85g, chopped and toasted)
Instructions
- Preheat oven to 350°F (175°C). Grease a 9×5-inch loaf pan or line with parchment paper, leaving overhang on long sides.
- Toast walnuts on a baking sheet for 5-7 minutes until fragrant and lightly golden. Set aside to cool.
- In a large mixing bowl, mash bananas with a fork or potato masher until mostly smooth (a few lumps are fine).
- Add melted butter, granulated sugar, brown sugar, eggs, yogurt (or sour cream), and vanilla extract. Whisk until well combined and smooth.
- Sprinkle flour, baking soda, salt, and cinnamon (if using) over the wet mixture. Gently fold with a spatula until just combined—do not overmix. Batter will be thick and slightly lumpy.
- Gently fold in toasted walnuts until evenly distributed. Reserve a handful for topping if desired.
- Pour batter into prepared loaf pan and spread evenly. Sprinkle reserved walnuts on top if using.
- Bake for 55-65 minutes, or until a toothpick inserted into the center comes out clean or with a few moist crumbs. If top browns too quickly, tent with foil around 40 minutes.
- Cool in pan on a wire rack for 15 minutes, then lift out using parchment paper and cool completely on rack before slicing.
Notes
Use very ripe bananas (spotted or black) for best sweetness and moisture. Room temperature ingredients help create a smooth batter. Do not overmix once flour is added to avoid tough bread. Let bread cool completely before slicing for best texture. Store in an airtight container at room temperature for up to 4 days, or freeze for up to 3 months.
- Prep Time: 15 minutes
- Cook Time: 55 minutes
- Category: Dessert
- Cuisine: American
Nutrition
- Serving Size: 1 slice
- Calories: 280
- Sugar: 18
- Sodium: 220
- Fat: 12
- Saturated Fat: 4
- Carbohydrates: 38
- Fiber: 2
- Protein: 5
Keywords: banana bread, walnut bread, one-bowl banana bread, easy banana bread, moist banana bread, homemade banana bread


