
That sound — the gentle sizzle of butter meeting a hot pan, garlic hitting the fat and releasing that first sharp, sweet note — still stops me in my tracks. It was a Tuesday night, the kind where you stare into the fridge hoping something will magically transform into dinner. I had chicken thighs thawed, a head of garlic that was starting to sprout, and a half-empty box of long-grain rice. No grand plan, just hunger and the faint memory of a garlic butter rice dish my grandmother used to make in her cast iron skillet. She never measured anything, just tossed and tasted until it felt right. I wanted that feeling — the one where one pan holds everything you need, and the cleanup is almost as satisfying as the meal.
So I grabbed my heaviest skillet, threw in a generous knob of butter (honestly, more than I probably needed), and let the garlic perfume the whole kitchen. The chicken went in skin-side down, and that crackle was pure comfort. By the time the rice absorbed all that garlicky, buttery goodness and the chicken came out golden and tender, I knew I had stumbled onto something special. This one-pan garlic butter chicken and rice is exactly that — a recipe born from a busy weeknight and a craving for something deeply satisfying without a sink full of dishes. It’s the kind of meal that makes you feel like you’ve got it all figured out, even when you’re just winging it.
Why You’ll Love This Recipe
I’ve tested this one-pan garlic butter chicken and rice more times than I can count, and every single time, it delivers. It’s not just another chicken and rice recipe — it’s the one that finally works. Let me tell you why it’s earned a permanent spot in my weekly rotation.
- Quick & Easy : From start to finish, this dish comes together in about 45 minutes. Most of that time is hands-off, letting the oven do the heavy lifting while you relax or prep a quick side salad.
- Simple Ingredients : You probably have everything you need already. Chicken, rice, garlic, butter, and a few pantry staples. No fancy grocery runs required.
- Perfect for Busy Weeknights : This is the dinner you turn to when you’re tired but still want something homemade and comforting. It’s reliable, forgiving, and always hits the spot.
- Crowd-Pleaser : I’ve served this to picky kids, hungry teenagers, and dinner guests who usually don’t go for rice dishes. Empty plates every single time.
- Unbelievably Delicious : The rice soaks up all that garlic butter sauce, the chicken stays juicy with crispy golden edges, and every bite tastes like you spent hours in the kitchen.
What makes this recipe different from the rest? It’s the technique. Most one-pan chicken and rice dishes end up with mushy rice or dry chicken. But by searing the chicken first, then letting it finish cooking on top of the rice, you get perfectly cooked meat and fluffy, flavorful grains. It’s a small detail that makes a huge difference.
This isn’t just good — it’s the kind of meal that makes you close your eyes after the first bite. It’s comfort food reimagined, simpler and faster, but with the same soul-soothing satisfaction. Perfect for impressing guests without stress, or turning a regular Tuesday into something memorable.
What Ingredients You Will Need
This recipe uses simple, wholesome ingredients to deliver bold flavor and satisfying texture without the fuss. Most of these are pantry staples, which makes this dish perfect for those nights when you need dinner on the table without a trip to the store.
For the Chicken
- 4 bone-in, skin-on chicken thighs (about 1.5 lbs / 680g) — The skin gets beautifully crispy, and the bone keeps the meat moist during cooking. You can use boneless thighs, but reduce the cooking time by about 10 minutes.
- 1 teaspoon salt — I prefer kosher salt for its clean flavor.
- ½ teaspoon black pepper — Freshly ground is best here.
- ½ teaspoon paprika — Adds a subtle smokiness and beautiful color. Smoked paprika works great too.
- ¼ teaspoon garlic powder — Just a little extra garlic punch.
For the Rice and Sauce
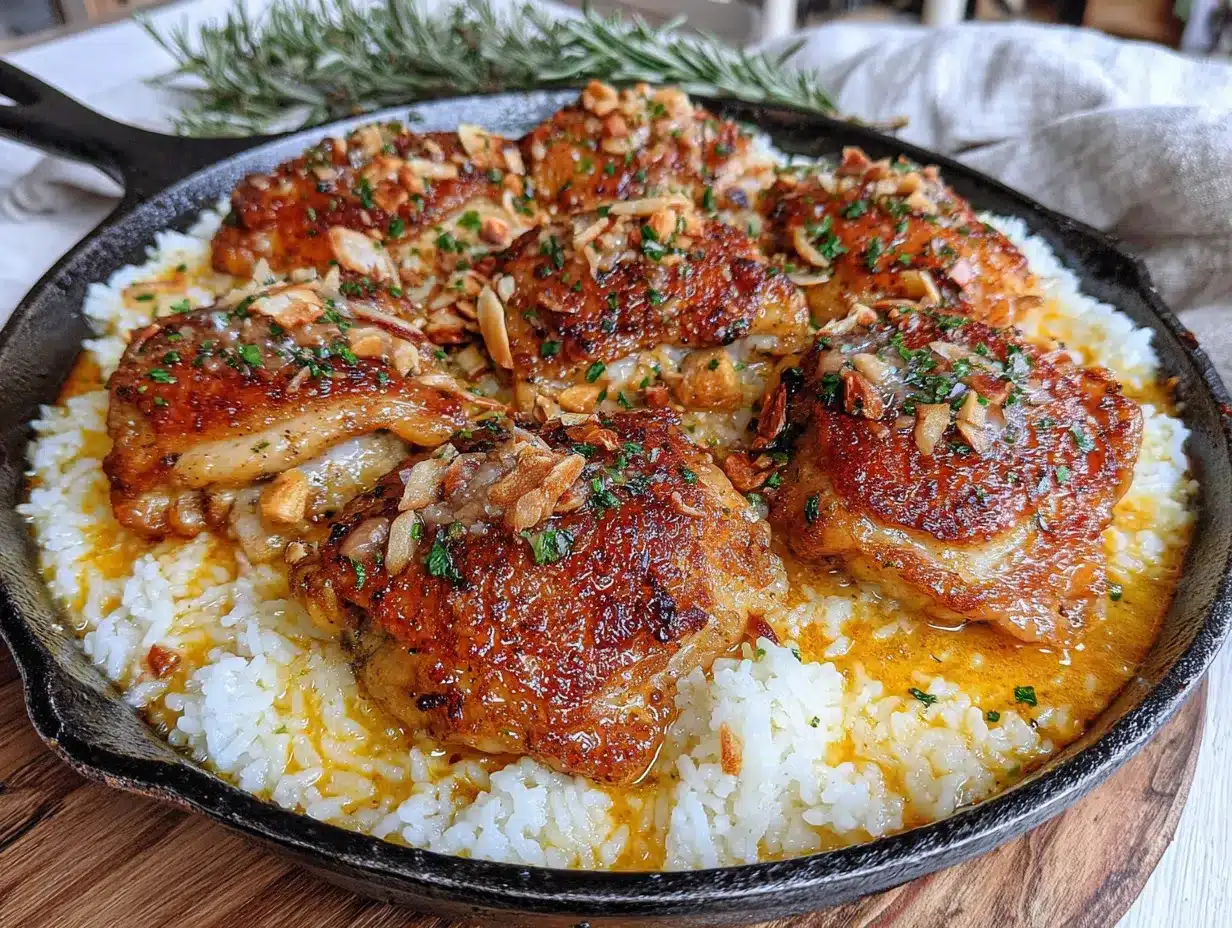
- 3 tablespoons unsalted butter — Divided. Two tablespoons for searing the chicken, one tablespoon for the rice. Use good quality butter here; it makes a difference.
- 5 cloves garlic, minced — Fresh garlic is non-negotiable. Don’t use the jarred stuff. I like to smash and mince it myself for the best flavor.
- 1 cup long-grain white rice — Basmati or jasmine work beautifully. Rinse it first to remove excess starch for fluffier rice.
- 2 cups chicken broth — Low-sodium is your friend here. You can control the salt level better. I recommend Swanson or Kitchen Basics.
- ½ cup water — Helps the rice cook evenly without drying out.
- 1 tablespoon fresh parsley, chopped — For garnish and a fresh finish. Dried works in a pinch, but fresh is lovely.
- Optional: ¼ cup grated Parmesan cheese — Stir this in at the end for an extra layer of savory goodness. Totally optional but highly recommended.
Ingredient Tips: If you want to swap the chicken thighs for breasts, go for it — just know that breasts cook faster and can dry out more easily. Check for doneness at 20 minutes of baking. For a dairy-free version, use olive oil instead of butter and a dairy-free broth. The flavor will be slightly different but still delicious.
Equipment Needed
You don’t need a fancy kitchen to make this one-pan garlic butter chicken and rice. Here’s what you’ll need:
- Large oven-safe skillet or Dutch oven (10-12 inches / 25-30 cm) — Cast iron is my go-to for even heat and that perfect sear. A stainless steel skillet with an oven-safe handle works great too. If you don’t have an oven-safe skillet, you can transfer everything to a baking dish after searing.
- Sharp knife and cutting board — For mincing garlic and chopping parsley. A good chef’s knife makes this step quick and satisfying.
- Measuring cups and spoons — Accuracy matters for the rice-to-liquid ratio.
- Wooden spoon or spatula — For stirring the rice and scraping up those flavorful browned bits from the bottom of the pan.
- Aluminum foil — For covering the skillet while the rice finishes cooking. This traps steam and ensures fluffy rice.
Budget-Friendly Tip: If you don’t own a Dutch oven, a deep oven-safe nonstick skillet works perfectly. Just make sure it can handle high heat on the stovetop. Lodge cast iron skillets are affordable and last forever — I’ve had mine for over a decade.
Preparation Method
Let’s get cooking! This one-pan garlic butter chicken and rice comes together in a few simple steps. I’ll walk you through each one, including what to look for along the way.
- Preheat your oven to 375°F (190°C). Position the rack in the middle. This gives you even heat for the rice to cook perfectly.
- Pat the chicken thighs dry with paper towels. This is crucial for crispy skin. Don’t skip this step — wet skin steams instead of sears. Season both sides with salt, pepper, paprika, and garlic powder.
- Heat 2 tablespoons of butter in your oven-safe skillet over medium-high heat. Let it melt and foam, then swirl the pan to coat the bottom. The butter should be sizzling but not browning.
- Place the chicken skin-side down in the skillet. Don’t crowd the pan — if your skillet is small, work in batches. Let it cook undisturbed for 5-6 minutes. You’ll know it’s ready when the skin is deep golden brown and releases easily from the pan. Flip and cook for another 3 minutes. The chicken won’t be cooked through yet, and that’s okay.
- Remove the chicken to a plate. Leave the rendered fat and browned bits in the pan — that’s pure flavor.
- Reduce the heat to medium. Add the remaining 1 tablespoon of butter and the minced garlic. Stir constantly for about 30 seconds until fragrant. Don’t let the garlic burn; it turns bitter quickly. If it starts browning too fast, take the pan off the heat for a moment.
- Add the rinsed and drained rice to the pan. Stir it around for about a minute, coating each grain in that garlic butter. This toasting step adds nuttiness and helps the rice stay separate.
- Pour in the chicken broth and water. Stir to combine, scraping up any browned bits from the bottom of the pan. These bits are packed with flavor and will season the rice beautifully. Bring the liquid to a gentle simmer.
- Nestle the chicken thighs back into the pan, skin-side up. They should sit on top of the rice, not buried in it. This keeps the skin crispy.
- Cover the skillet tightly with aluminum foil. Make sure it’s sealed well so no steam escapes. Transfer to the preheated oven.
- Bake for 30-35 minutes. At the 30-minute mark, check the rice. It should be tender and have absorbed most of the liquid. If it’s still a bit firm, cover and bake for another 5 minutes. The chicken should register 165°F (74°C) at the thickest part.
- Remove from the oven and let it rest, covered, for 5 minutes. This allows the rice to finish absorbing any remaining liquid and makes it extra fluffy. Fluff the rice gently with a fork, garnish with fresh parsley, and serve.
Pro Tip: If you want extra crispy chicken skin, after baking, pop the skillet under the broiler for 2-3 minutes. Watch it closely so it doesn’t burn. This gives you that restaurant-quality finish.
Cooking Tips & Techniques
I’ve made this one-pan garlic butter chicken and rice more times than I care to admit, and I’ve learned a few things the hard way. Here are my best tips to help you nail it every time.
Don’t skip the rice rinse. I know it’s an extra step, but rinsing the rice removes excess starch that can turn your dish gummy. Place the rice in a fine-mesh strainer and run cold water over it until the water runs clear. This takes about 30 seconds and makes a world of difference.
Use a heavy-bottomed pan. Even heat distribution is key for both searing the chicken and cooking the rice evenly. Cast iron is ideal, but any oven-safe heavy skillet works. Thin pans create hot spots that can burn the rice before it’s cooked through.
Let the chicken sear without moving it. I know it’s tempting to peek, but the skin needs uninterrupted contact with the hot pan to develop that gorgeous golden crust. Trust the process — after 5-6 minutes, it will release naturally. If it sticks, it’s not ready yet.
Mind your garlic. Garlic burns in seconds. When you add it to the pan after removing the chicken, keep the heat at medium and stir constantly. The moment it becomes fragrant (about 30 seconds), add the rice. Burnt garlic tastes bitter and can ruin the whole dish.
Check your liquid ratio. Different rice varieties absorb liquid differently. Long-grain white rice typically needs a 2:1 liquid-to-rice ratio. If you’re using brown rice, you’ll need more liquid and a longer cooking time (about 45-50 minutes). Adjust accordingly.
Let it rest. That final 5-minute rest after baking isn’t optional. It allows the rice to finish absorbing steam and the juices to redistribute in the chicken. Cutting into it too soon will leave you with dry meat and wet rice.
One mistake I’ll never make again: The first time I made this, I used a nonstick skillet that wasn’t oven-safe past 350°F. The handle melted in the oven. Always check your pan’s heat tolerance before starting. If in doubt, transfer everything to a baking dish after searing.
Variations & Adaptations
This one-pan garlic butter chicken and rice is wonderfully adaptable. Here are some of my favorite ways to switch it up.
Vegetarian Version: Skip the chicken and use 2 cups of mixed mushrooms (cremini, shiitake, or oyster). Sear them in the butter until golden, then proceed with the recipe as written. Use vegetable broth instead of chicken broth. The mushrooms add a meaty, umami richness that’s deeply satisfying.
Spicy Kick: Add ½ teaspoon of red pepper flakes along with the garlic. For even more heat, stir in a chopped serrano pepper or a dash of cayenne with the rice. The heat cuts through the butter beautifully and adds a lovely warmth.
Herb Infusion: Throw a few sprigs of fresh thyme or rosemary into the pan when you add the broth. They infuse the rice with an aromatic, earthy flavor. Remove the stems before serving. I love this version in the fall — it feels cozy and sophisticated.
Cheesy Delight: After the rice is cooked, stir in ½ cup of shredded mozzarella or Parmesan cheese. The cheese melts into the rice, creating a creamy, almost risotto-like texture. Top with extra cheese and broil for 2 minutes for a golden, bubbly crust.
Lemon Garlic Twist: Add the zest of one lemon and 2 tablespoons of fresh lemon juice along with the broth. The acidity brightens the dish and balances the richness of the butter. Garnish with extra lemon slices for a beautiful presentation.
Personal Favorite: I once added a handful of frozen peas and chopped carrots to the pan during the last 10 minutes of baking. The vegetables softened perfectly and added color and sweetness. Now I do it almost every time — it turns the dish into a complete one-pan meal with almost no extra effort.
Serving & Storage Suggestions
This one-pan garlic butter chicken and rice is a meal in itself, but a few simple sides can round it out beautifully.
Serving Temperature: Serve hot, straight from the oven. The rice should be steaming, and the chicken skin should have that irresistible crunch. A sprinkle of fresh parsley adds a pop of color and freshness.
Perfect Pairings: A simple green salad with a lemon vinaigrette cuts through the richness of the butter. Steamed green beans or roasted asparagus also work wonderfully. For a heartier meal, serve with crusty bread to soak up any leftover garlic butter sauce from the bottom of the pan.
Storage: Let any leftovers cool completely before transferring to an airtight container. Store in the refrigerator for up to 4 days. The flavors actually deepen overnight — the rice absorbs more of the garlic butter goodness, making leftovers even better.
Freezing: This dish freezes well for up to 3 months. Portion it into individual containers for easy lunches or quick dinners. Thaw overnight in the refrigerator before reheating.
Reheating: The best way to reheat is in a covered skillet over medium-low heat with a splash of chicken broth or water. This adds moisture back into the rice and prevents it from drying out. Microwave in 30-second bursts if you’re in a hurry, but the stovetop method gives you better texture. The chicken skin won’t be as crispy after reheating, but the flavor is still fantastic.
Flavor Development: I actually love this dish on day two. The rice continues to absorb the garlic butter flavors, and the chicken becomes even more tender. If you’re meal-prepping, this is a great candidate — it tastes just as good (if not better) the next day.
Nutritional Information & Benefits
Here’s an approximate nutritional breakdown for one serving (based on 4 servings, using bone-in chicken thighs and long-grain white rice):
| Nutrient | Amount per Serving |
|---|---|
| Calories | 485 |
| Protein | 32g |
| Fat | 22g |
| Saturated Fat | 9g |
| Carbohydrates | 38g |
| Fiber | 1g |
| Sugar | 1g |
| Sodium | 720mg |
Health Benefits: Chicken thighs are rich in protein, iron, and B vitamins, which support energy metabolism. Garlic is known for its anti-inflammatory and immune-boosting properties. Butter provides fat-soluble vitamins A, D, E, and K. While this isn’t a low-calorie dish, it’s a balanced meal with protein, carbs, and healthy fats that will keep you satisfied for hours.
Dietary Considerations: This recipe is naturally gluten-free (check your broth label to be sure). For a lower-carb option, swap the rice for cauliflower rice — just reduce the liquid and cooking time significantly. For a dairy-free version, use olive oil instead of butter and a dairy-free broth.
Potential Allergens: Dairy (butter). If you’re using Parmesan, that’s dairy too. The recipe is nut-free, egg-free, and soy-free as written.
I love that this dish feels indulgent but is made with whole, recognizable ingredients. It’s the kind of meal that nourishes both body and soul — and that’s a win in my book.
Conclusion
This one-pan garlic butter chicken and rice is more than just a weeknight dinner — it’s a reminder that simple ingredients, treated with care, can create something truly special. The crispy-skinned chicken, the fluffy rice infused with garlic and butter, and the fact that it all comes together in a single pan makes this a recipe you’ll come back to again and again.
I hope you make this your own. Add your favorite herbs, toss in some vegetables, or give it a spicy kick. Cooking should feel flexible and fun, not rigid. The best meals are the ones that adapt to what you have and what you love.
Personally, I love this recipe because it reminds me of that Tuesday night when I stopped overthinking dinner and just cooked from instinct. It turned out better than anything I could have planned. That’s the magic of cooking — sometimes the best dishes come from the simplest moments.
If you try this one-pan garlic butter chicken and rice, I’d love to hear about it. Leave a comment below and let me know how it turned out, what variations you tried, or if you served it with something unexpected. And if you loved it, share it with a friend who needs a reliable dinner in their back pocket. Happy cooking!
Frequently Asked Questions
Can I use chicken breasts instead of thighs?
Absolutely! Boneless, skinless chicken breasts will work, but they cook faster and can dry out more easily. Check for doneness at around 20 minutes of baking. For best results, use bone-in, skin-on chicken breasts for extra moisture and flavor.
Why is my rice mushy or undercooked?
Mushy rice usually means too much liquid or overcooking. Undercooked rice means not enough liquid or time. Stick to the 2:1 liquid-to-rice ratio (2 cups liquid for 1 cup rice) and check at 30 minutes. Every oven runs slightly different, so adjust timing as needed.
Can I make this in a slow cooker or Instant Pot?
Yes! For the Instant Pot, sear the chicken using the sauté function, then add the rice and liquid. Pressure cook on high for 6 minutes with a natural release. For a slow cooker, sear the chicken first, then add all ingredients and cook on low for 4-5 hours. The texture will be softer than the oven version.
How do I prevent the chicken skin from getting soggy?
The key is keeping the chicken skin above the liquid. When you nestle the chicken into the pan, make sure the skin is exposed above the rice. Also, pat the chicken very dry before searing. For extra crispiness, broil for 2-3 minutes after baking.
Can I double this recipe?
You can, but you’ll need a larger pan (at least 14 inches) to avoid overcrowding. If your pan isn’t big enough, sear the chicken in batches and transfer everything to a large baking dish before adding the rice and baking. Adjust the baking time by 5-10 minutes for a larger batch.
Pin This Recipe!
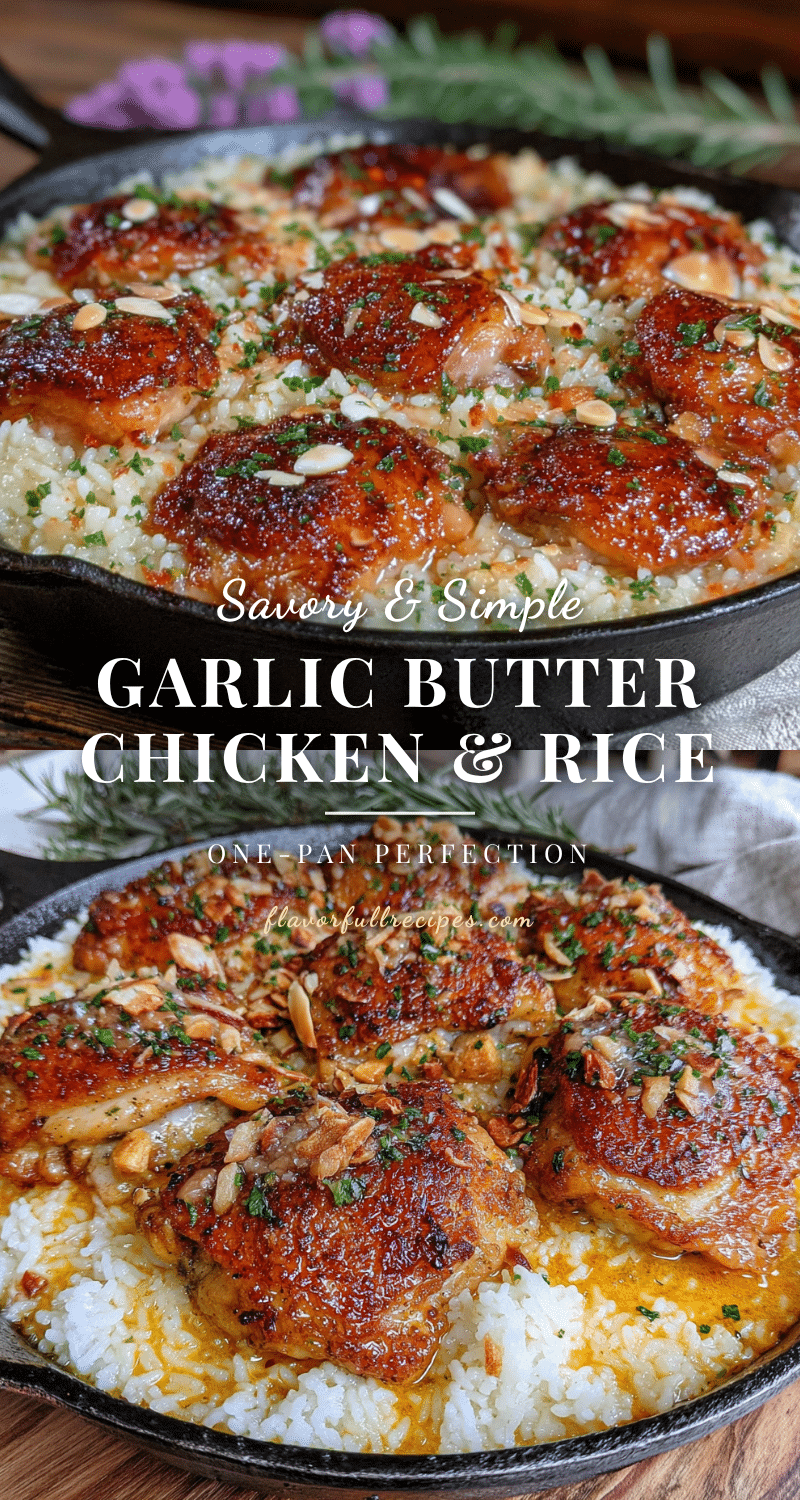

One-Pan Garlic Butter Chicken and Rice – Easy Dinner in 45 Minutes
- Total Time: 45 minutes
- Yield: 4 servings 1x
Description
A simple, one-pan meal featuring crispy-skinned chicken thighs and fluffy rice infused with garlic and butter. Perfect for busy weeknights, this dish delivers deep comfort with minimal cleanup.
Ingredients
- 4 bone-in, skin-on chicken thighs (about 1.5 lbs / 680g)
- 1 teaspoon salt
- ½ teaspoon black pepper
- ½ teaspoon paprika
- ¼ teaspoon garlic powder
- 3 tablespoons unsalted butter, divided
- 5 cloves garlic, minced
- 1 cup long-grain white rice (rinsed and drained)
- 2 cups low-sodium chicken broth
- ½ cup water
- 1 tablespoon fresh parsley, chopped
- Optional: ¼ cup grated Parmesan cheese
Instructions
- Preheat your oven to 375°F (190°C). Position the rack in the middle.
- Pat the chicken thighs dry with paper towels. Season both sides with salt, pepper, paprika, and garlic powder.
- Heat 2 tablespoons of butter in an oven-safe skillet over medium-high heat until sizzling.
- Place the chicken skin-side down in the skillet. Cook undisturbed for 5-6 minutes until deep golden brown. Flip and cook for another 3 minutes. Remove chicken to a plate.
- Reduce heat to medium. Add remaining 1 tablespoon butter and minced garlic. Stir constantly for about 30 seconds until fragrant.
- Add the rinsed and drained rice to the pan. Stir for about 1 minute to coat each grain in garlic butter.
- Pour in chicken broth and water. Stir to combine, scraping up any browned bits from the bottom. Bring to a gentle simmer.
- Nestle the chicken thighs back into the pan, skin-side up, on top of the rice.
- Cover the skillet tightly with aluminum foil. Transfer to the preheated oven.
- Bake for 30-35 minutes. Check that the rice is tender and the chicken registers 165°F (74°C) at the thickest part.
- Remove from the oven and let rest, covered, for 5 minutes. Fluff rice gently with a fork, garnish with fresh parsley, and serve.
Notes
For extra crispy chicken skin, broil for 2-3 minutes after baking. Rinsing the rice is essential for fluffy texture. If using chicken breasts, check for doneness at 20 minutes. For a dairy-free version, use olive oil instead of butter.
- Prep Time: 15 minutes
- Cook Time: 30 minutes
- Category: Main Course
- Cuisine: American
Nutrition
- Serving Size: 1 serving (1 chicken
- Calories: 485
- Sugar: 1
- Sodium: 720
- Fat: 22
- Saturated Fat: 9
- Carbohydrates: 38
- Fiber: 1
- Protein: 32
Keywords: one-pan chicken and rice, garlic butter chicken, easy weeknight dinner, chicken thighs, one skillet meal


