
I burned the peanut butter mixture twice before I finally got these Easy No-Bake Peanut Butter Chocolate School Treats right—and honestly, that almost made me give up on them. At first, I couldn’t figure out why the texture was off or why the chocolate wouldn’t set properly. I was so frustrated because these treats are supposed to be simple, quick, and kid-approved, but my attempts felt like a mess every time.
One afternoon, while scraping a slightly charred pan, I realized it wasn’t about rushing or skipping steps. It was about patience and understanding how the peanut butter and chocolate play together without overcooking. I also never really considered how the choice of peanut butter mattered until I switched to a creamier, less oily kind—and that made all the difference.
The smell of peanut butter melting gently with chocolate swirling in the background, that first taste of the soft, chewy bites—well, it’s a small but sweet victory. These school treats became a kind of ritual for me, a snack that’s as effortless as it is nostalgic for any busy parent or snack-maker. There’s something quietly satisfying about grabbing a no-bake treat that doesn’t require an oven or fancy ingredients, just a little bit of attention and care.
And since then, these Easy No-Bake Peanut Butter Chocolate School Treats have stuck around in my kitchen rotation not because they’re fancy, but because they’re honest, straightforward, and they really hit the spot when the kids want something sweet after school. No bells, no whistles—just simple, kid-friendly goodness.
Why You’ll Love This Recipe
This recipe is a keeper because it hits all the right notes without fuss or stress. I’ve tested it over and over (and yes, burned it a few times) to make sure it’s reliable and easy enough for anyone to whip up quickly.
- Quick & Easy: Ready in about 20 minutes, no oven needed—perfect for those hectic school afternoons or last-minute snack emergencies.
- Simple Ingredients: You probably already have peanut butter, chocolate chips, and a few pantry staples on hand—no special trips required.
- Perfect for Kids’ Lunches: These treats pack well and are a fun surprise in lunchboxes or after-school snack bowls.
- Crowd-Pleaser: My kids and their friends go crazy for these every time; the combo of creamy peanut butter and rich chocolate is just irresistible.
- Unbelievably Delicious: The texture is soft and chewy with just the right amount of chocolate coating, making these school treats a cozy favorite.
What makes this recipe stand out is the balance between the peanut butter’s creaminess and the chocolate’s smooth coat without getting overly sticky or dry. It’s not just slapped-together; there’s a little technique in warming the peanut butter just so and folding in the dry ingredients to get that perfect bite. Plus, you can tweak it for allergies or preferences without losing the charm—like swapping out chocolate chips for dairy-free options or using almond butter for a twist.
In a sea of snack options, these school treats feel like a small, reliable win—bringing a little comfort and sweetness that kids really appreciate, without turning the kitchen upside down.
What Ingredients You Will Need
This recipe uses simple, wholesome ingredients that come together to create a satisfying, textured treat without any fuss. Most are pantry staples, and you can easily swap a few based on what you have or dietary needs.
- Peanut Butter (creamy, unsweetened or lightly salted) – This acts as the binding agent and flavor star; I prefer using a natural brand like Smucker’s Natural for richness without excess oil.
- Chocolate Chips (semi-sweet or milk chocolate) – For coating and a bit of melty sweetness. Ghirardelli chips work great here.
- Honey or Maple Syrup – Adds just enough sweetness and helps hold the ingredients together without making the treats too sticky.
- Rolled Oats (old-fashioned) – Provides chewiness and heartiness. You can use gluten-free oats if needed.
- Rice Cereal (crisped, like Rice Krispies) – Adds crunch and lightness to balance the dense peanut butter.
- Vanilla Extract – Just a splash to round out the flavors.
- Salt (a pinch) – Enhances the peanut butter and chocolate contrast.
Optional:
- Chopped Nuts (such as peanuts or almonds) – For added texture if your kids like a bit of crunch.
- Dairy-Free Chocolate Chips – For allergy-friendly versions.
- Sunflower Seed Butter – A great peanut-free substitute that still binds well.
Seasonal note: Sometimes I like to toss in dried cranberries or mini marshmallows for a little festive twist, especially around holidays or for school parties.
Equipment Needed
To make these Easy No-Bake Peanut Butter Chocolate School Treats, you won’t need anything fancy—just the basics that most kitchens already have.
- Medium Saucepan: For gently warming the peanut butter and honey mixture. A non-stick pan helps prevent burning.
- Mixing Bowl: To combine oats, rice cereal, and the warm peanut butter mix.
- Spoon or Spatula: For stirring and folding ingredients together. I find a silicone spatula easiest for scraping the sides clean.
- Baking Sheet or Tray: To set the treats on while the chocolate hardens. Lined with parchment paper or a silicone mat for easy cleanup.
- Microwave-Safe Bowl: To melt chocolate chips quickly and evenly. You can also melt chocolate over a double boiler if preferred.
- Measuring Cups and Spoons: For accuracy—especially important with sticky ingredients.
Tip: If you don’t have parchment paper, lightly greasing your tray works fine, but parchment really saves you from sticky fingers later. Also, a small cookie scoop can help portion out the treats evenly if you want uniform sizes.
Preparation Method
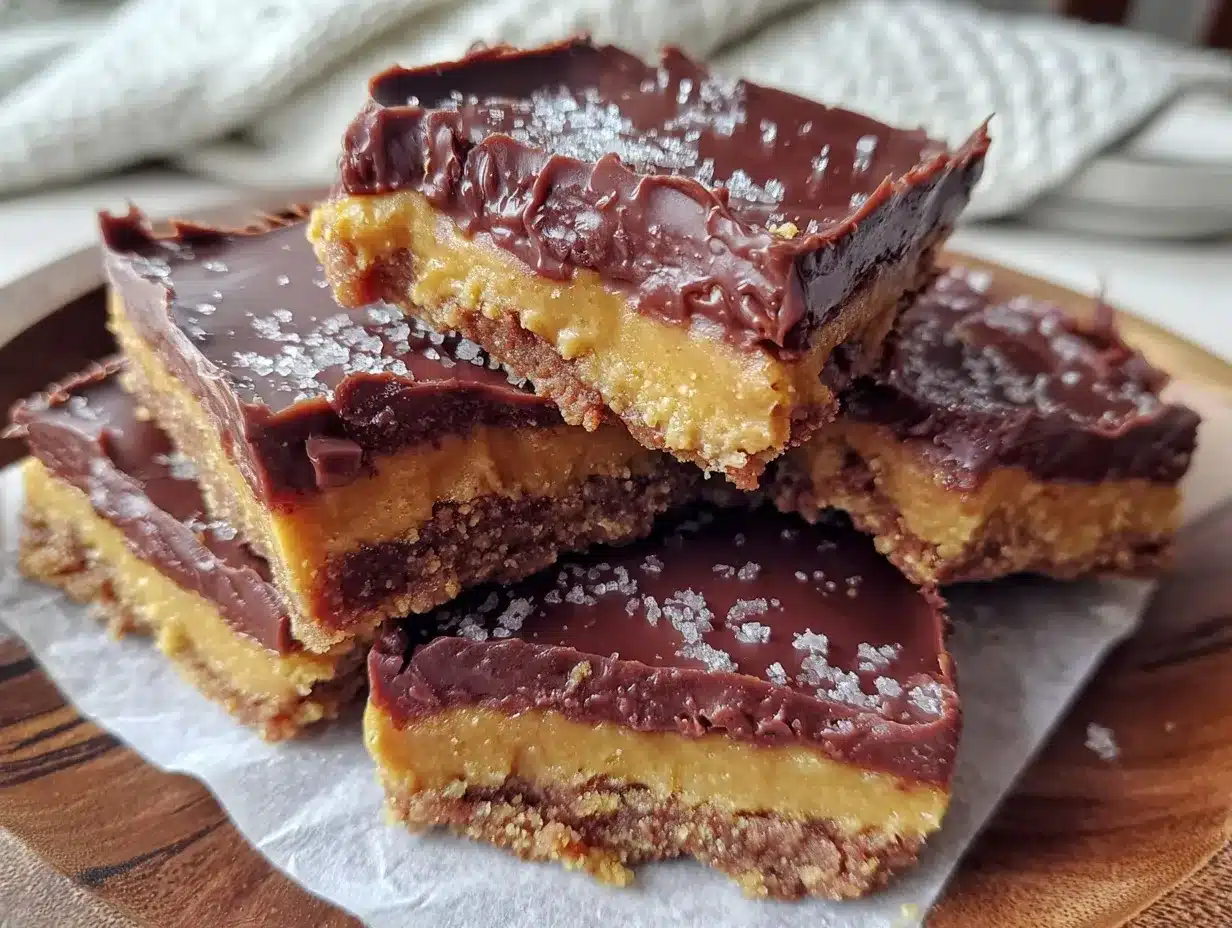
- Gather and measure all ingredients. Have everything ready before you start because the mixing goes quickly. For reference: use 1 cup (240 ml) peanut butter, 1/2 cup (120 ml) honey, 2 cups (180 g) rolled oats, 1 cup (30 g) rice cereal, 1 teaspoon vanilla extract, and a pinch of salt.
- Warm the peanut butter and honey. Place the peanut butter and honey in a medium saucepan over low heat. Stir constantly for about 3-5 minutes until smooth and combined. Be careful not to overheat or burn the mixture—if it smells toasty or you see bubbles forming, reduce the heat immediately.
- Remove from heat and stir in vanilla and salt. This little bit of vanilla adds depth, and the salt balances the sweetness.
- Mix oats and rice cereal in a large bowl. Make sure they’re evenly combined for consistent texture.
- Pour the warm peanut butter mixture over the dry ingredients. Stir quickly but gently to coat all the oats and cereal evenly. The mixture should be sticky but manageable—if it feels too wet, add a bit more oats.
- Shape the treats. Using a spoon or your hands, scoop and form bite-sized balls or bars. Place each piece onto a lined baking sheet. This step goes fast, so work efficiently before the mixture cools and hardens.
- Melt the chocolate chips. Place chocolate chips in a microwave-safe bowl and heat in 20-second increments, stirring between each, until smooth. Alternatively, melt the chocolate over a double boiler.
- Dip or drizzle chocolate over the treats. For a neat look, I like to dip the bottoms or drizzle with a fork. Place the treats back on the tray.
- Set the treats. Chill the tray in the refrigerator for at least 20-30 minutes until the chocolate firms up and the treats hold their shape.
- Serve or store. Once set, these treats are ready to enjoy or pack in lunchboxes.
Pro tip: If the mixture starts to harden while shaping, briefly warm it in the pan over low heat to soften again, but don’t overdo it or it’ll get too runny.
Cooking Tips & Techniques
One thing I learned the hard way is that patience is key—rushing the peanut butter mixture on high heat will scorch it fast. Always warm over low heat and stir constantly. You know that nutty aroma? When it’s just starting to smell fragrant, it’s time to remove it from heat.
Another tip is using creamy peanut butter without excess oil; natural peanut butters sometimes separate, so give it a good stir before measuring. This keeps the texture smooth and prevents oily pockets in your treats.
When melting chocolate, short bursts in the microwave with frequent stirring prevent burning. If the chocolate seizes, adding a tiny bit of coconut oil or butter can bring it back to life.
For shaping, lightly wetting your hands can stop the sticky mixture from clinging, making it easier to form uniform balls or bars. Also, chilling the treats fully before storage helps them hold together better.
Lastly, multitasking is your friend here—while the peanut butter mixture warms, prep your dry ingredients and line your tray to save time. These little efficiencies make snack-making less of a chore.
Variations & Adaptations
If peanut butter isn’t your thing or you’re dealing with allergies, try sunflower seed butter or almond butter instead. Both bind similarly and add their own subtle flavors.
For a seasonal twist, swap out the rice cereal for puffed quinoa or crushed graham crackers—this changes the texture and adds a new flavor note. I once made a batch with crushed peppermint candies folded in for a holiday snack that disappeared fast.
If you want a bit more indulgence, stir in mini marshmallows or shredded coconut before shaping. These add a surprise chewiness that kids love.
Prefer a more chocolate-forward treat? Mix some cocoa powder into the peanut butter mixture or use dark chocolate chips for dipping to deepen the flavor.
For gluten-free needs, confirm your oats are certified gluten-free and opt for gluten-free crispy rice cereal. This keeps the recipe safe without sacrificing crunch.
Serving & Storage Suggestions
These treats are best served chilled or at room temperature. I like popping a few in the fridge right before serving so the chocolate feels firm but not too hard to bite.
They make a fun addition to kid-friendly party snacks or school bake sales because they hold up well and don’t melt easily in lunchboxes.
Store leftovers in an airtight container in the refrigerator for up to one week. They may firm up as they chill but soften slightly when left out for 10-15 minutes before eating.
If you want to keep them longer, freeze the treats separated by parchment paper in a freezer-safe container for up to 3 months. Thaw in the fridge overnight to prevent condensation.
Flavors mellow and meld a bit after a day, which is why I sometimes make these a day ahead for school events—by then, the peanut butter and chocolate meld into a perfect harmony.
Nutritional Information & Benefits
Each treat (makes about 12) roughly contains:
| Calories | 150-180 kcal |
|---|---|
| Protein | 5-6 g |
| Fat | 9-12 g (mostly from healthy fats in peanut butter) |
| Carbohydrates | 15-18 g (includes natural sugars from honey and chocolate) |
| Fiber | 2-3 g |
The peanut butter provides plant-based protein and healthy monounsaturated fats, which keep kids energized without sugar crashes. Oats add fiber which helps digestion and sustained energy levels, while dark or semi-sweet chocolate offers antioxidants.
Note: Contains peanuts and gluten unless gluten-free oats and cereal are used. For allergy-friendly versions, swapping peanut butter with seed butters and choosing gluten-free cereals is a good option.
I appreciate this recipe because it balances a sweet treat with some nutrition, making it a better choice than processed snacks while still feeling like a fun indulgence for my family.
Conclusion
These Easy No-Bake Peanut Butter Chocolate School Treats have earned their spot in my kitchen because they’re honest, forgiving, and genuinely tasty. They’re not about fancy ingredients or complicated steps—just simple flavors that kids adore and parents can feel good about.
Feel free to tweak the recipe for your family’s preferences or dietary needs; it’s flexible enough to handle swaps without losing the essence of what makes these treats so great. I’ve found they bring a little extra joy to hectic afternoons and school lunches alike.
Give them a try, and if you come up with your own twists or stories, I’d love to hear about it in the comments below. Sharing these little kitchen wins always feels like a treat in itself.
Happy snacking!
Frequently Asked Questions
Can I use crunchy peanut butter instead of creamy?
Yes, but the texture will be chunkier and a bit more crumbly. If you like a bit of crunch, go for it, but creamy peanut butter helps the treats hold together better.
What if I don’t have rice cereal—can I substitute it?
You can use puffed quinoa, crushed graham crackers, or even extra oats for a similar texture. Just watch the moisture balance so the mixture isn’t too wet.
How long do these treats stay fresh?
Stored in an airtight container in the refrigerator, they last about one week. They can also be frozen for up to three months.
Can I make these treats vegan?
Yes! Use maple syrup instead of honey, and choose dairy-free chocolate chips and nut butters that fit your vegan preferences.
Is there a way to make these less sticky for younger kids to handle?
Try adding a little more oats or rice cereal to firm up the mixture and chilling the treats longer before serving. Lightly wetting your hands when shaping also helps prevent sticking.
For more fun kid-friendly snack ideas, you might enjoy the ease and whimsy of crispy witch finger shortbread cookies or the spooky charm of monster mash graveyard brownie bites. Both share that same no-fuss, fun vibe perfect for little hands and big smiles.
Pin This Recipe!
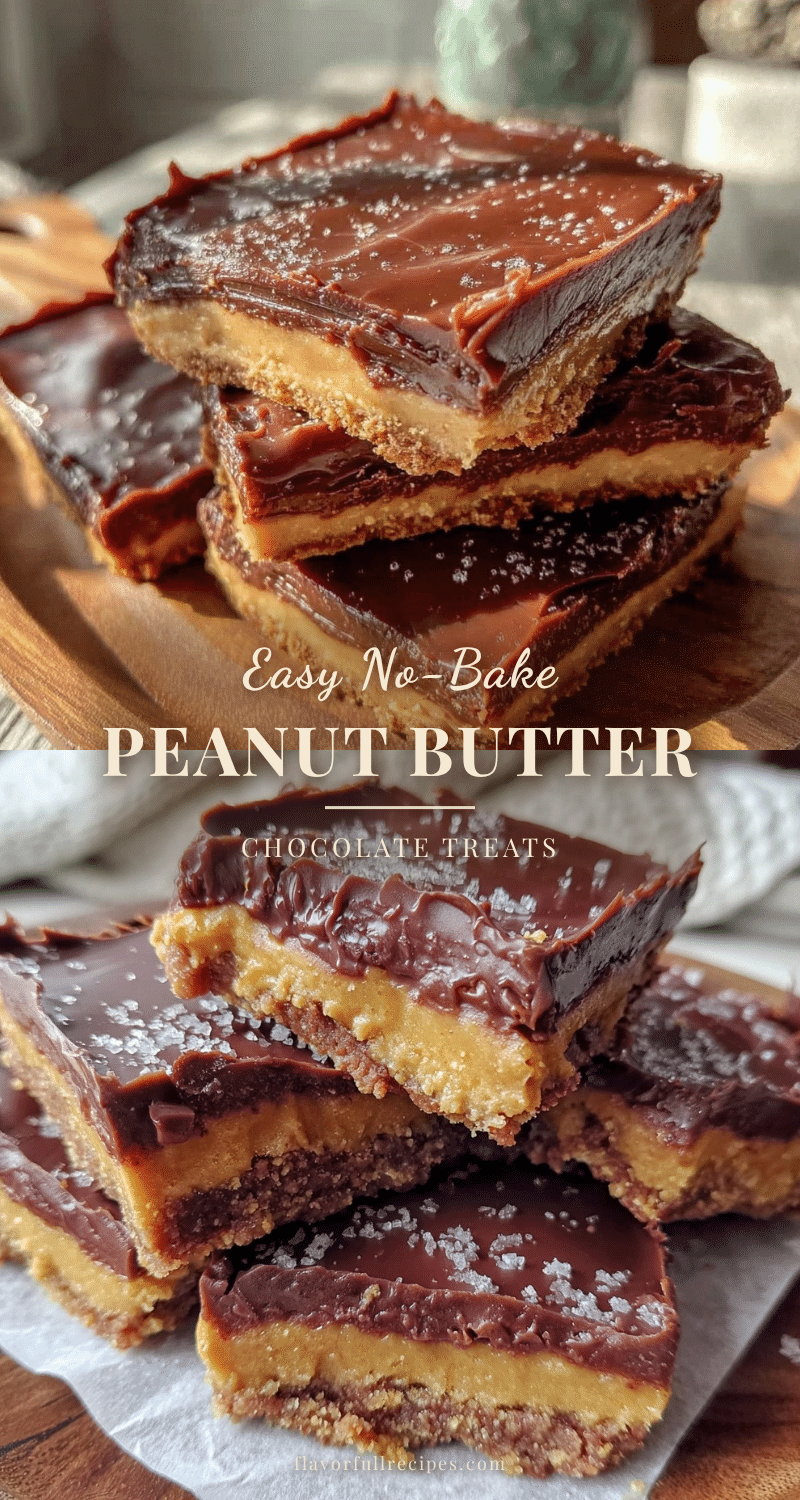
Easy No-Bake Peanut Butter Chocolate School Treats
- Total Time: 20 minutes
- Yield: 12 servings 1x
Description
These no-bake peanut butter chocolate treats are quick, kid-friendly snacks that combine creamy peanut butter and melty chocolate for a soft, chewy, and crowd-pleasing bite.
Ingredients
- 1 cup creamy peanut butter (unsweetened or lightly salted)
- 1/2 cup honey or maple syrup
- 2 cups old-fashioned rolled oats
- 1 cup crisped rice cereal (like Rice Krispies)
- 1 teaspoon vanilla extract
- Pinch of salt
- 1 cup semi-sweet or milk chocolate chips
- Optional: chopped nuts (peanuts or almonds)
- Optional: dairy-free chocolate chips
- Optional: sunflower seed butter (peanut-free substitute)
- Optional: dried cranberries or mini marshmallows for festive twist
Instructions
- Gather and measure all ingredients.
- Warm the peanut butter and honey in a medium saucepan over low heat, stirring constantly for 3-5 minutes until smooth and combined. Avoid overheating or burning.
- Remove from heat and stir in vanilla extract and salt.
- Mix rolled oats and rice cereal in a large bowl until evenly combined.
- Pour the warm peanut butter mixture over the dry ingredients and stir quickly but gently to coat evenly. Add more oats if mixture is too wet.
- Shape the mixture into bite-sized balls or bars and place on a lined baking sheet.
- Melt chocolate chips in a microwave-safe bowl in 20-second increments, stirring between each, or melt over a double boiler until smooth.
- Dip or drizzle melted chocolate over the treats and place back on the tray.
- Chill the treats in the refrigerator for 20-30 minutes until the chocolate firms up.
- Serve chilled or at room temperature, or store as desired.
Notes
Warm peanut butter and honey gently over low heat and stir constantly to avoid burning. Use creamy peanut butter without excess oil for best texture. Melt chocolate in short bursts with stirring to prevent burning. Lightly wet hands when shaping treats to prevent sticking. Chill treats fully before storage for best shape retention. For allergy-friendly versions, substitute peanut butter with sunflower seed or almond butter and use gluten-free oats and cereals.
- Prep Time: 10 minutes
- Cook Time: 10 minutes
- Category: Snack
- Cuisine: American
Nutrition
- Serving Size: 1 treat (approximate
- Calories: 165
- Sugar: 8
- Sodium: 75
- Fat: 10.5
- Saturated Fat: 3.5
- Carbohydrates: 16.5
- Fiber: 2.5
- Protein: 5.5
Keywords: no-bake, peanut butter, chocolate, school treats, kid-friendly, easy snacks, no oven, quick, after school snack


