Someone rang the doorbell just as I was about to call it a night. It was my neighbor’s kids, unexpected and buzzing with energy, eyes wide for Halloween treats. I glanced at my kitchen and realized—the only thing left was a nearly forgotten box of brownie mix and a handful of leftover candy. No fancy decorations or elaborate plans, just that. So I thought, “Why not turn this into the best monster mash graveyard brownie bites for Halloween?”
The air was thick with the smell of melting chocolate as I scrambled to shape the brownies into little monster mounds, then topped them with whatever creepy candies I could find. Honestly, it felt chaotic, pulled together at the last second, but those spooky little bites somehow became the hit of the night. There’s something about making a treat on the fly—using what you have—that sticks with you. These brownie bites carry that same spirit, a little messy, definitely fun, and surprisingly delicious.
What I love most about this recipe is how it captures the playful, slightly wild energy of Halloween night. It’s not just about the sweets; it’s about the moment when you grab what’s around and create something that feels special. This recipe isn’t about perfection—it’s about the joy of mixing monster madness with simple chocolatey goodness. And if you’ve got a last-minute craving or an unexpected crowd, this might be just the treat you didn’t know you needed.
Why You’ll Love This Recipe
After testing these monster mash graveyard brownie bites multiple times, I can say with confidence they’re a Halloween winner for both adults and kids. Here’s why this recipe has become my go-to for spooky occasions:
- Quick & Easy: Ready in under 45 minutes, these bites are perfect when you don’t have hours to fuss in the kitchen.
- Simple Ingredients: You don’t need exotic stuff—just pantry staples and a few fun candies to get that graveyard vibe.
- Perfect for Halloween Parties: Whether it’s a neighborhood gathering or a school event, these are crowd-pleasers every time.
- Crowd-Pleaser: The rich, fudgy brownie pairs perfectly with crunchy candy “tombstones” and creepy decorations that kids adore.
- Unbelievably Delicious: The texture is moist but firm, with just the right balance of chocolate and candy crunch.
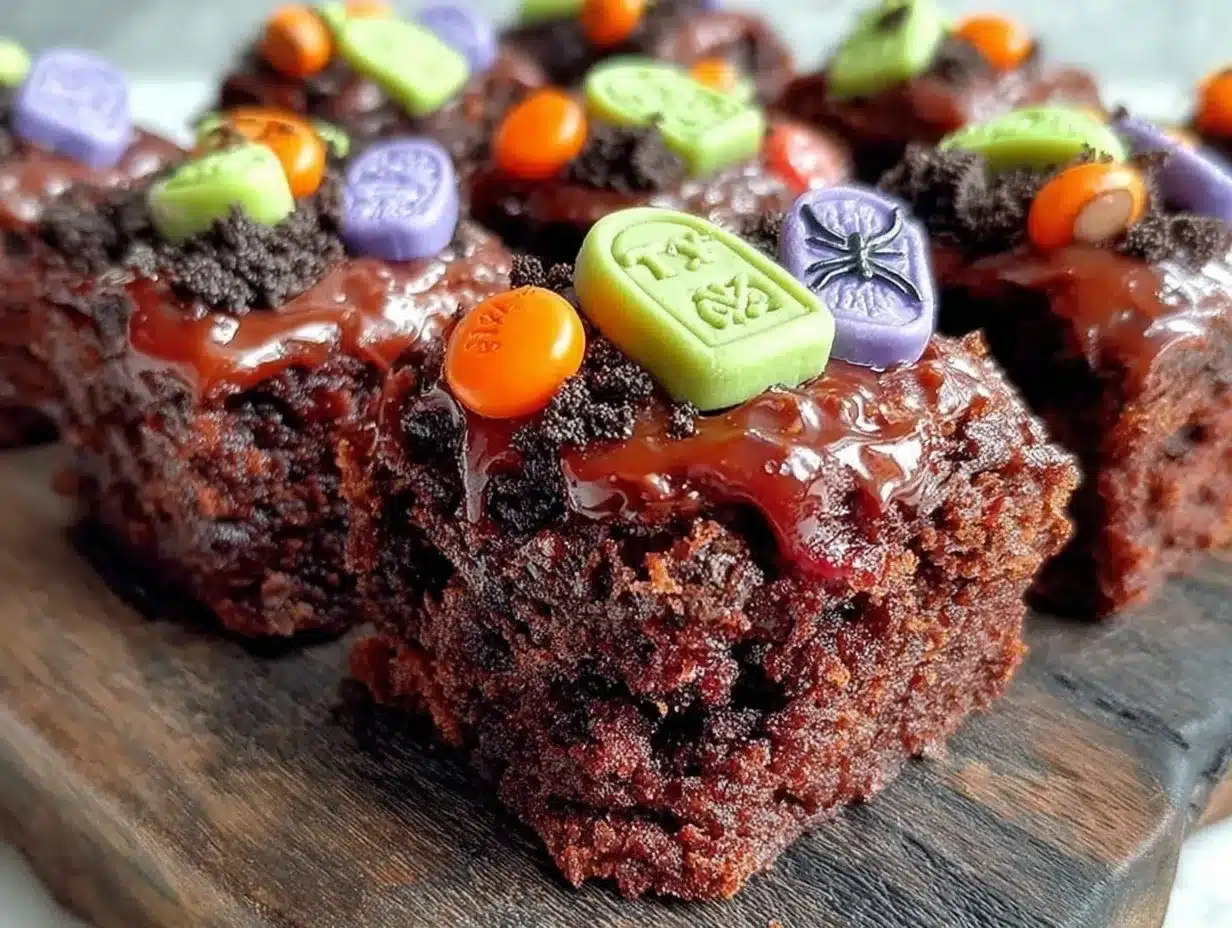
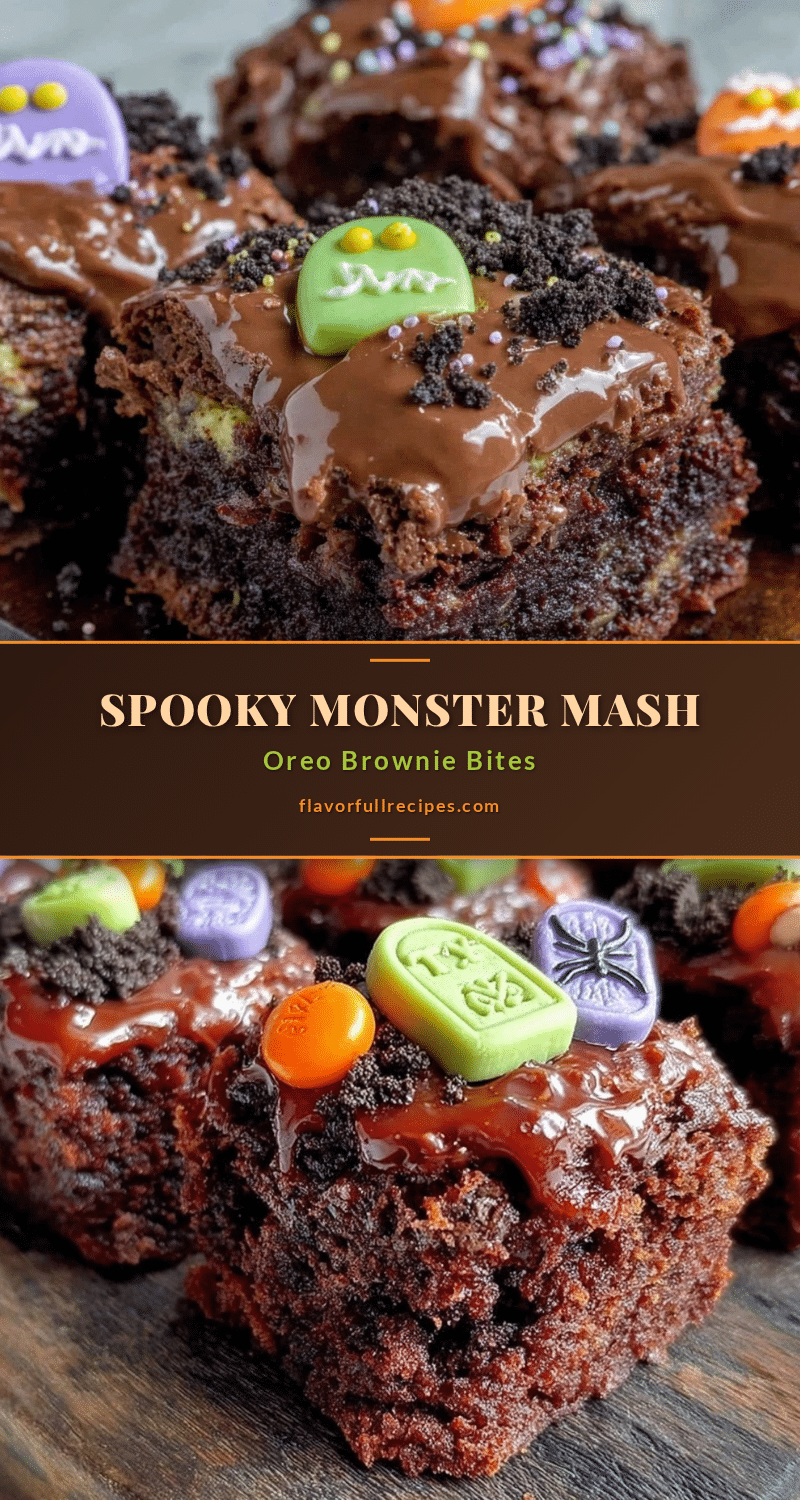
What makes this recipe stand apart from other Halloween treats is the fun of its “graveyard” presentation—think little brownie mounds topped with candy bones, gummy worms, and a dusting of crushed cookies for “dirt.” Plus, blending a classic brownie base with a few creative decorations means it’s not just a simple bake; it’s part art, part snack, and totally festive.
This recipe isn’t just a dessert; it’s a playful event on your plate that brings a little Halloween magic without stress. It’s the kind of treat that makes you pause, smile, and maybe even sneak an extra bite when no one’s watching.
What Ingredients You Will Need
This recipe calls for straightforward, easy-to-find ingredients that work together to create monster mash graveyard brownie bites that are both rich and festive. Most are pantry staples, making this a no-fuss treat for last-minute plans.
- Brownie Base:
- 1 box of brownie mix (I recommend Ghirardelli for a fudgy texture) or homemade brownie batter (about 1 cup all-purpose flour, ¾ cup cocoa powder, 1 cup sugar, 2 large eggs, ½ cup unsalted butter, melted)
- 2 large eggs, room temperature
- ½ cup unsalted butter, melted
- ½ cup water (or coffee for an extra depth of flavor)
- Graveyard Decorations:
- Gummy worms (for creepy crawlies)
- Miniature candy bones or white chocolate chips (for “bones”)
- Crushed chocolate sandwich cookies (like Oreos) for “dirt”
- Black licorice strands (to mimic “roots” or vines)
- Colored sprinkles or edible eyes (to add monster faces)
- Optional:
- Green and orange food coloring gels (to tint frosting or batter)
- Store-bought frosting for “mud” or “slime” effects (cream cheese or vanilla works great)
Feel free to swap gummy worms for sour candy snakes or crushed cookies for graham crackers if that’s what you have. For a gluten-free twist, use a gluten-free brownie mix, and swap the crushed cookies with gluten-free alternatives. I’ve also tried using coconut flour in the batter for a subtle nutty flavor, which gave a surprisingly nice texture.
Equipment Needed
- Standard 9×13-inch baking pan (or a similar size for bite-sized brownies)
- Mixing bowls – one for wet ingredients, one for dry
- Electric mixer or a sturdy whisk (a hand mixer speeds things up but a whisk will do)
- Spatula for folding ingredients and scraping the bowl
- Measuring cups and spoons (accuracy helps, but eyeballing works in a pinch)
- Cooling rack (optional but helps brownies cool faster and evenly)
- Knife for cutting brownies into bite-sized pieces
- Small offset spatula or butter knife for spreading frosting or “mud” decorations
If you don’t have a 9×13-inch pan, an 8×8-inch will work — just adjust baking time accordingly. I once used a muffin tin to make individual brownie “mounds” for easier serving and less cutting mess. For frosting, if you don’t have a spatula, the back of a spoon works just fine.
Preparation Method
- Preheat your oven to 350°F (175°C). Grease your baking pan lightly with butter or non-stick spray. This prevents sticking and helps with even baking. (Approx. 5 minutes)
- Mix the brownie batter. In a medium bowl, whisk together the brownie mix, eggs, melted butter, and water (or coffee) until just combined. Don’t overmix—stop when you see no dry flour. The batter should be thick and glossy. (Approx. 5 minutes)
- Pour the batter into the prepared pan. Use a spatula to spread it evenly, smoothing the top. This helps the brownies bake uniformly. (Approx. 2 minutes)
- Bake the brownies. Place the pan in the oven for 25-30 minutes. At around 25 minutes, start checking by inserting a toothpick in the center; it should come out with a few moist crumbs but no wet batter. Overbaking leads to dry bites, which is a rookie mistake I learned the hard way.
- Cool completely on a wire rack. This step is key for clean cutting and for your decorations to stick nicely later. If you cut too soon, the brownies crumble. (Approx. 30-40 minutes)
- Prepare the graveyard “dirt.” Crush your sandwich cookies in a zip-top bag using a rolling pin or the bottom of a pan. You want fine crumbs, but some chunks add texture and visual interest.
- Cut brownies into bite-sized squares. Aim for 1.5-inch pieces—small enough for bite-size but big enough to hold decorations.
- Decorate the brownie bites. Spread a thin layer of frosting or cream cheese on each brownie piece to act as “glue.” Then press on gummy worms, candy bones, and sprinkle crushed cookies around to make your spooky graveyard. Add licorice strands for “roots” or “vines.”
- Chill for 15 minutes. This helps the decorations set so they won’t slide off when you serve.
- Serve and enjoy! These bites are best served slightly chilled or at room temperature for that perfect fudgy bite.
Pro tip: If you want to add a little green or orange tint to your frosting, mix in a drop of food coloring for an extra monster mash vibe. Also, when cutting brownies, dip your knife in hot water and wipe it clean between cuts to get smooth edges.
Cooking Tips & Techniques
One thing I learned making these monster mash graveyard brownie bites is that timing is everything. Baking brownies until they’re just set—not overbaked—is crucial to keep them moist and tender. The classic mistake is baking too long, which leads to dry, crumbly bites that don’t hold decorations well.
When mixing your batter, gently fold ingredients together instead of stirring vigorously. This keeps your brownie texture dense and fudgy, rather than cakey. Also, using coffee instead of water in the batter can boost the chocolate flavor without making it taste “coffee-like.”
Cooling is sometimes overlooked but vital here. Warm brownies won’t hold the “graveyard” toppings, and the frosting can melt away. Give yourself plenty of cooling time or pop them in the fridge briefly before decorating.
For decorating, I like to use cream cheese frosting for its slight tang and stickiness, but plain buttercream or even peanut butter frosting can work. Just keep the layers thin to avoid overpowering the brownie.
Lastly, don’t hesitate to get creative with your decorations. I once swapped out gummy worms for little candy spiders and licorice for green fruit leather strips—both gave a fun, unexpected twist. Multitasking here is easy: bake the brownies while prepping decorations to save time.
Variations & Adaptations
Feel like switching things up? These brownie bites are versatile and can be adapted to fit your taste or dietary needs.
- Gluten-Free Version: Use a gluten-free brownie mix or homemade gluten-free flour blend. Swap crushed Oreos for gluten-free cookie crumbs.
- Vegan Adaptation: Choose a vegan brownie mix or make brownies with flax eggs and coconut oil. Use dairy-free frosting and vegan candy decorations.
- Flavor Twists: Add a teaspoon of peppermint extract to the batter for a spooky minty surprise. Or swirl in some peanut butter before baking for a rich, nutty flavor.
- Alternative Decorations: Replace gummy worms with dried fruit snakes or use mini marshmallows to create ghostly figures. Colored sugar crystals can add sparkle to your graveyard dirt.
- Mini Cupcake Format: Pour batter into mini cupcake liners and bake for 15-18 minutes for easy single servings. Top with monster faces using candy eyes and frosting.
One personal favorite variation I tried was adding orange zest to the batter for a subtle citrus kick—unexpected but delicious! For more Halloween-themed treats, you might enjoy the cozy butternut squash soup that pairs well with these sweet bites for a full festive meal.
Serving & Storage Suggestions
These monster mash graveyard brownie bites shine when served slightly chilled or at room temperature. Arrange them on a dark platter to bring out the “graveyard” effect and add some plastic spiders or fake cobwebs for an extra spooky presentation.
They pair wonderfully with a cold glass of milk or a warm cup of spiced apple cider—perfect for a chilly Halloween evening. For a savory twist alongside your treats, consider serving them after a meal like sheet pan caprese chicken thighs for a balanced party spread.
Store leftover brownie bites in an airtight container in the refrigerator for up to 4 days. The decorations may soften, so try to decorate just before serving if possible. You can also freeze the plain brownies (undecorated) for up to 2 months—wrap tightly and thaw overnight before decorating.
Reheat frozen brownies by letting them come to room temperature or warming briefly in a microwave (about 10 seconds) before adding decorations. The flavors actually deepen a bit after chilling, so leftovers are often tastier the next day.
Nutritional Information & Benefits
Each monster mash graveyard brownie bite packs a decent dose of chocolatey goodness, with roughly 120-150 calories per bite depending on size and toppings. They contain fats from butter and sugar from candies, so enjoy them as an occasional treat.
Key ingredients like cocoa powder provide antioxidants, and by controlling your candy toppings, you can keep sugar levels moderate. Using dark chocolate or high-quality cocoa powder can add some nutritional value without sacrificing flavor.
For those with dietary restrictions, the recipe is easily adaptable to gluten-free or vegan diets, making it inclusive for most Halloween celebrations. Just keep in mind common allergens like eggs, dairy, or nuts depending on your substitutions.
Honestly, I think treats like this remind us that indulgence and fun can coexist with some balance—and sharing them with friends and family adds a sprinkle of wellness to the whole experience.
Conclusion
These best monster mash graveyard brownie bites for Halloween are a fun, quick, and delightfully messy way to celebrate the spooky season. They’re proof you don’t need a fancy setup or hours in the kitchen to make something memorable. Just a bit of creativity, pantry staples, and a playful spirit go a long way.
Feel free to make the recipe your own by swapping decorations, adjusting flavors, or trying different baking vessels. It’s that kind of recipe that welcomes improvisation and rewards it with smiles and sticky fingers.
For me, these bites hold the memory of that unexpected visit and the rush of turning simple ingredients into a Halloween hit. If you give the recipe a try, I’d love to hear what monster mash twists you add to your graveyard brownies!
FAQs About Monster Mash Graveyard Brownie Bites
Can I make these brownie bites ahead of time?
Yes! You can bake the brownies a day or two in advance and store them in an airtight container. Add the decorations just before serving for the freshest look and best texture.
What if I don’t have gummy worms or candy bones?
No worries! Use any fun candy you have on hand—mini marshmallows, chocolate chips, dried fruit, or even pretzel sticks can create spooky effects.
How do I keep the brownie bites moist?
Don’t overbake your brownies and make sure to cool them completely before cutting. Using coffee instead of water in the batter can also keep the chocolate flavor rich and moist.
Can I freeze these brownie bites?
You can freeze the plain baked brownies (before decorating) for up to 2 months. Thaw fully before adding decorations and serving.
Are these brownie bites suitable for kids?
Absolutely! They’re fun to make and eat, and you can tailor the candy decorations to suit kids’ tastes or dietary needs.
Pin This Recipe!
Best Monster Mash Graveyard Brownie Bites Recipe Easy Halloween Treats
- Total Time: 45 minutes
- Yield: 24 servings 1x
Description
These monster mash graveyard brownie bites are a quick, fun, and festive Halloween treat featuring fudgy brownies topped with creepy candy decorations. Perfect for last-minute parties and crowd-pleasing spooky snacks.
Ingredients
- 1 box of brownie mix (or homemade brownie batter: about 1 cup all-purpose flour, 3/4 cup cocoa powder, 1 cup sugar, 2 large eggs, 1/2 cup unsalted butter, melted)
- 2 large eggs, room temperature
- 1/2 cup unsalted butter, melted
- 1/2 cup water or coffee
- Gummy worms
- Miniature candy bones or white chocolate chips
- Crushed chocolate sandwich cookies (like Oreos)
- Black licorice strands
- Colored sprinkles or edible eyes
- Optional: green and orange food coloring gels
- Optional: store-bought frosting (cream cheese or vanilla)
Instructions
- Preheat your oven to 350°F (175°C). Grease your baking pan lightly with butter or non-stick spray.
- In a medium bowl, whisk together the brownie mix, eggs, melted butter, and water (or coffee) until just combined. Do not overmix.
- Pour the batter into the prepared pan and spread evenly with a spatula.
- Bake for 25-30 minutes. Check doneness by inserting a toothpick; it should come out with a few moist crumbs but no wet batter.
- Cool completely on a wire rack for 30-40 minutes.
- Crush sandwich cookies to create ‘dirt’ for decoration.
- Cut brownies into 1.5-inch bite-sized squares.
- Spread a thin layer of frosting on each brownie piece to act as glue.
- Decorate with gummy worms, candy bones, crushed cookies, licorice strands, and sprinkles or edible eyes.
- Chill for 15 minutes to set decorations.
- Serve slightly chilled or at room temperature.
Notes
Do not overbake brownies to keep them moist and fudgy. Use coffee instead of water to enhance chocolate flavor. Cool brownies completely before decorating to prevent frosting from melting. Dip knife in hot water and wipe between cuts for smooth edges. Decorations can be customized with various candies. Store undecorated brownies frozen up to 2 months; decorate just before serving.
- Prep Time: 15 minutes
- Cook Time: 30 minutes
- Category: Dessert
- Cuisine: American
Nutrition
- Serving Size: 1 brownie bite (appr
- Calories: 135
- Sugar: 12
- Sodium: 90
- Fat: 7
- Saturated Fat: 4
- Carbohydrates: 18
- Fiber: 1
- Protein: 2
Keywords: Halloween treats, brownie bites, monster mash, graveyard brownies, easy dessert, spooky snacks, quick Halloween recipe