
My six-year-old looked up from the kitchen counter last Tuesday, peanut butter smeared across his cheek like war paint, and said, “Mom, can we make these every single day for the rest of my life?” He was holding a half-eaten peanut butter banana roll-up, and honestly, I hadn’t even planned to share them with him. I was just testing a quick snack idea for myself—something to shove in my mouth between school pickup and a work call. But there he was, asking for a lifetime supply of something I’d thrown together in about four minutes flat.
That’s the thing about these Easy 5-Ingredient Peanut Butter Banana Roll-Ups. They don’t look like much at first glance. A flour tortilla, some peanut butter, a banana, a drizzle of honey, and a sprinkle of cinnamon. That’s it. But something about the combination—the warm, slightly toasted tortilla, the creamy peanut butter, the sweet banana that gets all soft and almost custard-like when you warm it through—it hits different. It hits like a snack that actually satisfies, not just fills a gap.
I’ve made these peanut butter banana roll-ups for after-school chaos, for lazy Sunday mornings when nobody wants a real breakfast, and even for my own “I need something but I don’t know what” moments. They’re the kind of recipe that doesn’t ask anything of you. No fancy techniques, no obscure ingredients, no 30-minute prep time. Just five things you probably already have, rolled up and ready in under ten minutes. And honestly? That might be the most beautiful kind of recipe there is.
Why You’ll Love This Recipe
Let me tell you why these roll-ups have become a permanent fixture in my kitchen rotation. I’ve tested this recipe about a dozen times now—with different tortillas, different spreads, different ripeness levels of bananas—and every single time, I’m surprised by how good something so simple can be.
- 5 Ingredients Only : No grocery store scavenger hunt needed. You probably have everything right now. If you don’t, it’s a one-aisle trip.
- Ready in 10 Minutes : From craving to eating in less time than it takes to decide what to order for delivery. Perfect for those “I’m hungry and I need it now” moments.
- Kid-Approved and Adult-Friendly : My kids devour these, but I’ve also served them to grown friends who asked for the recipe before they finished chewing. It’s that good.
- Endlessly Customizable : Swap peanut butter for almond butter, add chocolate chips, use a whole wheat tortilla—it bends to whatever you have and whatever you’re craving.
- Actually Satisfying : Unlike a lot of quick snacks, these have protein, fiber, and real staying power. No crash-and-burn hunger 20 minutes later.
What makes these different from every other banana roll-up out there? It’s the method. I don’t just roll and serve. I toast the tortilla first—just enough to get those golden brown spots and that slight crispiness on the outside. Then I spread the peanut butter while the tortilla is still warm, so it melts slightly and creates this creamy, dreamy layer. The banana goes in whole (not sliced), and the roll gets a quick pan-sear on all sides. That extra minute of heat transforms everything. The peanut butter gets warm and gooey, the banana softens to this almost pudding-like texture, and the tortilla gets this irresistible crispy-chewy thing going on.
This isn’t just another snack recipe. It’s the kind that makes you close your eyes after the first bite and forget, just for a second, that you were in a hurry.
What Ingredients You Will Need
This recipe uses five simple ingredients to create something that tastes way bigger than the sum of its parts. Here’s what you need and why each one matters.
Flour Tortillas (8-inch)
The foundation of the whole operation. I recommend a standard 8-inch flour tortilla—not the huge burrito size, not the tiny taco size. Medium is perfect. Look for tortillas that are soft and pliable, not dry or cracking at the edges. I personally like the Mission brand or the store-brand ones from my local grocery. If you’re feeling fancy, you can use whole wheat or spinach tortillas for a different flavor and a little extra fiber. Corn tortillas won’t work here—they’re too small and too fragile for rolling.
Creamy Peanut Butter
The heart of the filling. You want a creamy peanut butter that spreads easily—not the super thick natural kind that separates and requires a workout to stir. I use Jif or Skippy for this recipe because they spread like a dream and have that perfect sweet-salty balance. If you prefer natural peanut butter, go for it, but warm it up for about 10 seconds in the microwave first so it spreads without tearing the tortilla. Chunky peanut butter works too if you like a little texture, but I find creamy gives you that smooth, even layer that makes every bite perfect.
Ripe Bananas
The sweetness comes from the banana, so you want one that’s ripe—yellow with a few brown spots, but not mushy or overly soft. A too-green banana won’t have enough sweetness and will be firm and almost starchy inside the roll-up. A too-ripe banana will turn into mush when you cook it. The sweet spot is that perfect yellow with speckles. One medium banana is enough for two roll-ups, which is the perfect single serving.
Honey
A light drizzle adds just enough extra sweetness to make these feel like a treat. I use a local wildflower honey that has a mild, floral flavor, but any honey you have works. If you’re out of honey, maple syrup or agave nectar are great substitutes. Just don’t skip it entirely—that little bit of liquid sweetness makes a big difference.
Ground Cinnamon
The secret weapon. A light sprinkle of cinnamon adds warmth and depth that elevates these from “kid snack” to “actually impressive.” It pairs beautifully with both the peanut butter and the banana. I use Ceylon cinnamon when I have it (it’s milder and sweeter), but regular grocery store cinnamon works perfectly. Don’t skip this one—it’s what makes these taste like something special.
Optional add-ins that I sometimes use: a handful of mini chocolate chips (because chocolate and peanut butter is a non-negotiable life pairing), a sprinkle of sea salt on top (that sweet-salty thing is addictive), or a thin layer of Nutella instead of peanut butter for a totally different vibe.
Equipment Needed
You don’t need much for these roll-ups, which is part of the beauty. Here’s what you’ll want to have handy.
- Non-stick skillet or griddle : An 8 or 10-inch skillet works perfectly. I use my old non-stick pan that’s seen better days but still does the job. A cast iron skillet works too, just make sure it’s well-seasoned so nothing sticks.
- Spatula : For flipping the roll-ups and pressing them gently while they cook. A thin metal spatula works best, but a silicone one is fine too.
- Butter knife or offset spatula : For spreading the peanut butter. A regular butter knife is totally fine.
- Cutting board and sharp knife : For slicing the bananas and cutting the finished roll-ups into bite-sized pieces. A serrated knife works best for cutting through the warm tortilla without squishing everything.
- Small bowl : For mixing the cinnamon and honey if you want to drizzle it on rather than sprinkle. Honestly, I just sprinkle straight from the jar and bottle—one less dish to wash.
That’s it. No food processor, no mixer, no special gadgets. If you have a stove and a pan, you’re good to go.
Preparation Method
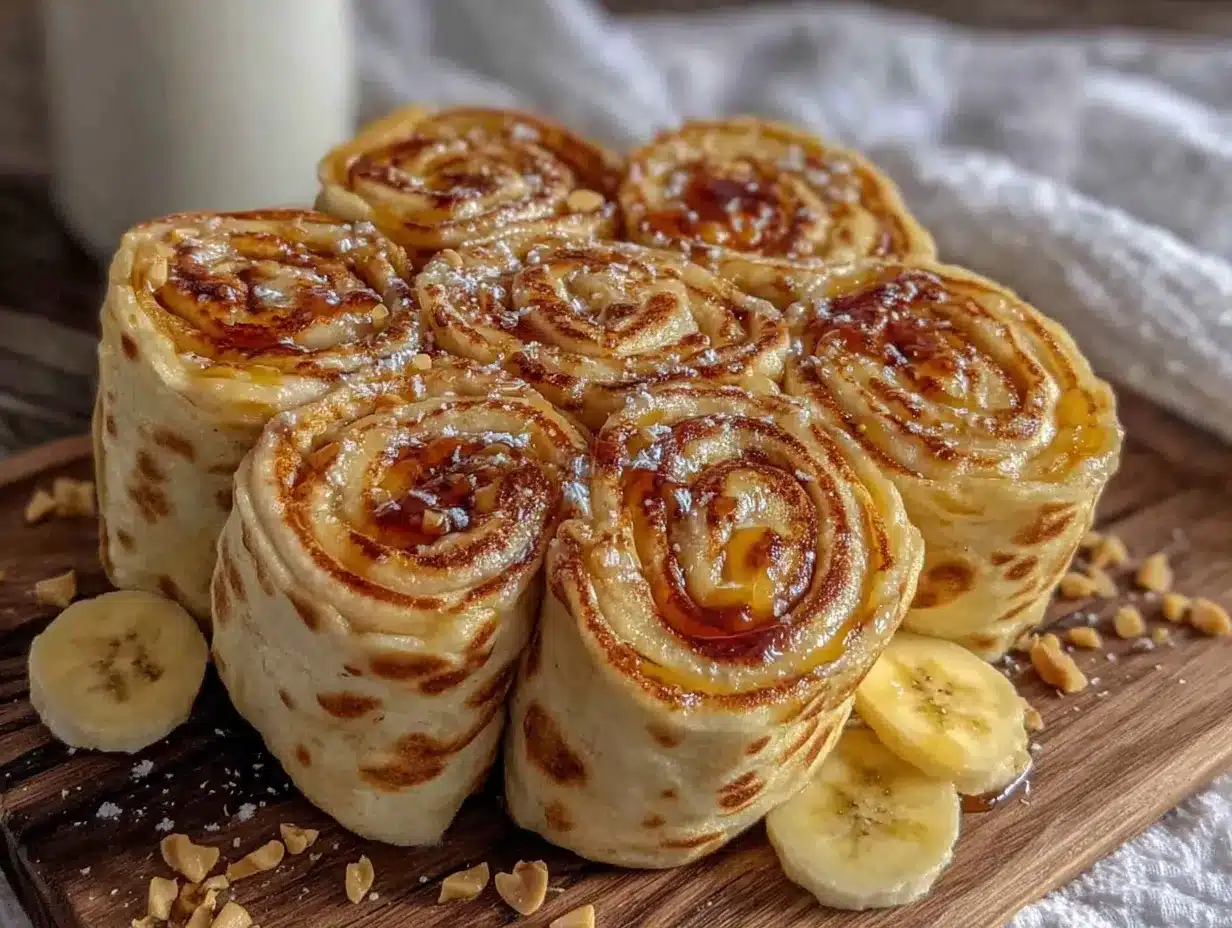
Let me walk you through exactly how I make these, including all the little tricks I’ve learned from making them about twenty times now.
- Heat your skillet over medium heat. Let it get hot for about 2 minutes. You want it hot enough that a drop of water sizzles on contact, but not screaming hot. If the pan is too hot, your tortilla will burn before the inside gets warm. If it’s not hot enough, the tortilla will get dry and stiff instead of crispy and golden.
- Place one tortilla in the dry skillet. No oil, no butter—just the tortilla straight on the hot surface. Let it cook for about 30-45 seconds per side, until you see light golden brown spots forming. You’re not trying to cook it through, just warm it up and get some color. Flip once using your spatula and cook the other side. The tortilla should be warm and pliable, with a few toasted spots.
- Transfer the warm tortilla to a cutting board. Spread about 2 tablespoons of peanut butter evenly over the surface. Leave about a 1-inch border around the edges so the filling doesn’t squish out when you roll it. The warmth from the tortilla will soften the peanut butter, making it easy to spread into a smooth, even layer.
- Peel your banana and place it whole near one edge of the tortilla. Don’t slice it—keeping the banana whole gives you that perfect banana-to-peanut butter ratio in every bite. Position it about 1 inch from the edge closest to you, running parallel to that edge.
- Drizzle about 1 teaspoon of honey over the banana. Be generous but not crazy—you want sweetness, not a sticky mess. Then sprinkle a light dusting of cinnamon over everything. I use about 1/4 teaspoon, but I’m a cinnamon lover. Adjust to your taste.
- Roll it up tight. Start with the edge closest to the banana and fold it over the banana, tucking it gently. Then continue rolling, keeping the roll tight but not so tight that the filling squishes out the ends. Think of it like rolling a burrito—firm but gentle. The seam should end up on the bottom.
- Place the rolled tortilla back in the hot skillet, seam-side down. Cook for about 1-2 minutes per side, turning carefully with your spatula. You want all sides to get golden brown and slightly crispy. The cheese-grilled sandwich method works perfectly here—press down gently with your spatula as it cooks to ensure even browning.
- Remove from the skillet and let it rest for about 30 seconds. This is important—if you cut into it immediately, everything will squish out. That 30-second rest lets the peanut butter set slightly and the banana settle.
- Slice on a diagonal into 1-inch pieces. A serrated knife works best here. Cut at an angle for that Instagram-worthy look, but straight across works just fine too. You should get about 5-6 pieces per roll-up.
- Serve immediately. These are best eaten warm, when the peanut butter is still slightly melty and the tortilla is crispy on the outside. They cool down fast, so don’t wait around.
A few things I’ve learned the hard way: Don’t overfill the tortilla. Two tablespoons of peanut butter is plenty—more than that and it’ll ooze out the sides when you roll. Also, don’t skip the initial toasting of the tortilla. That first dry toast gives the tortilla structure so it doesn’t get soggy from the peanut butter. And please, for the love of all things good, let them rest before cutting. I learned that lesson the messy way.
Cooking Tips & Techniques
After making these roll-ups more times than I can count, I’ve picked up a few tricks that make a real difference. Here’s what I wish someone had told me from the start.
The Tortilla Toast is Non-Negotiable
I know it seems like an extra step, but toasting the tortilla before adding the filling is what separates a good roll-up from a great one. That dry toast creates a slight barrier that prevents the peanut butter from making the tortilla soggy. Plus, it gives you those beautiful golden spots that add flavor and texture. Don’t skip it, and don’t rush it.
Temperature Matters
Medium heat is your friend. I’ve burned more tortillas than I care to admit by getting impatient and cranking the heat. Low and slow-ish is the way to go. The tortilla should sizzle gently when it hits the pan, not scream at you. If you see smoke, your heat is too high.
The Banana Should Be Room Temperature
Cold bananas straight from the fridge won’t warm through properly in the short cooking time. If your bananas are cold, let them sit on the counter for 15 minutes before you start. Or, if you’re in a hurry, microwave them for 10 seconds—just enough to take the chill off.
Don’t Overcrowd the Pan
Cook one roll-up at a time. If you try to cook two in the same pan, they’ll steam instead of getting crispy, and you’ll end up with soft, sad roll-ups. I know it takes longer, but it’s worth it.
Press Down Gently While Cooking
Use your spatula to gently press down on the roll-up as it cooks. This ensures even browning and helps the layers adhere to each other. Don’t squish it flat—just a gentle press.
My Biggest Failure
The first time I made these, I used a banana that was way too ripe. It turned into banana mush inside the tortilla, and the whole thing fell apart when I tried to cut it. Lesson learned: ripe but firm is the way to go. Also, I once forgot to toast the tortilla first, and the result was a soggy, sad mess that my kids still ate because they’re not picky. But I knew better.
Variations & Adaptations
One of the best things about this recipe is how easily it adapts to whatever you have or whatever you’re craving. Here are some of my favorite variations.
Chocolate Peanut Butter Banana Roll-Ups
Add a tablespoon of mini chocolate chips along with the banana before rolling. The chocolate melts as the roll-up cooks, creating a chocolate-peanut butter-banana situation that’s basically dessert pretending to be a snack. My kids lose their minds over this version.
Almond Butter and Berry Roll-Ups
Swap the peanut butter for almond butter and add a handful of fresh raspberries or sliced strawberries alongside the banana. The tartness of the berries cuts through the richness of the nut butter beautifully. This version feels a little more grown-up and sophisticated.
Healthy-ish Breakfast Roll-Ups
Use a whole wheat tortilla, swap the honey for a drizzle of maple syrup, and add a sprinkle of chia seeds or ground flaxseed. You get fiber, protein, and healthy fats all wrapped up in a portable breakfast that takes 10 minutes to make. I make these on busy mornings when I need something I can eat with one hand while packing lunches with the other.
Nut-Free School Lunch Version
Use sun butter or Wowbutter (soy-based spread) instead of peanut butter. Make sure to check the label for any allergy warnings. The flavor is slightly different, but the texture works perfectly. My friend’s son has a nut allergy, and this version is his go-to after-school snack.
Air Fryer Method
Assemble the roll-ups as directed, then place them in an air fryer basket at 350°F for 4-5 minutes, flipping halfway through. They come out extra crispy and evenly browned. This is my preferred method when I’m making a batch for a crowd.
Savory-Sweet Twist
Add a sprinkle of flaky sea salt on top of the peanut butter before rolling. That sweet-salty combination is addictive. I also sometimes add a thin layer of cream cheese under the peanut butter for extra richness and tang.
Serving & Storage Suggestions
These roll-ups are best served warm, right after you make them. That’s when the tortilla is at its crispiest, the peanut butter is at its creamiest, and the banana is perfectly soft and warm. I like to serve them on a plate with a small dish of extra honey for dipping, because I’m extra like that.
They pair beautifully with a glass of cold milk (if you’re a kid or a kid at heart), a cup of coffee (if you’re an adult who needs caffeine), or a tall glass of iced tea. For a more complete snack or light meal, serve them alongside some fresh fruit or a handful of nuts.
Storage Instructions
These don’t store particularly well, to be honest. The tortilla loses its crispiness within about 30 minutes, and the banana starts to oxidize and turn brown. If you absolutely must make them ahead, here’s what I recommend:
- Refrigerator : Store uncut roll-ups in an airtight container for up to 24 hours. Reheat in a skillet or air fryer to restore some crispiness. Microwave will make them soft and sad.
- Freezer : Assemble the roll-ups but don’t cook them. Wrap each one tightly in plastic wrap, then place in a freezer bag. Freeze for up to 1 month. To serve, cook from frozen in a skillet over medium-low heat for 4-5 minutes per side, or in an air fryer at 350°F for 6-7 minutes.
Honestly, though? These are so quick to make that I never bother with storage. I just make what I need and eat it immediately. That’s the beauty of a 10-minute recipe.
Nutritional Information & Benefits
Here’s a rough estimate for one roll-up (using standard ingredients):
- Calories : Approximately 350-400
- Protein : 12-15 grams
- Carbohydrates : 45-50 grams
- Fiber : 5-7 grams
- Fat : 16-20 grams
- Sugar : 18-22 grams (mostly from the banana and honey)
These numbers vary depending on your specific ingredients, but the general picture is a snack that provides a good balance of protein, healthy fats, and carbohydrates. The peanut butter offers protein and heart-healthy monounsaturated fats. The banana provides potassium, vitamin B6, and fiber. The cinnamon has anti-inflammatory properties and can help regulate blood sugar.
If you’re watching your sugar intake, you can skip the honey drizzle—the banana provides plenty of natural sweetness on its own. For a lower-carb option, use a low-carb tortilla and reduce the honey. For a higher-protein version, add a scoop of vanilla protein powder mixed into the peanut butter before spreading.
These roll-ups are naturally vegetarian and can easily be made vegan by using maple syrup instead of honey. They’re also nut-free if you use a seed butter alternative.
Conclusion
These Easy 5-Ingredient Peanut Butter Banana Roll-Ups have become a staple in my kitchen for one simple reason: they work. They work when you’re hungry and impatient. They work when you have picky kids who won’t eat anything else. They work when you need something that feels like a treat but doesn’t require a trip to the store or a sink full of dishes.
I love that this recipe doesn’t pretend to be fancy. It’s honest food—the kind you make because you’re hungry and you want something good, fast. The kind that reminds you that cooking doesn’t have to be complicated to be satisfying. The kind that makes a six-year-old ask for it every single day for the rest of his life.
I’d love to hear how these turn out for you. Did you add something unexpected? Did your kids love them? Did you find a new favorite variation? Drop a comment below and let me know. And if you’re looking for more easy, satisfying snacks, you should check out my easy no-bake peanut butter protein balls for another quick make-ahead option, or these healthy peanut butter banana overnight oats for a breakfast that preps itself while you sleep. Happy cooking, friends!
Frequently Asked Questions
Can I use a different type of nut butter?
Absolutely. Almond butter, cashew butter, or sunflower seed butter all work great. Just make sure whatever you use is spreadable at room temperature. If it’s too thick, warm it up for 10 seconds in the microwave first.
Can I make these gluten-free?
Yes! Use gluten-free tortillas. Look for ones made from brown rice or cassava flour. Corn tortillas are too small and fragile for rolling, so stick with gluten-free flour tortillas. The rest of the ingredients are naturally gluten-free.
How do I keep the roll-ups from getting soggy?
Toast the tortilla in a dry skillet before adding the filling. That initial toast creates a barrier that prevents the peanut butter from soaking into the tortilla. Also, don’t overdo the honey—a little goes a long way, and too much liquid will make everything soggy.
Can I make these ahead for a party?
You can assemble them up to a day ahead and refrigerate them uncooked. When you’re ready to serve, cook them in a skillet or air fryer. They’re best served within 30 minutes of cooking, so plan your timing accordingly.
What if I don’t have a skillet?
You can use an air fryer (350°F for 4-5 minutes), a panini press, or even a toaster oven. If you’re using a toaster oven, place the assembled roll-up on the rack and toast at 350°F for about 5 minutes, flipping halfway through. The texture will be slightly different, but still delicious.
Pin This Recipe!
5-Ingredient Peanut Butter Banana Roll-Ups
- Total Time: 10 minutes
- Yield: 2 servings 1x
Description
These easy 5-ingredient peanut butter banana roll-ups are the perfect quick snack, ready in under 10 minutes. Made with a flour tortilla, creamy peanut butter, ripe banana, honey, and cinnamon, they’re kid-approved and endlessly customizable.
Ingredients
- 2 (8-inch) flour tortillas
- 4 tablespoons creamy peanut butter
- 1 ripe banana
- 2 teaspoons honey
- 1/2 teaspoon ground cinnamon
Instructions
- Heat a non-stick skillet over medium heat for about 2 minutes.
- Place one tortilla in the dry skillet and cook for 30-45 seconds per side until light golden brown spots form. Transfer to a cutting board.
- Spread about 2 tablespoons of peanut butter evenly over the warm tortilla, leaving a 1-inch border around the edges.
- Peel the banana and place it whole near one edge of the tortilla, about 1 inch from the edge.
- Drizzle about 1 teaspoon of honey over the banana and sprinkle with a light dusting of cinnamon (about 1/4 teaspoon).
- Roll the tortilla tightly, starting from the edge closest to the banana, tucking gently as you roll. Place seam-side down.
- Place the rolled tortilla back in the hot skillet, seam-side down. Cook for 1-2 minutes per side, pressing gently with a spatula, until all sides are golden brown and slightly crispy.
- Remove from the skillet and let rest for 30 seconds.
- Slice on a diagonal into 1-inch pieces using a serrated knife. Serve immediately.
Notes
Toast the tortilla in a dry skillet before adding filling to prevent sogginess. Use ripe but firm bananas. Let roll-ups rest for 30 seconds before cutting to prevent filling from squishing out. For best results, serve immediately while warm and crispy.
- Prep Time: 5 minutes
- Cook Time: 5 minutes
- Category: Snack
- Cuisine: American
Nutrition
- Serving Size: 1 roll-up
- Calories: 375
- Sugar: 20
- Sodium: 380
- Fat: 18
- Saturated Fat: 3.5
- Carbohydrates: 48
- Fiber: 6
- Protein: 13
Keywords: peanut butter banana roll-ups, easy snack, 5-ingredient, kid-friendly, quick snack, after-school snack


